Group 32, Tilt Cylinders
SM 765, Nov ’06 Tilt Cylinder Overhaul • 32-4-3
Inspection
1. Carefully clean all parts in an approved solvent and
place on a clean surface.
2. Check the piston and rod for damage. Look for
gouges, scratches, corrosion, or evidence of unusual
wear. Minor surface damage may be repaired by use
of fine abrasion cloth or stoning. Deeper damage will
require replacement of piston rod assembly.
3. Be sure the threads on rod are undamaged.
4. Inspect the tilt cylinder barrel internal bore for wear,
scratches or other damage. Check the outside for
damage. Inspect all welds for cracks.
Deep gouges or pitted surfaces require replacement
of parts.
Check the gland, base end, and ports for cracks or
damage that could cause failure. Inspect the ports to
be sure they are free of contamination and that the
threads are clean and not damaged.
5. Put a light coating of hydraulic fluid on all parts. If
parts are to be left disassembled for a period of time,
e.g., overnight, they should be covered with a clean
cloth.
Reassembly
Be sure inside of cylinder and all parts are clean before
starting reassembly. Seals may be lubricated with hydrau-
lic oil to assist assembly into cylinder barrel.
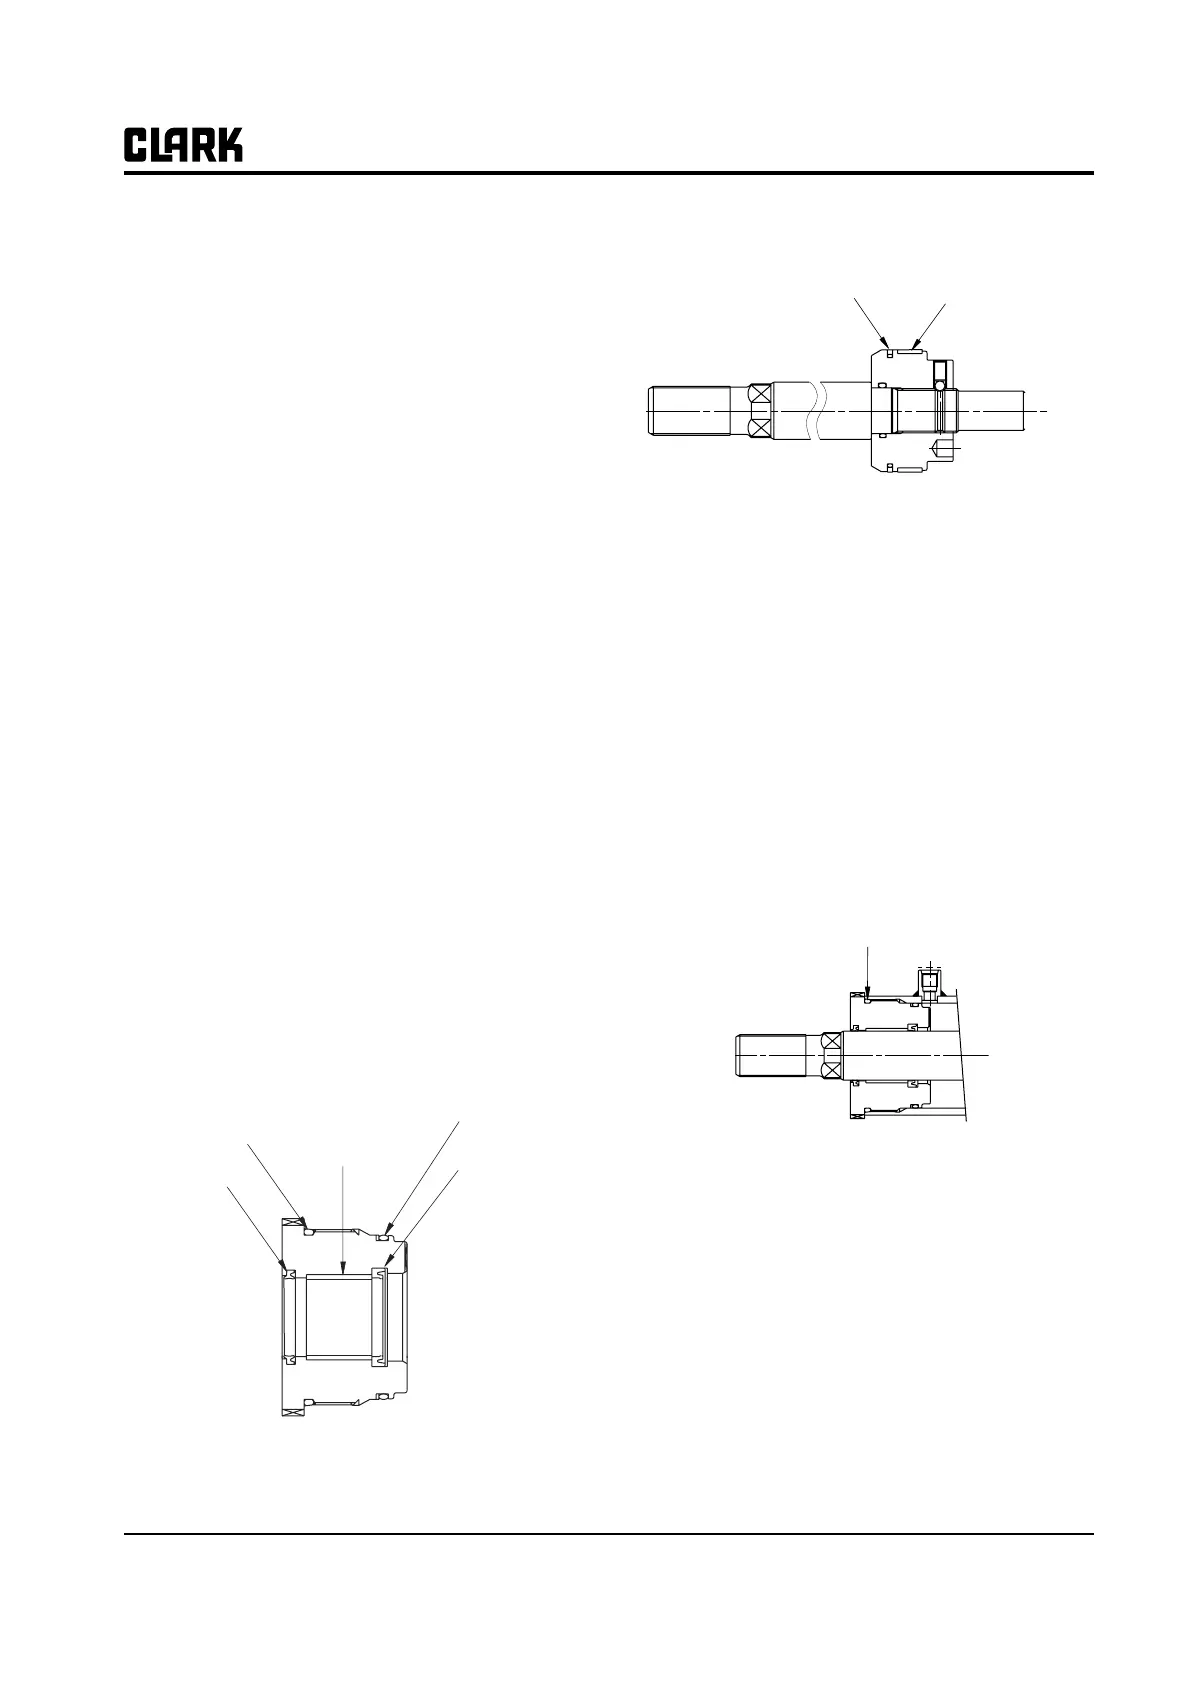
1. Install piston dust wiper, rod seal, and O-ring on the
gland. Make sure rod seal and dust wiper are
installed in proper orientation as shown in the illus-
tration.
2. Replace the piston packing and wearing.
3. Install gland on piston rod. Use gentle pressure and
careful movements to avoid damage to the U-cup
seal and rod wiper when these parts are moved over
the piston rod end.
N
TEN
TEN
TEN
TEN
TE
Reassemble cylinder carefully to prevent
damage to seal lips and O-rings.
4. Install piston into cylinder barrel. Be careful not to
damage the piston seals when installing the piston
into end of cylinder.
5. Install gland into cylinder them screw the gland into
the cylinder barrel with a hook wrench. When tight-
ing, do not damage the seal. Tighten torque : 60±6
kgf⋅m
6. Check the assembly by making sure the piston slides
freely in and out of the cylinder.
See Section 3 for replacement procedures ; see Section 2
for checks and adjustments before returning the truck to
service.
Dust Wiper
Rod Wiper
O-Ring
O-Ring + Backup Ring
DU Bush
Piston Seal
Wear Ring
O-Ring