Group 34, Uprights
34-4-8 •
Carriage and Upright Roller Clearance Checks and Shim Adjustments
SM 765, Nov ’06
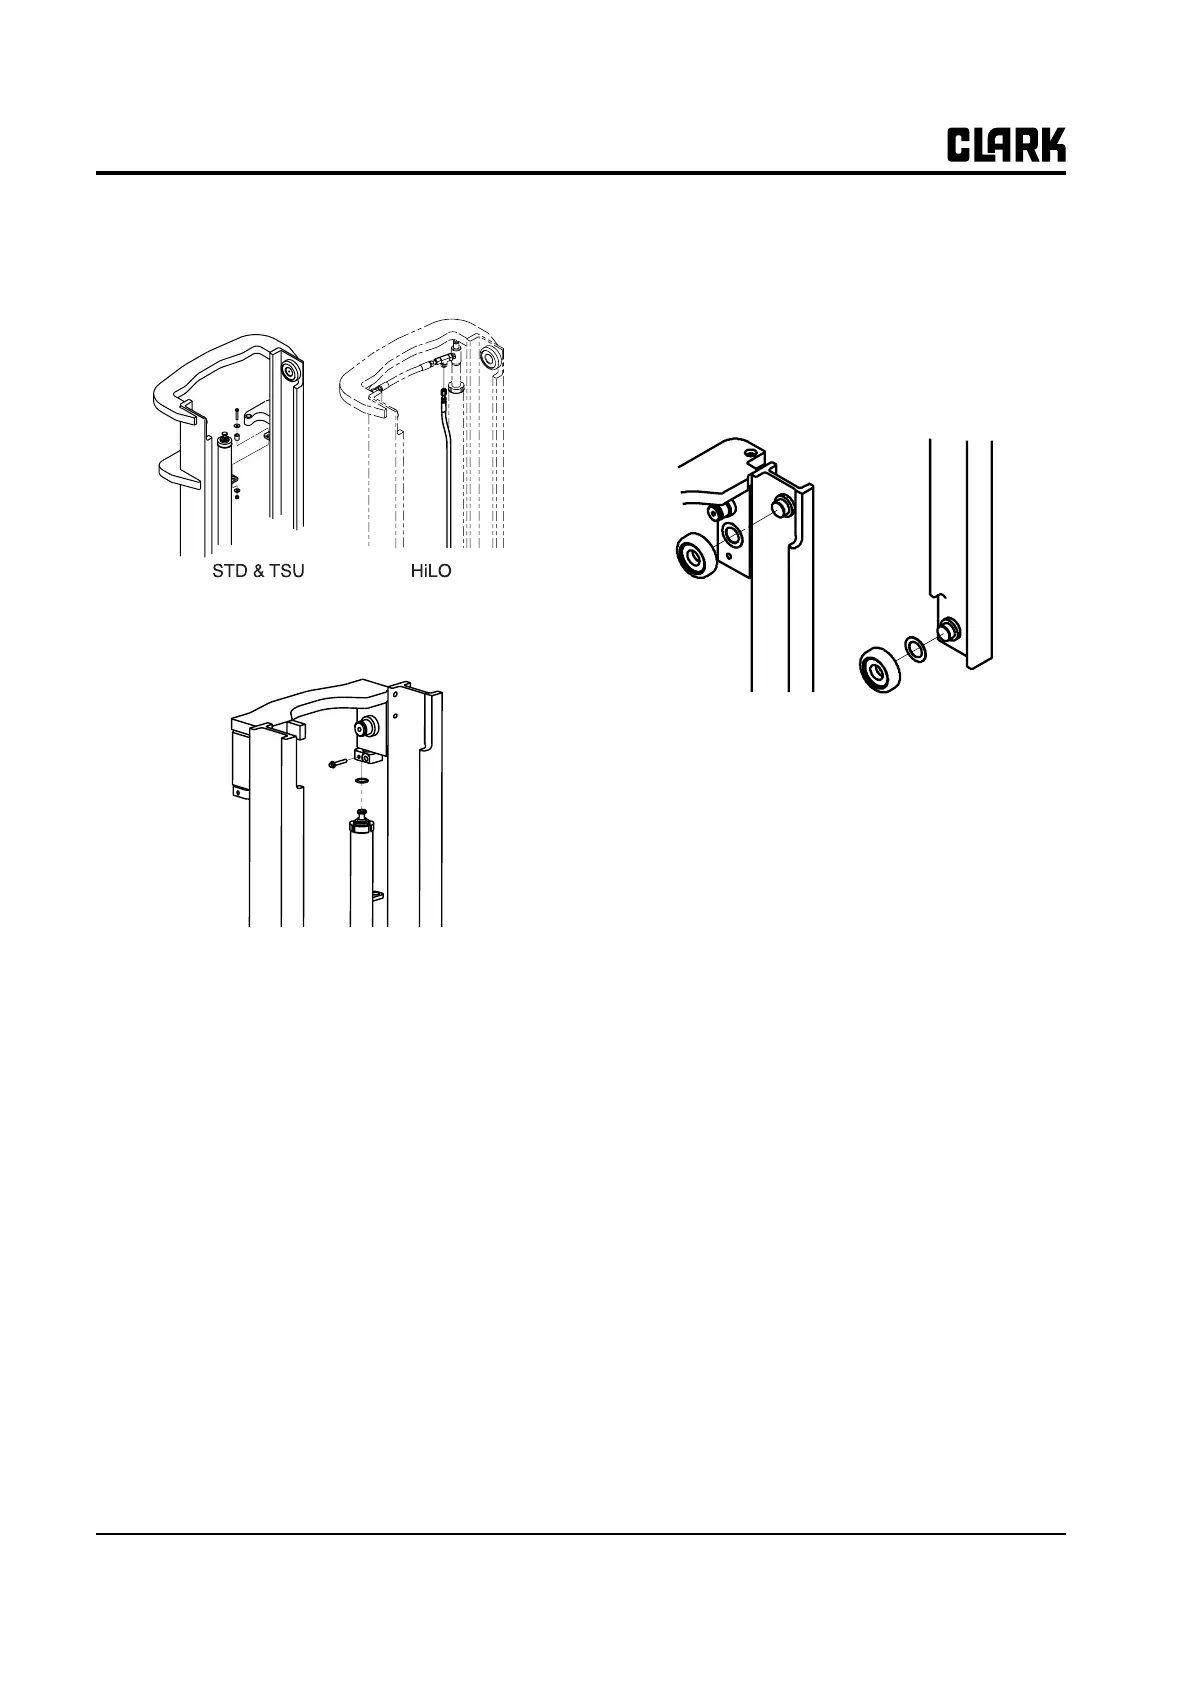
7. Disconnect the cylinder guide bolts.
In Hi-Lo upright, disconnect the secondary cylinder
hose.
8. Secure the cylinder to prevent its falling and discon-
nect the cylinder rod retaining bolts.
N
TE
For 4-hose adapters, you must disconnect the
hose sheave and bracket. This is not neces-
sary for 2-hose adapters.
9. Move the sheave with the hoses and any other con-
nected components out of the way.
10. Disconnect the rail cylinders by raising the rails to
free the cylinder rod ends from the tie bar. Tilt the
cylinders inward and secure out of the way of the tie
bars.
11. Lower the assembly completely to expose the rollers.
The lower roller set of the inner rail and upper roller set of
the outer rail on standard and triple-stage uprights are now
exposed for shim adjustment.
Roller Removal, Shimming, and Replacement
To add shims to, or replace the rollers:
1. Use a puller to remove the rollers from the posts. Or,
gently pry the rollers off the posts. Pry at different
points around the bearing to work it off. Do not dam-
age the bearing seals on the backside of the roller.
2. Inspect all roller components when removed:
a. Clean and inspect the rollers, shims, and roller
shafts.
b. Bearings should be in good condition and allow
the roller to spin smoothly with a true rotation.
c. Clean rail sections and add lubricant if necessary.
d. Replace any worn or damaged component.
3. If the clearance check indicated an even number of
shims needed, split the number evenly between the
rollers on either side of the upright.
4. If the clearance check indicated an odd number of
shims needed, keep the odd number to the same side
on all rails of the upright. If three shims are needed,
for example, add one to the rollers on the left side.
Add the other two on the rollers on the right side.
5. Reposition the rollers onto the roller shaft and use a
plastic or hard-rubber mallet to gently tap the roller.
Seat the roller evenly by continuing to tap gently
until it is fully seated and snug against the added
shims.