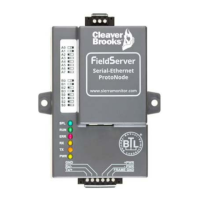
ProtoNode Gateway
750-426 3
Quick Start Reference
Below is a basic sequence of steps required to configure and register a ProtoNode. It is recommended to
become familiar with the manual in its entirety before beginning the registration process.
If using the ProtoNode for cloud-based data monitoring only (without protocol translation), steps 4, 5, 6, 8,
and 13 below may be skipped.
1. First determine the configuration method (Auto-Discovery or Web Configurator) for devices to be connected
to the ProtoNode (Section 1.2).
2. Record the ProtoNode part number in case needed for technical support (Section 2.1).
3. Set the device's COM settings and Node-ID for each of the devices that are to connect to the ProtoNode
RER or LER (Section 2.3).
4. RER: Select the field protocol on the S Bank DIP Switches (Section 2.4).
5. BACnet MS/TP (RER): Set the MAC Address on the A Bank DIP Switches (Section 2.5.1).
6. BACnet MS/TP, Modbus RTU (RER): Set the baud rate of the field protocol on the B Bank DIP Switches
(Section 2.5.2).
7. Connect ProtoNode 6 pin RS-485 connector to the RS-485 network that is connected to each of the C-B
serial devices (Section 3.2).
8. Connect ProtoNode RER's 3 pin RS-485 port to the field protocol cabling, (Section 3.3) or connect the
ProtoNode LER's 2 pin LonWorks port to the field protocol cabling (Section 3.4).
9. Connect power to the ProtoNode 6 pin connector (Section 3.6).
10. Optional, for Falcon controls only - Enable the ProtoNode “Auto-Discovery” mode on S Bank DIP Switches
(Section 2.4.1). When power is applied it will take about 3 minutes for all the devices to be discovered
and the configuration file to be built. Once Auto-Discovery is complete turn OFF the S3 DIP switch to save
the configuration settings (Section 3.5).
11. Web Configurator Devices: Use a web browser to access the ProtoNode Web Configurator page; select the
profiles of the devices attached to the ProtoNode and input the Node-ID from each device. Once devices
are selected, the ProtoNode automatically builds and loads the appropriate configuration (Section 4).
12. BACnet/IP, Modbus TCP/IP, or cloud (RER): Use a web browser to access the ProtoNode Web Configurator
page to change the IP Address. No changes to the configuration are necessary (Section 4.4).
13. LonWorks (LER): The ProtoNode must be commissioned on the LonWorks Network. This needs to be done
by the LonWorks administrator using a LonWorks commissioning tool (Section 7).
14. Complete the registration process for the FieldPoP device cloud (Section 8).
In order to complete the ProtoNode registration and setup process, the following are required:
• A laptop computer for Internet access
• Ethernet cable
• IP address(es) to identify the ProtoNode and connected devices on plant network (NOTE - all devices
connected via Ethernet to the ProtoNode will need an IP address on the same subnet)
• Email address for site/end user contact that will be the Enterprise Customer Admin for the site
The startup technician must be registered on the FieldPoP site as an OEM Manager.
BEFORE BEGINNING