ProtoNode Gateway
750-426 27
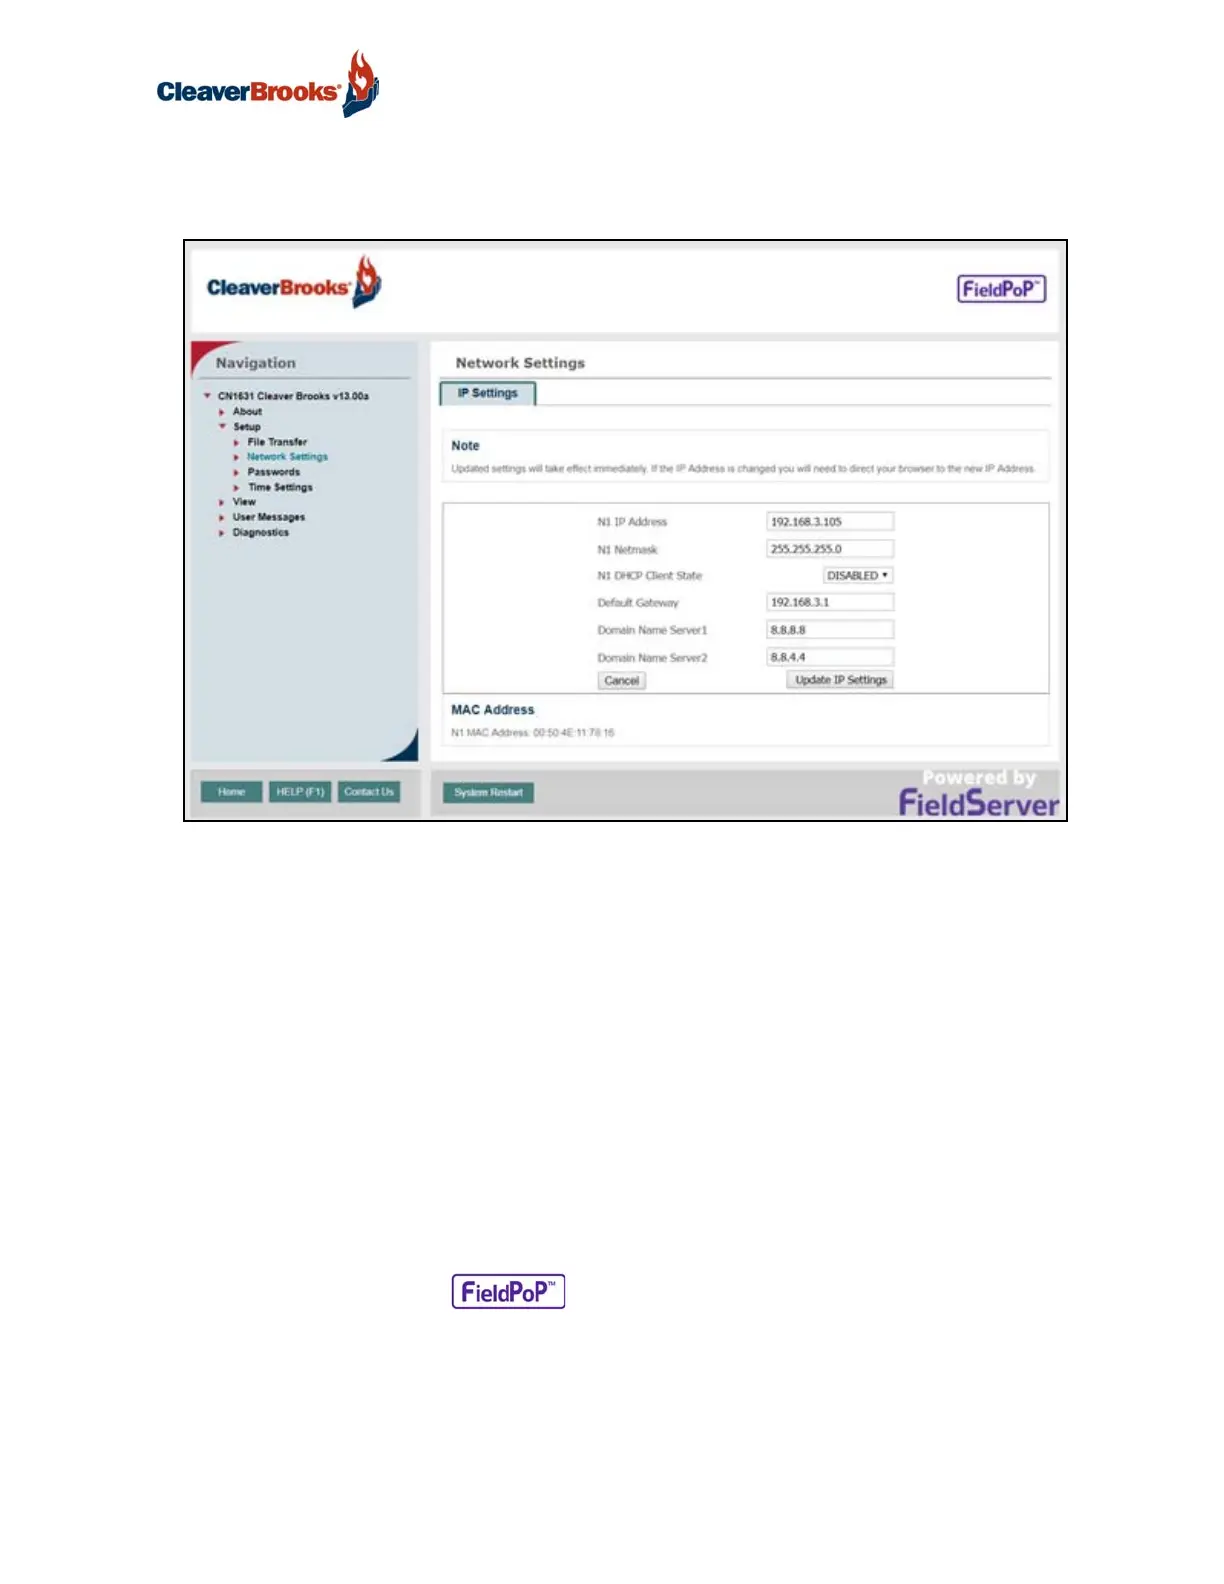
From the FS-GUI landing page, click on “Setup” to expand the navigation tree and then select “Network
Settings” to access the IP Settings menu.
Modify the IP Address (N1 IP Address field) of the ProtoNode Ethernet port.
If necessary, change the Netmask (N1 Netmask field).
If necessary, change the IP Gateway (Default Gateway field).
DHCP Client State should remain disabled; Domain Name Server 1 and 2 should be left at their cur-
rent values.
NOTE: If the ProtoNode is connected to a managed switch/router, the IP Gateway of the ProtoNode
should be set to the IP Address of that managed switch/router.
Click the “System Restart” button at the bottom of the page to apply changes and restart the Proto-
Node.
Unplug Ethernet cable from PC and connect it to the network switch or router.
Record the IP Address assigned to the ProtoNode for future reference.
NOTE: The FieldPoP™ button (see Figure 28) allows users to connect to the SMC
Cloud, Sierra Monitor's device cloud solution for IIoT. The SMC Cloud enables secure remote con-
nection to field devices through a FieldServer and its local applications for configuration, manage-
ment, maintenance. For more information about the SMC Cloud, refer to the SMC Cloud Start-up
Guide.
FIGURE 28 - Changing IP Address via FS-GUI