Installation
July 22, 2019 | 287960-ENG | R00 17
To install the SH configuration kit:
The SH configuration may include an optional extra shelf and fluorescent light canopy
(Figure 3-10).
These basic installation instructions apply to all SH configuration shelf and lighting
combinations.
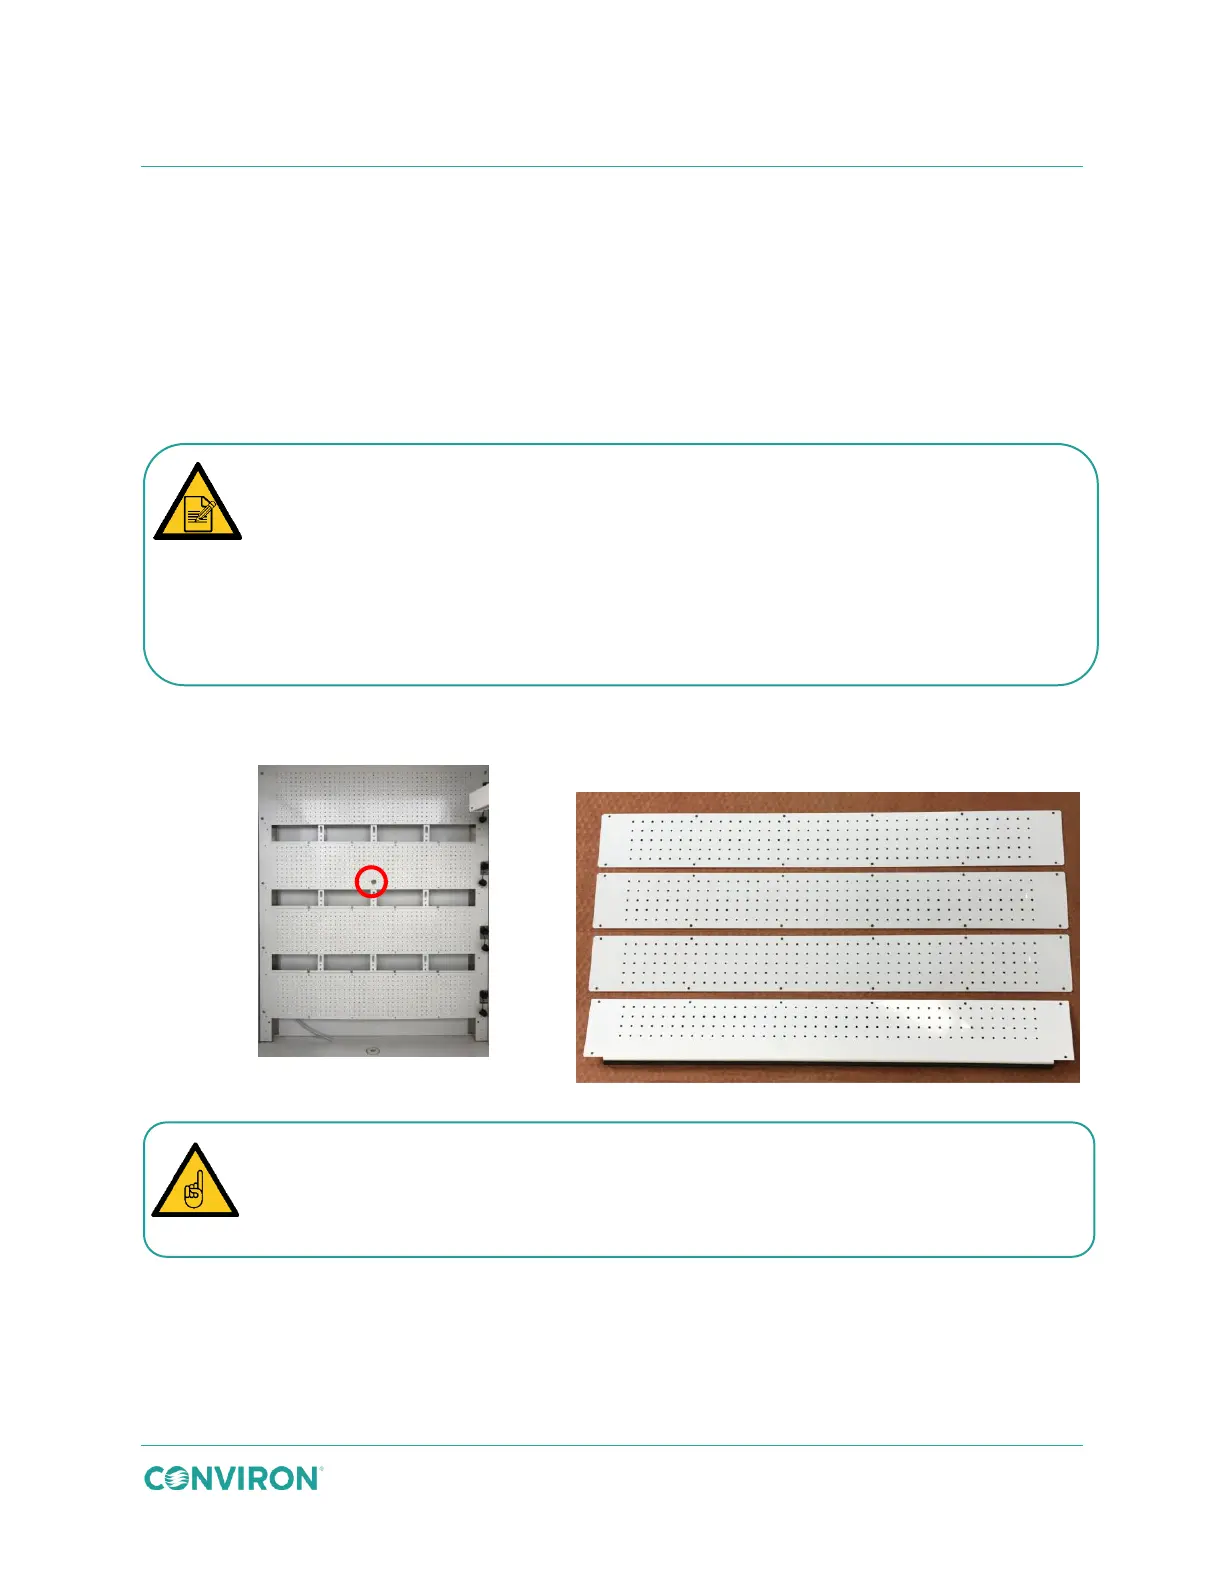
1. Confirm that air flow through the plenum is open (Figure 3-11). The plenum must be
open for air to flow correctly in the SH configuration.
2. Use 12 screws to attach each perforated cover plate to the rear wall, covering the
openings in the rear wall (Figure 3-13).
Figure 3-12 Perforated Cover Plates
The chamber is shipped with the plenumn open by default. To confirm that the
plenum is open, do one of the following;
Confirm that the center locking knob (Figure 3-11
) on the rear wall of the chamber is
in the down position.
OR
Look through the perforated holes. If you can see through them, the plenum is open.
If not, the plenum is closed.
The cover plates are not all interchangeable. The three flat plates, shown at the top of
Figure 3-12, must be installed over the top three openings. The cover plate with the
bottom flange and gasket, shown at the bottom of Figure 3-12
, must be installed over
the bottom opening.