3CC
1-4-4
(2) Replacing the desk upper or lower paper width switches
Replace the desk upper or lower paper width switches as follows.
Caution:
After replacing a desk paper width switch, be sure to perform (4) Adjusting the position of the rack adjuster.
Procedure
1. Remove the drawer.
2. Remove the two screws and 8-pin socket
from the rear of the drawer.
3. Detach the 8-pin desk paper width switch
connector from the 8-pin socket.
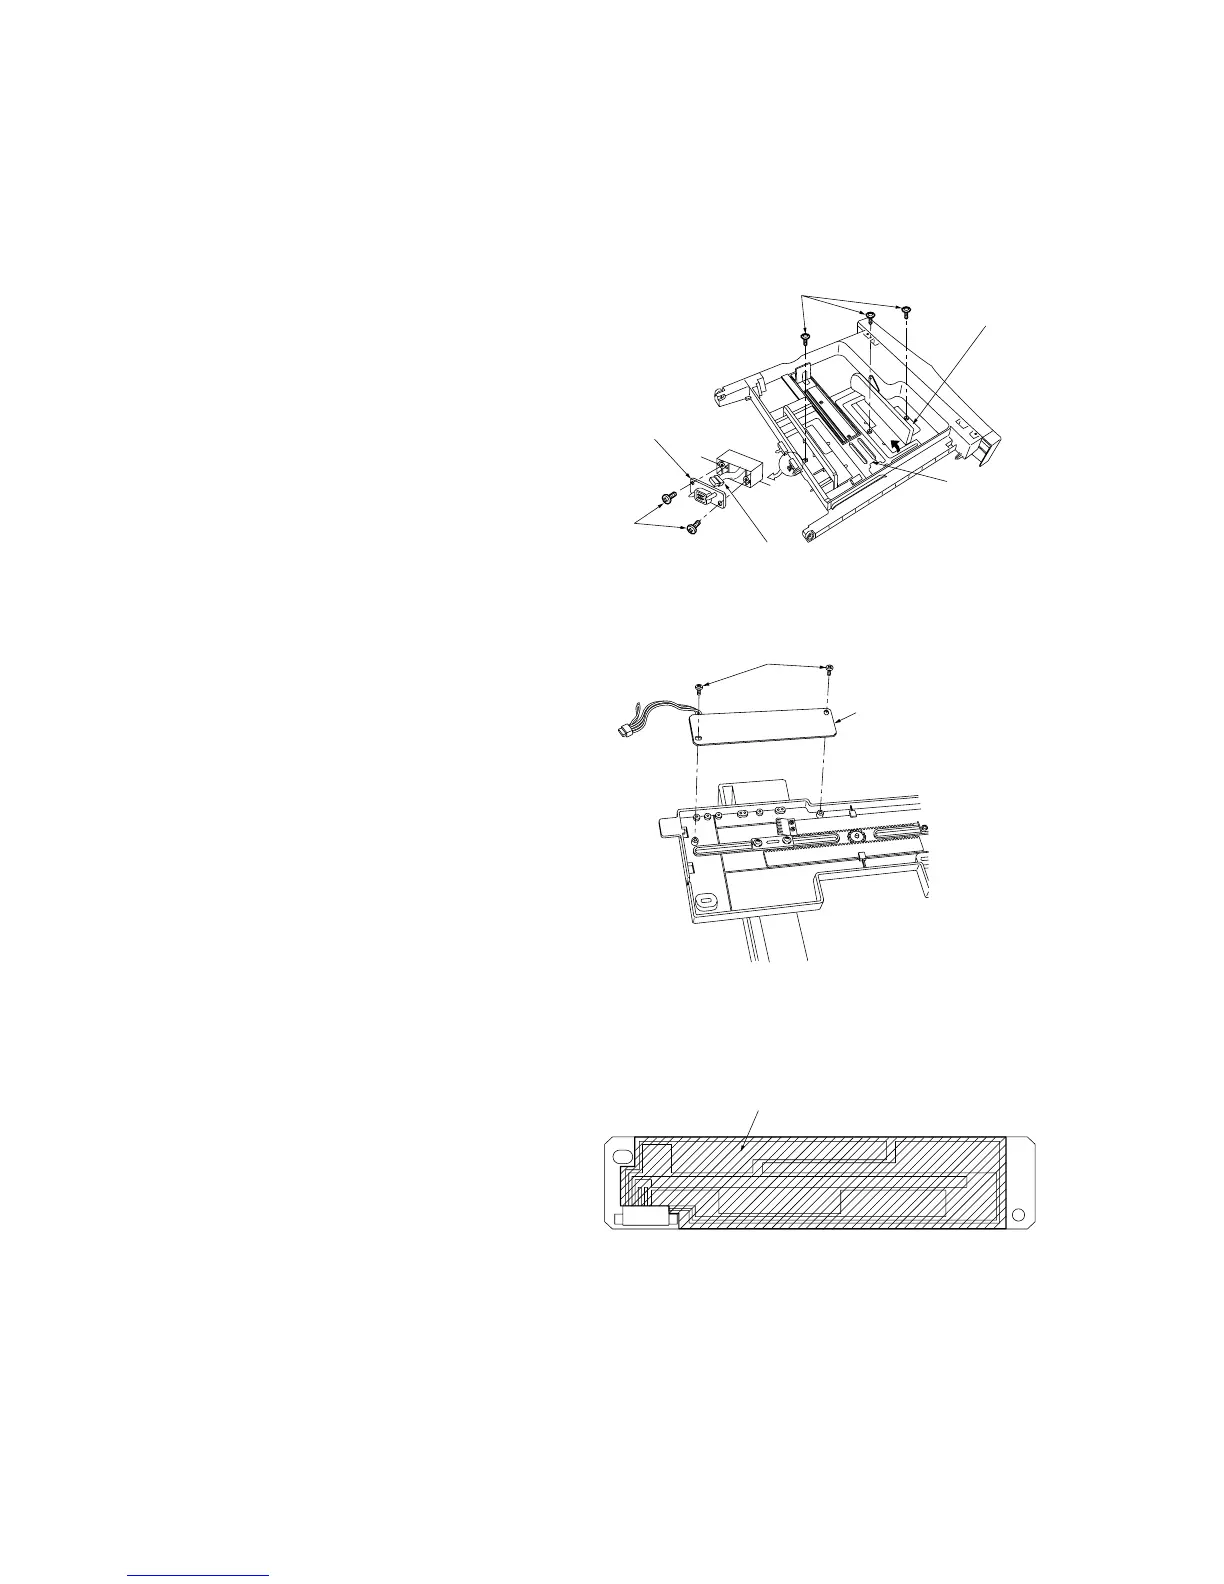
4. Remove the three screws holding the rack
adjuster.
5. While raising the drawer lift in the direction of
the arrow, remove the rack adjuster.
Figure 1-4-7 Detaching the rack adjuster
6. Remove the two screws from the back of the
rack adjuster and then the desk paper width
switch.
Figure 1-4-8 Detaching the desk paper width switch
7. Apply the specified grease to the printed
surface of the new desk paper width switch
(shaded area in the diagram) and fit the
switch to the rack adjuster.
8. Refit all removed parts.
Figure 1-4-9 Desk paper width switch
Screws
Rack adjuster
Drawer lift
8-pin connector
Screws
8-pin socket
Screws
Desk paper width switch
Apply the specified grease.