Artiglio Master Code User Manual 83
UK
This operation must ONLY be carried out in one
of the cases below:
1. Replacing the LASER triangulation sensor
2. Replacing one or both of the bead breaker
potentiometers
3. Replacing the tool head micro limit switches
4. Mechanical adjustment and/or replacement of
tool head parts
5. Replacing the LASER triangulation sensor move-
ment cylinder
Procedure:
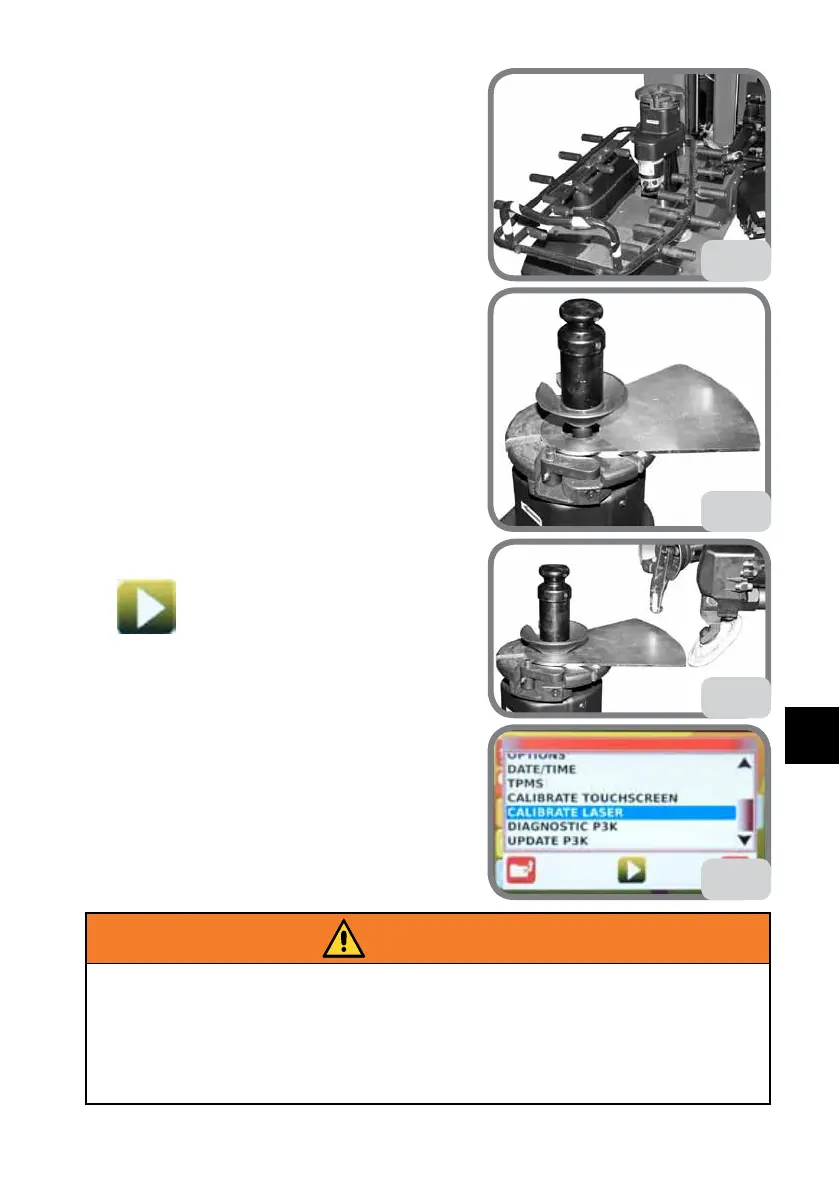
1. Position the lifter in the work position (Fig. 68).
2. Assemble the calibration template.
Use the M11 cast iron cone without the guard and
position the template with the chamfer facing
downwards (Fig. 68a).
Position it so it is interfacing with the bead break-
ers and head. (B, Fig. 68).
3. Select CALIBRATE LASER then press the confirm
key
(Fig. 68c).
CRUSHING HAZARD:
Some parts of the machine, such as the head, the bead breakers and turntable
move by themselves.
A beeper will sound to indicate when automatic movements are carried out.
Do not approach moving parts of the machine.
WARNING
68
68a
68c
68b