84 Artiglio Master Code User Manual
Setup:
4. The following are automatically carried out:
- The tool head moves fully upwards and downwards.
- The lower bead breaker moves fully upwards and
then returns to the lower rest position.
- The upper bead breaker moves fully downwards
and then returns to the upper rest position.
- The laser scans the template twice at two different
heights. During this stage, the turntable moves.
- The assembly tool will make two small movements
to indicate it must be positioned.
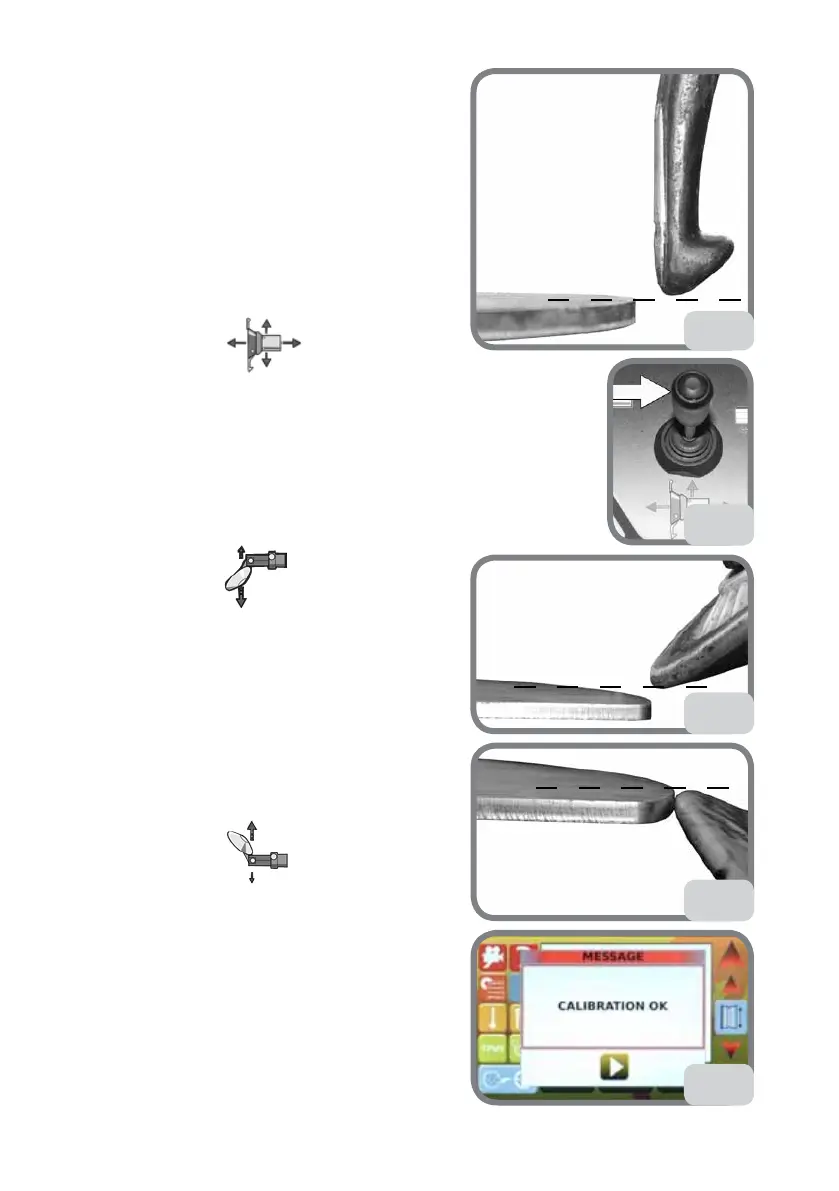
5. Operate the lever
to position the tool
head (see Fig. 68d).
After alignment, confirm the position, moving the tool head joystick to
the right ONCE, without holding it down (see Fig. 68e).
The laser comes out from the rest position and performs a reading.
The upper bead breaker will make two small movements to indicate
that the operation has been confirmed and that it will be the next tool
to be calibrated.
6. Operate the lever
to position the upper
bead breaker downwards until the lower part of the
bead breaking disc is aligned with the upper surface
of the template (see Fig. 68f).
After alignment, confirm the position, moving the tool
head joystick to the right ONCE, without holding it
down (see Fig. 68e).
The lower bead breaker will make two small move-
ments to indicate that the operation has been con-
firmed and that it will be the next tool to be calibrated.
7. Operate the lever
to position the lower
bead breaker upwards until the upper part of the
bead breaking disc is aligned with the upper surface
of the template (see Fig. 68g).
After alignment, confirm the position, moving the tool
head joystick to the right ONCE. Make sure you only
move the joystick to the right once, without holding
it down (see Fig. 68e).
8. At the end, Fig. 68h will be displayed.
If error messages are displayed, check the messages
68d
68g
68f
68h
68e