56
2813
1
2
3
4
5
6
index no part
no name
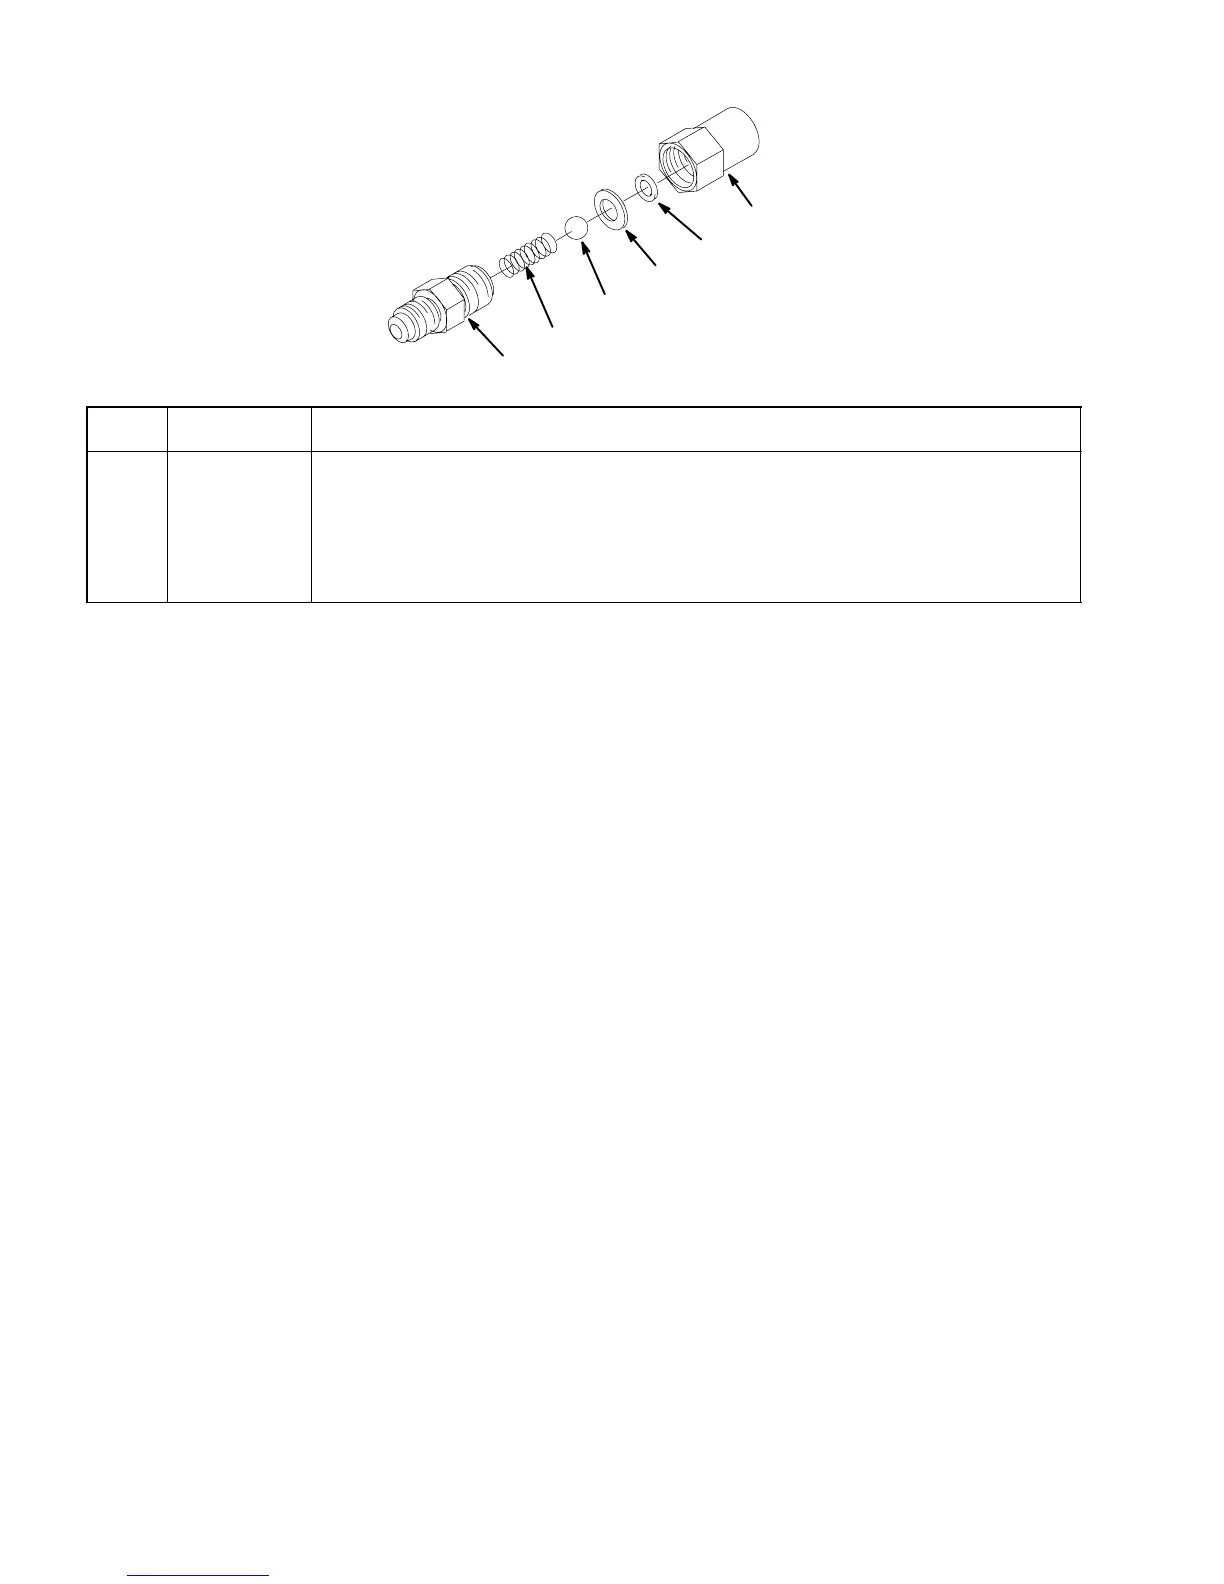
1 317965000 Retainer
2 312196000 Spring
3 312419000 Ball
4 312415000 Washer, .300 I.D.
5 312418000 Quad Ring
6 317963000 Body
Install new ball seat each servicing.
FIGURE 11. LIQUID CHECK VALVE ASSEMBLY
7. Assemble check valves together. DO NOT OVERTIGHTEN.
8. Make sure white tapered gasket is in place inside female end of double liquid check valve assembly, then
install check valve assembly on elbow in water pump outlet port.
9. Connect carbonator tank water line to double liquid check valve assembly outlet. DO NOT
OVERTIGHTEN.
10. Open CO
2
cylinder and water inlet supply lines shutoff valves. Check for water leaks and tighten any loose
connections.
11. Install Unit back panel by reversing removal procedure.
12. Connect electrical power to Unit.
13. Press both ‘‘AUTO BLEND 1’’ and ‘‘AUTO BLEND 2’’ switches.
14. Press both ‘‘AUTO 1’’ and ‘‘AUTO 2’’ switches to start freeze cylinders beaters and refrigeration system.
REPLENISHING SYRUP SUPPLY
NOTE: Sugar–free diet syrup cannot be used with this Unit.
Although syrup replenishing can be done anytime, syrup supply must be replenished when either ‘‘SYRUP 1’’ or
‘‘SYRUP 2’’ fault messages are displayed on message display indicating either No. 1 or No. 2 syrup system soft
drink tank is empty.
NOTE: The following instructions are applicable only when replenishing syrup supply. Refer to SYRUP
FLAVOR CHANGE when changing syrup flavors.
1. Press applicable ‘‘OFF 1’’ or ‘‘OFF 2’’ switch to stop applicable freeze cylinder beater and refrigeration
system.
IMPORTANT: The following CO
2
and liquid disconnect and connecting procedure for soft drink tank
replacement or filling soft drink tank in place must be performed in order as follows: