58
2813
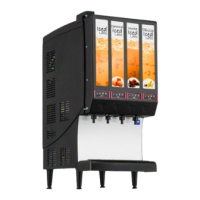
2. To disconnect soft drink tank from Unit syrup system.
A. Disconnect liquid disconnect from soft drink tank. NOTE - Disconnecting liquid quick disconnect
from soft drink tank first prevents syrup from backflowing through Unit syrup flow regulator
which may alter regulator adjustment.
B. Second, disconnect CO
2
quick disconnect from soft drink tank.
3. To connect soft drink tank into Unit syrup system.
A. First, connect CO
2
quick disconnect to soft drink tank to pressurize tank.
B. Second, connect liquid quick disconnect to soft drink tank.
4. Disconnect inlet (CO
2
) and outlet (syrup) lines from empty soft drink tank.
5. Check soft drink tank quick disconnects for sticky or restricted operation. Rinse disconnects in warm water.
6. First, pressurize full soft drink tank by connecting CO
2
line to tank, then connect Unit syrup inlet line to
tank.
7. Press applicable ‘‘FILL 1’’ or ‘‘FILL 2’’ switch to fill applicable No. 1 or No. 2 syrup system syrup float switch
with syrup.
8. Press applicable ‘‘AUTO BLEND 1’’ or ‘‘AUTO BLEND 2’’ switch to fill applicable No. 1 or No. 2 system
product blender tank with product.
9. Press applicable ‘‘AUTO 1’’ or ‘‘AUTO 2’’ switch to start refrigeration system and beater in applicable No. 1
or No. 2 freeze cylinder.
10. If freeze cylinder is not full of product, repeatedly pull and release faceplate relief valve to slowly bleed CO
2
from freeze cylinder and allow product to fill cylinder. Do not relieve freeze cylinder pressure too fast or
product will foam excessively in cylinder and lose carbonation.
REPLENISHING CO
2
SUPPLY
WARNING: CO
2
displaces oxygen. Strict attention must be observed in the prevention of
CO
2
(carbon dioxide) gas leaks in the entire CO
2
and soft drink system. If a CO
2
gas leak is
suspected, particularly in a small area, immediately ventilate the contaminated area before
attempting to repair the leak. Personnel exposed to high concentration of CO
2
gas will experience
tremors which are followed rapidly by loss of consciousness and suffocation.
NOTE: When indicator on primary CO
2
cylinder regulator assembly 1800-psi gage is in shaded
(‘‘change CO
2
cylinder’’) portion of the dial, CO
2
cylinder is almost empty and should be changed.
1. Fully close (clockwise) CO
2
cylinder valve.
2. Slowly loosen CO
2
regulator assembly coupling nut allowing CO
2
pressure to escape, then remove
regulator assembly from empty CO
2
cylinder.
3. Unfasten safety chain and remove empty CO
2
cylinder.
4. Position full CO
2
cylinder and secure with safety chain.
WARNING: To avoid personal injury and/or property damage, always secure CO
2
cylinder in
upright position with safety chain to prevent it from falling over. Should valve become
5. Make sure gasket is in place inside CO
2
regulator coupling nut, then install regulator on CO
2
cylinder.
6. Open (counterclockwise) CO
2
cylinder valve slightly to allow lines to slowly fill with gas, then open valve
fully to back-seat valve. (Back-seating valve prevents leakage around valve shaft).
7. Check CO
2
connections for leaks. Tighten loose connections.