2813
9
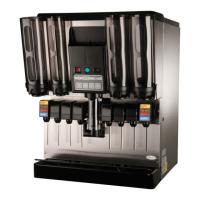
INSTALLATION
This section covers unpacking and inspection, installing LOOSE-SHIPPED PARTS, selecting location, installing
Unit, preparing for operation, and operation.
UNPACKING AND INSPECTION
(see Figure 6)
NOTE: The Unit was thoroughly inspected before leaving the factory and the carrier has accepted and
signed for it. Any damage or irregularities should be noted at time of delivery (or not later than 15 days
from date of delivery) and immediately reported to the delivering carrier. Request a written inspection
report from Claims Inspector to substantiate any necessary claim. File claim with the delivering carrier,
not with IMI Cornelius Inc.
1. After Unit has been unpacked, remove shipping tape and other packing material.
2. Remove Unit sides, top and back panels as instructed.
3. Remove shipping bolts that secure Unit to skid, then remove skid.
4. Unpack LOOSE-SHIPPED PARTS. Make sure all items are present and in good condition.
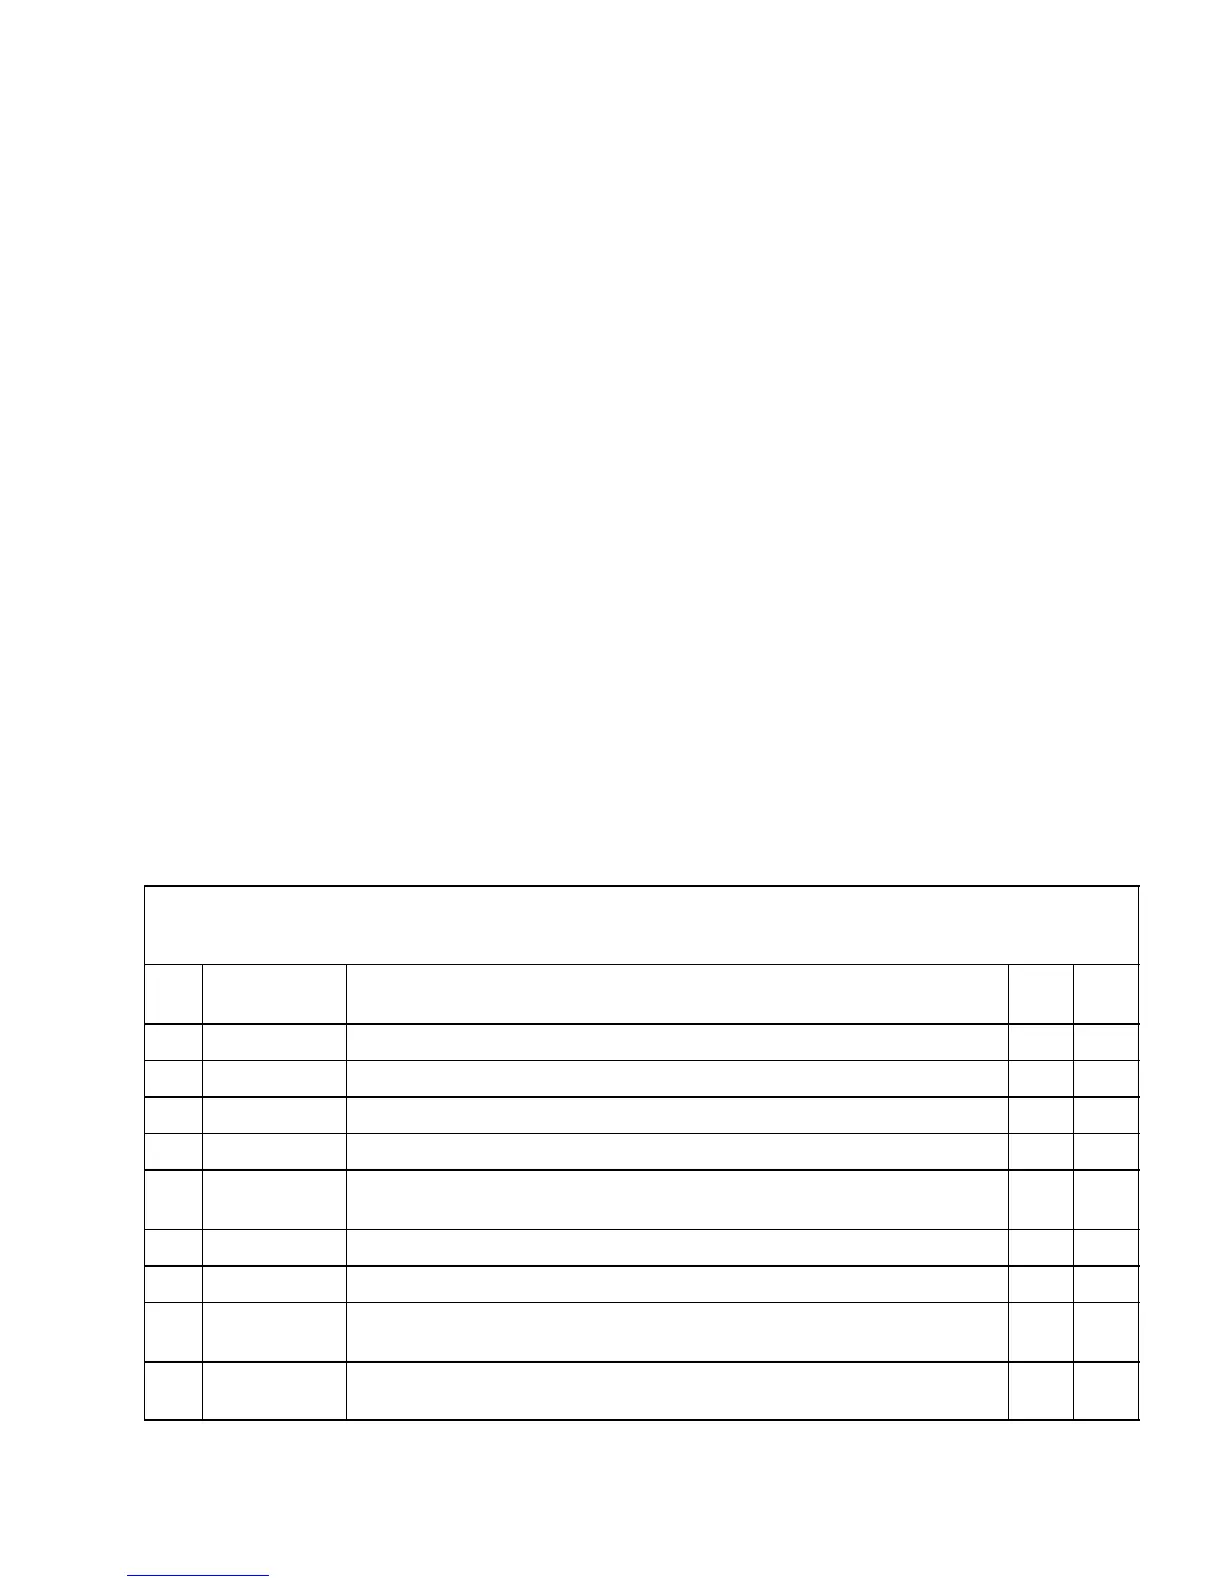
IDENTIFICATION OF LOOSE-SHIPPED PARTS
1. TAPERED GASKETS, WHITE (item 1 ) are used to seal connections when connecting Unit product inlet
lines to product tanks and connecting Unit CO
2
inlet line to CO
2
source.
2. SPANNER WRENCH, DISPENSING VALVE (item 2) is used to remove shank nuts securing dispensing
valves to faceplates.
3. CLEANING BRUSH (item 3) is used to clean faceplate relief valves passages.
Table 2. Loose-Shipped Parts
Item
No. Part No. Name
Qty.
2-Fl
Qty.
4-Fl
1 178025-100 Tapered Gasket, White 4 5
2 322859 Spanner Wrench, Dispensing Valve 1 1
3 325216 Cleaning Brush 1 1
4 311304 Tapered Gasket, Black 3 5
5 325982
325992
Cup Rest
Cup Rest
1
x
x
1
6 319941 Thread Cutting Screw, Hex HD, No. 8-32 by 3/8 in. Long 4 4
7 325986 Drip Tray Support 2 2
8 325991 Frame, Drip Tray
Frame, Drip Tray
x
1
1
x
9 325990-039
325983-039
Drip Tray
Drip Tray
x
1
1
x