3.3 Configuring the robot controller
3-4
3.3 Configuring the robot controller
This section describes the procedure for the configuration performed on the robot controller.
3.3.1 Registering the welding power source
When using the interface to connect a Welbee Inverter series welding power source, register
the welding power source as the corresponding D series welding power source shown in Table
3.3.1 in f5 <Arc Constant> - [1 Registration of welder] on the robot controller.
When changing from an existing D series welding power source to a Welbee Inverter series
welding power source as shown in Table 1.2.3 and continuing to use the existing programs, this
step is not required.
D series welding power sources and Welbee Inverter series welding power
sources cannot be used at the same time.
Register the Welbee Inverter series welding power source in the robot
controller as the corresponding D series welding power source shown below.
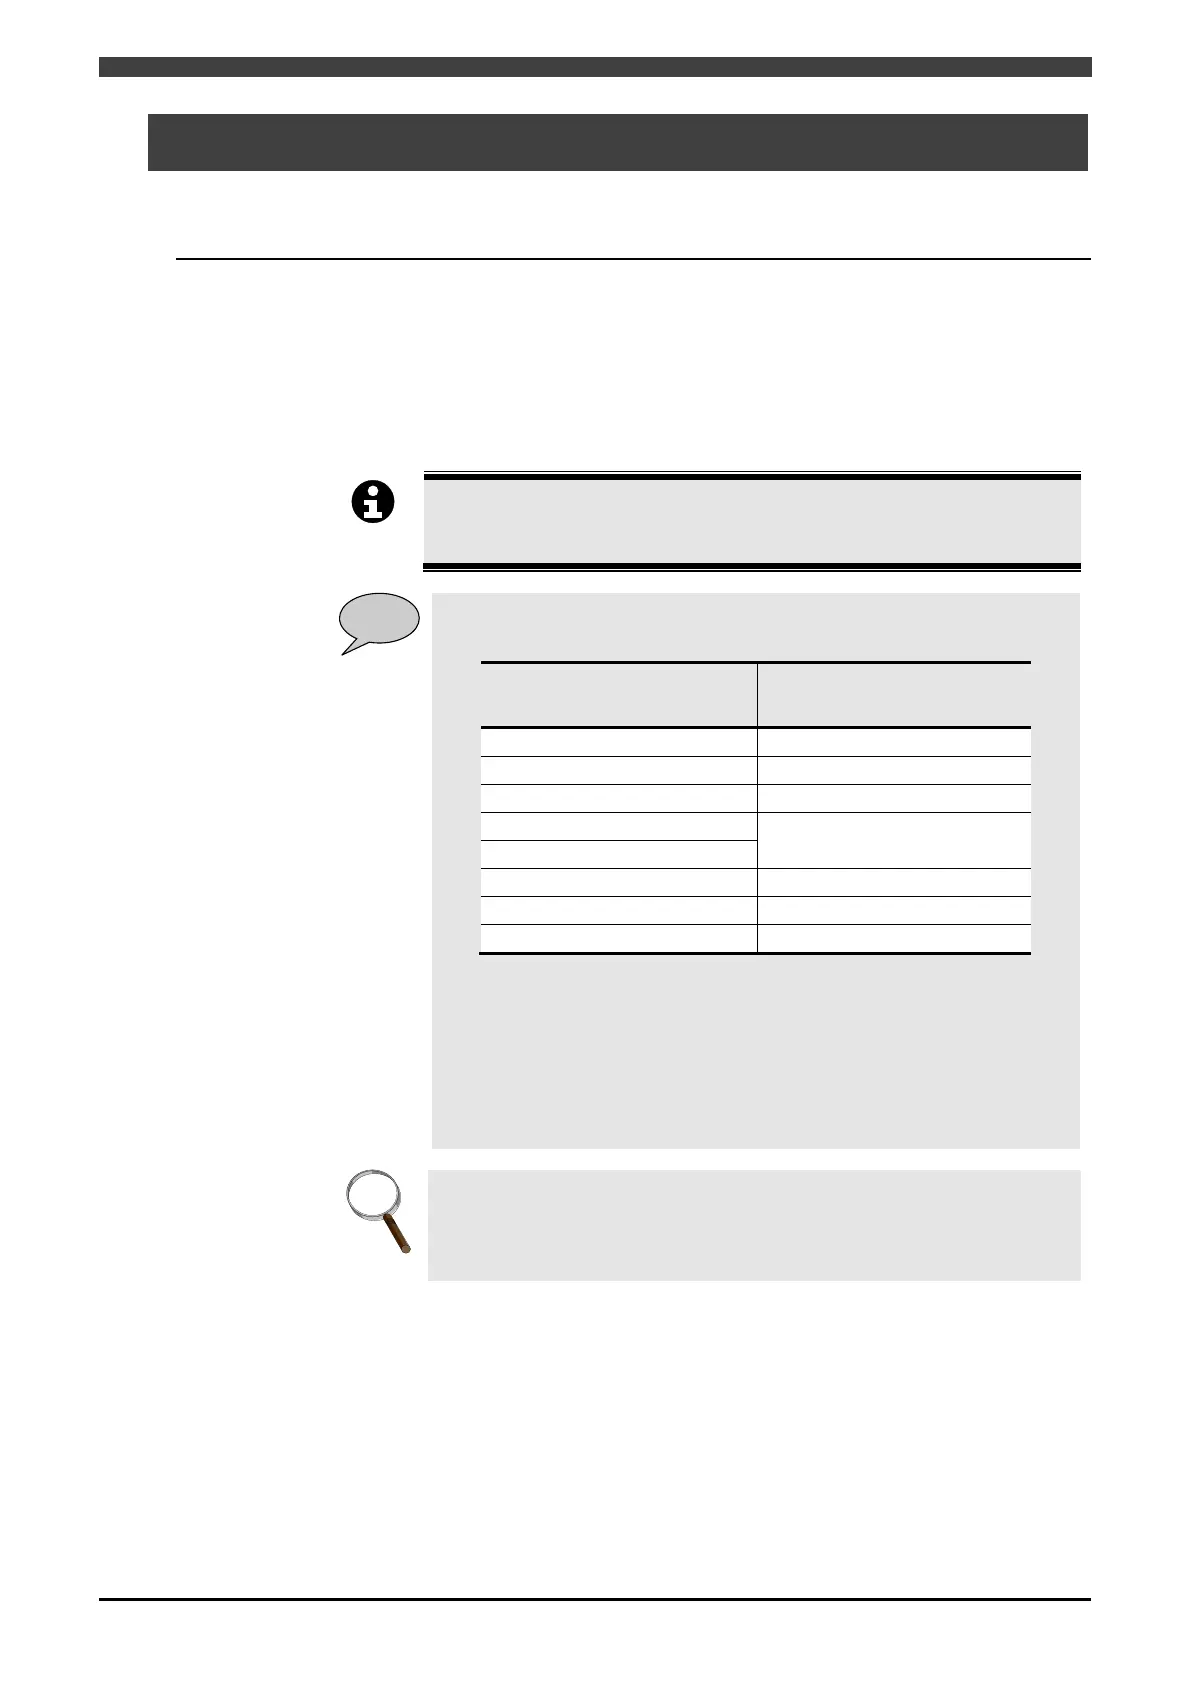
Table 3.3.1 Recommended settings
WB series welding power
source to be connected
D series welding power source
to register
*1
DP *2
WB-P350L/P400L
*3
*1 Only when replacing an existing DM or DM(S-2) with the Welbee
Inverter series, continue using DM or DM(S-2).
*2 Apply the welding characteristic data for a rated current 350A when
WB-P350/P350L is in connection.
*3 Continue using DP as is only when the existing DP-500 is replaced
with WB-P500L. Also, for rated current, you can set up to the rated
current of the welding power source.
For details, see the "1.2.3 Connectable welding power sources".
After registering
the welding power source, configure the robot to which the
welding power source will be connected, and the connection type. For details on
the configuration method, see "Chapter 1 Basic settings" in the APPLICATION
MANUAL (ARC WELDING) instruction manual for the robot controller.
 Loading...