3.4 Creating the setup data
3-13
3.4.2 Configuring the welding mode for the Welbee Inverter series welding
power source
Associate the welding mode used in the Welbee Inverter series welding power source with the
welding mode registered in the robot controller, and save this information in the setup data. For
details on the welding modes that can be used, see "Chapter 1 Introduction" in this manual.
When the setup data is created, the welding characteristic data selected in
"3.3.2 Register the welding mode" is replaced with the data for Welbee Inverter
welding power source.
The welding characteristic data saved in the backup data specified in "3.4.1
Configuring the setup tool" is replaced.
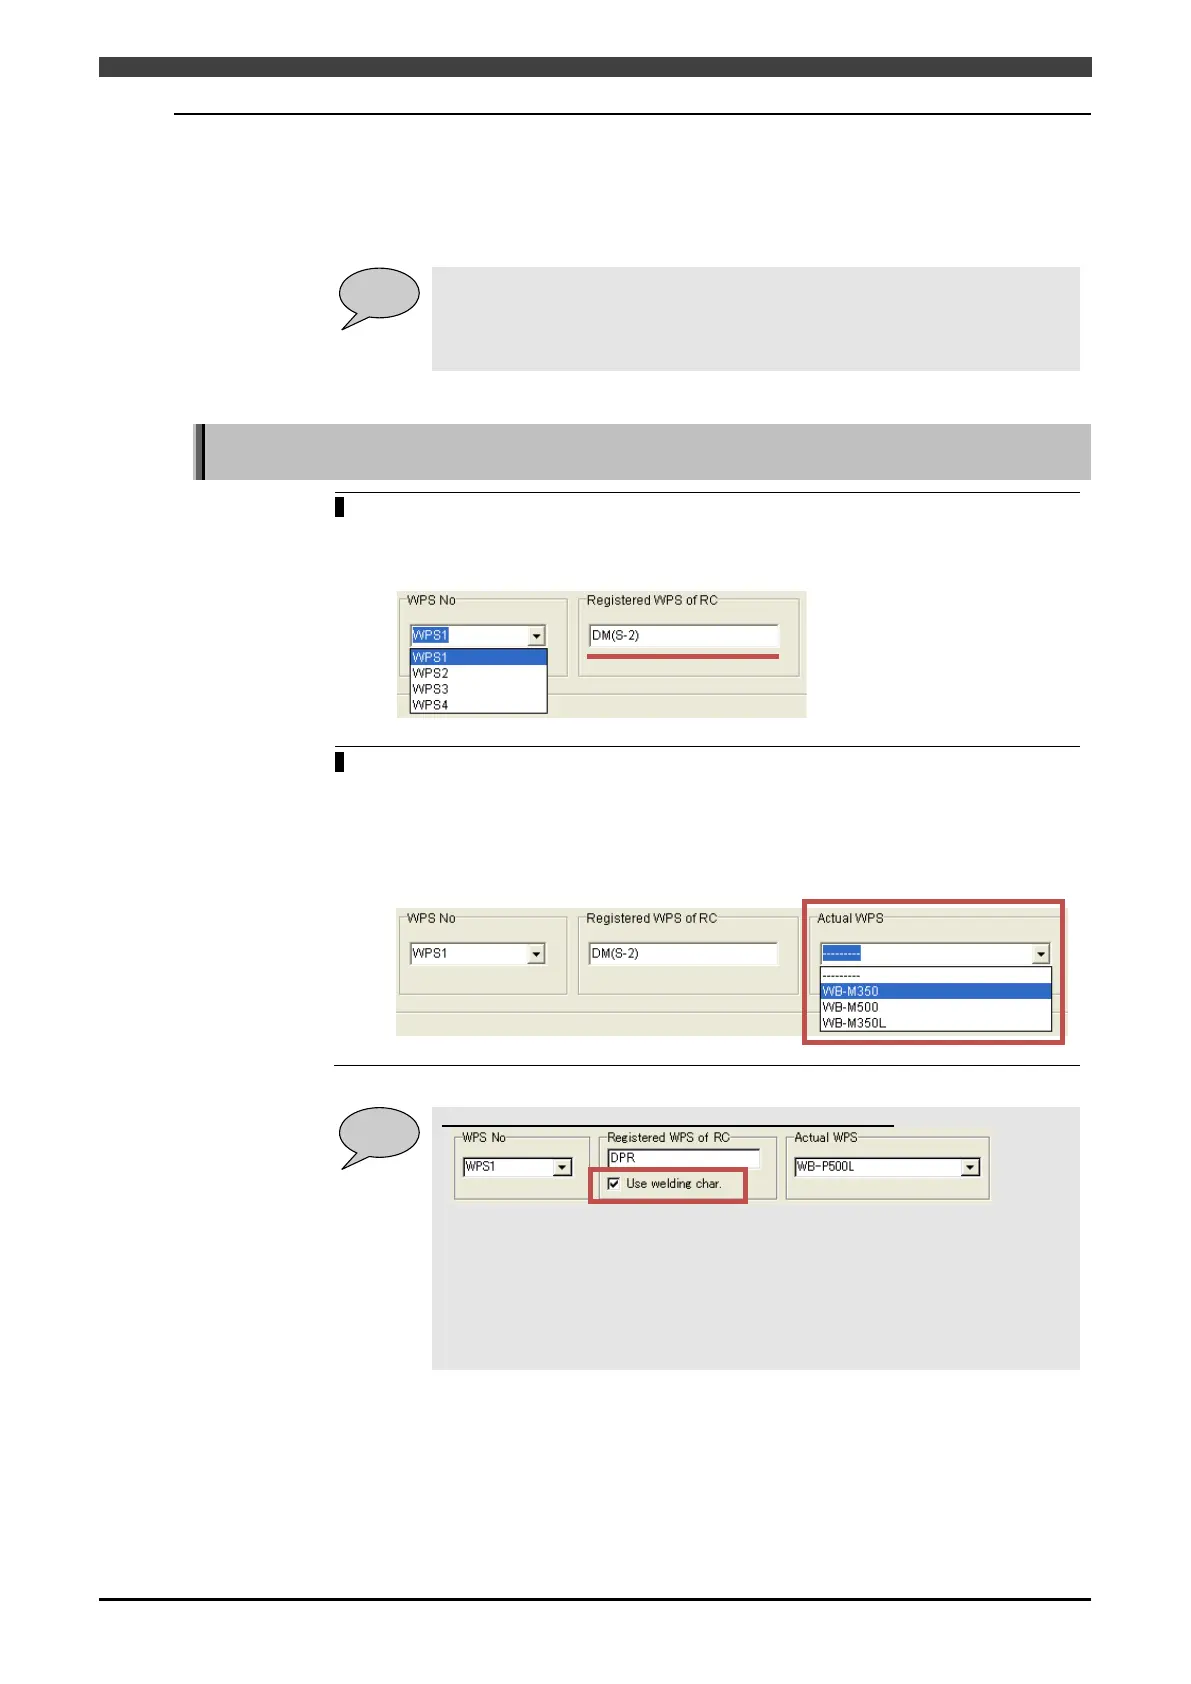
Associating the welding modes of the robot controller and Welbee Inverter welding
power source
In [WPS No], select the welding power source registered in the robot controller.
>> The type of the registered welding power source is displayed in [Registered WPS of
RC].
In [Actual WPS], select the Welbee Inverter series welding power source to be used.
>> If you cannot select the power source you want, refer to "3.3.1 Registering the
welding power source
" and check the correspondence between the D series
welding power source and Welbee Inverter series welding power source. If there is
no corresponding power source, perform the procedure again from "3.3.1
Registering the welding power source".
When the “Use welding char.” checkbox is displayed
Check this box when replacing an existing D series welding power source with
a Welbee Inverter series welding power source. Checking this box changes the
welding characteristic data file to current and voltage output characteristics
silimar to those of the D series welding power source.
Unchecking the box changes the welding characteristic data file to the original
current and voltage output characteristics for the Welbee Inverter series
welding power source.
 Loading...