3.7 Configuring the Welbee Inverter series welding power source
3-22
3.7.2 The welding power source internal functions when a robot is connected
When a Welbee Inverter series welding power source is connected to the robot, internal functions
that can be used with the welding power source are displayed in Table 3.7.2. Any other functions
related to the welding control and welding performance itself are configured by the welding
constants.
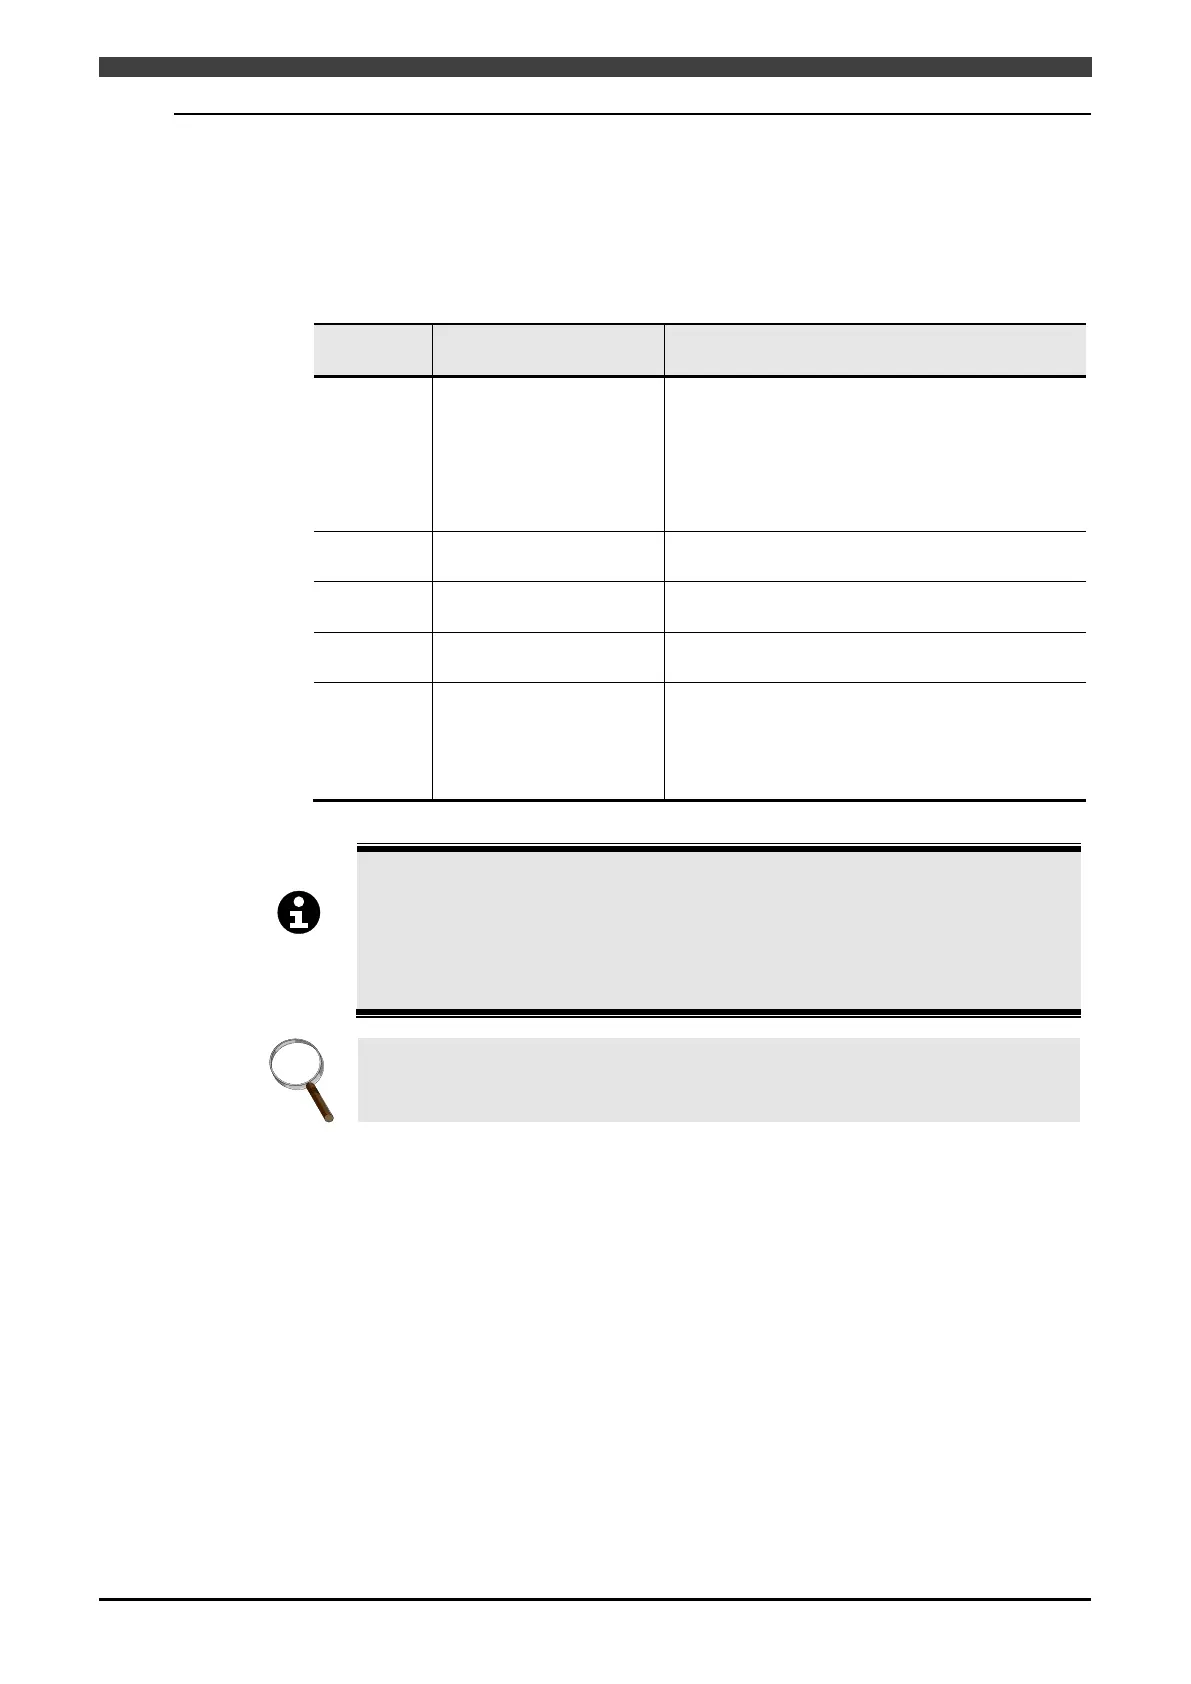
Table 3.7.2 Internal functions that can be used when the Welbee Inverter series welding power
source is connected to a robot
Function
number
Function name Function
4 Auto/Semi auto mode
Switches the I/O settings for the welding power
source.
0 : Semi-automatic machine
1 : Automatic 1
2 : Automatic 2
3 : OTC robot 1 (500Kbps mode)
4 : OTC robot 2 (1Mbps mode)
8
Setting of Result Display
Holding Time
See the instruction manual for the welding power
source.
21
Cooling fan maximum
operation
See the instruction manual for the welding power
source.
22
Keypad tone ON/OFF
Selection
See the instruction manual for the welding power
source.
43 Welders ID (CANID)
This is used to set the numbers (1 to 4) of the
welding power sources.
Select <Arc Constant> – [1 Registration of welder],
and select the numbers corresponding to the
welding power sources to be registered.
Do not change any other internal functions other than the above.
If changes are made, the welding power source may not operate properly. However, it
may be necessary to configure the settings separately
for the function when the
registered welding power source is DP. For details, see “3.11.7 Settgin
Welding Power Source Side” or “3.11.7 Settgins on the Welding Power Source Side”.
As for the function number 4 [Auto/Semi-auto mode], set it to “3: OTC robot 1
(500Kbps)”.
In the initial factory settings, the setting for function number 4 "Auto/Semi auto mode" is
set to "0: Semi-automatic machine".
If the welding power source is communicating normally with the robot controller, the
lowest dots in the left/right digital meters are blinked.
 Loading...