3.5 Writing the setup data
3-18
3.5.2 Writing the setup data onto Welding Interface (Digital)
Write the setup data you created in "3.4.2 Configuring the welding mode for the Welbee Inverter
series welding power source" onto Welding Interface (Digital).
Writing the setup data onto Welding Interface (Digital)
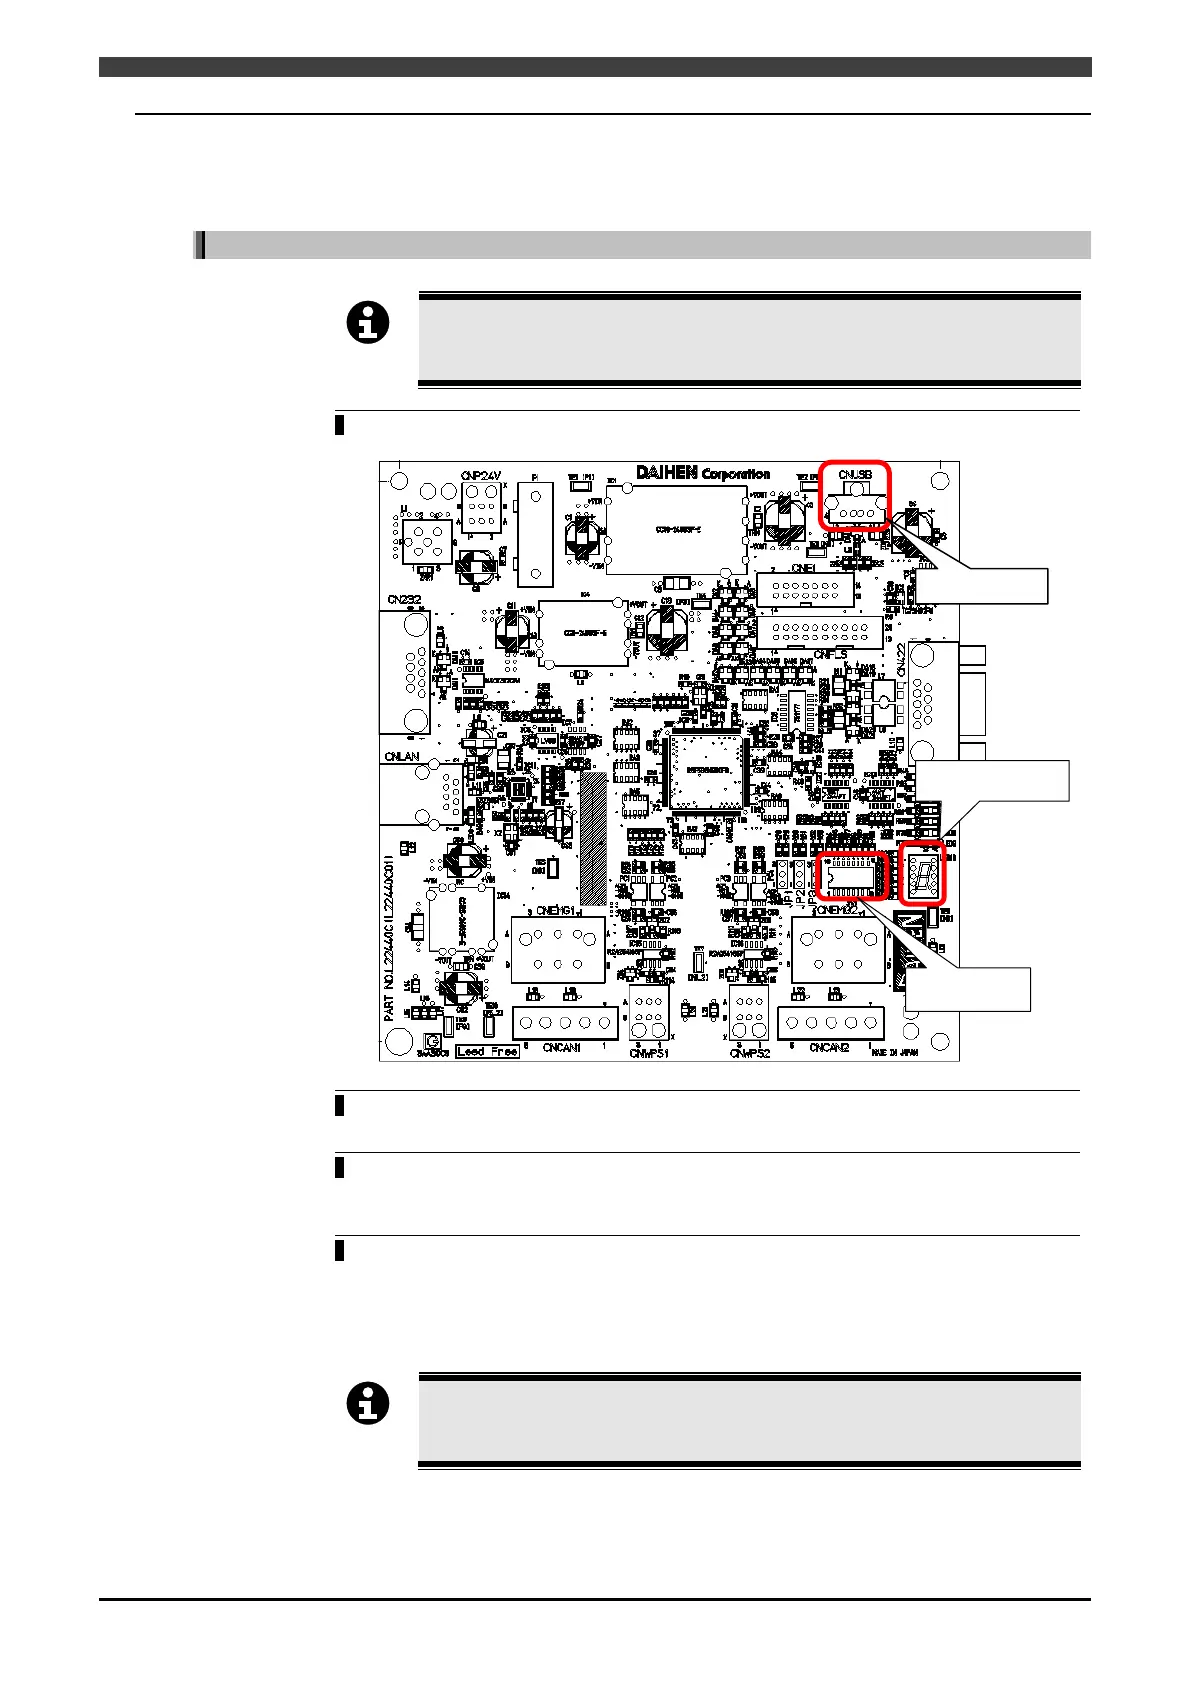
Make sure that the power of the robot controller is OFF before inserting the USB
memory or operating a DIP switch.
While the power of the robot controlle
r is OFF, connect the USB memory to the
Welding Interface (Digital) board.
While the power of the robot controller is OFF, turn ON the No. 3 DIP switch on
the Welding Interface (Digital) board. Turn OFF the other DIP switches.
Turn ON the power of the robot controller.
>> After 10 seconds, the writing of the setup data onto the interface starts automatically.
The setup data writing finishes after approximately 10 seconds.
When the 7-segment LED displays 'E' → 'n' → 'd' in order, check on the robot
controller teach pendant that the robot controller has started, turn OFF the robot
controller power, and then turn OFF all the DIP switches.
memory.
>> This completes the configuration of the Welding Interface (Digital) board.
After turning ON the power of the robot controller, do not turn OFF the power until
the starting process has completed (do not turn OFF during startup).
 Loading...