Adjustments and Maintenance
2-9
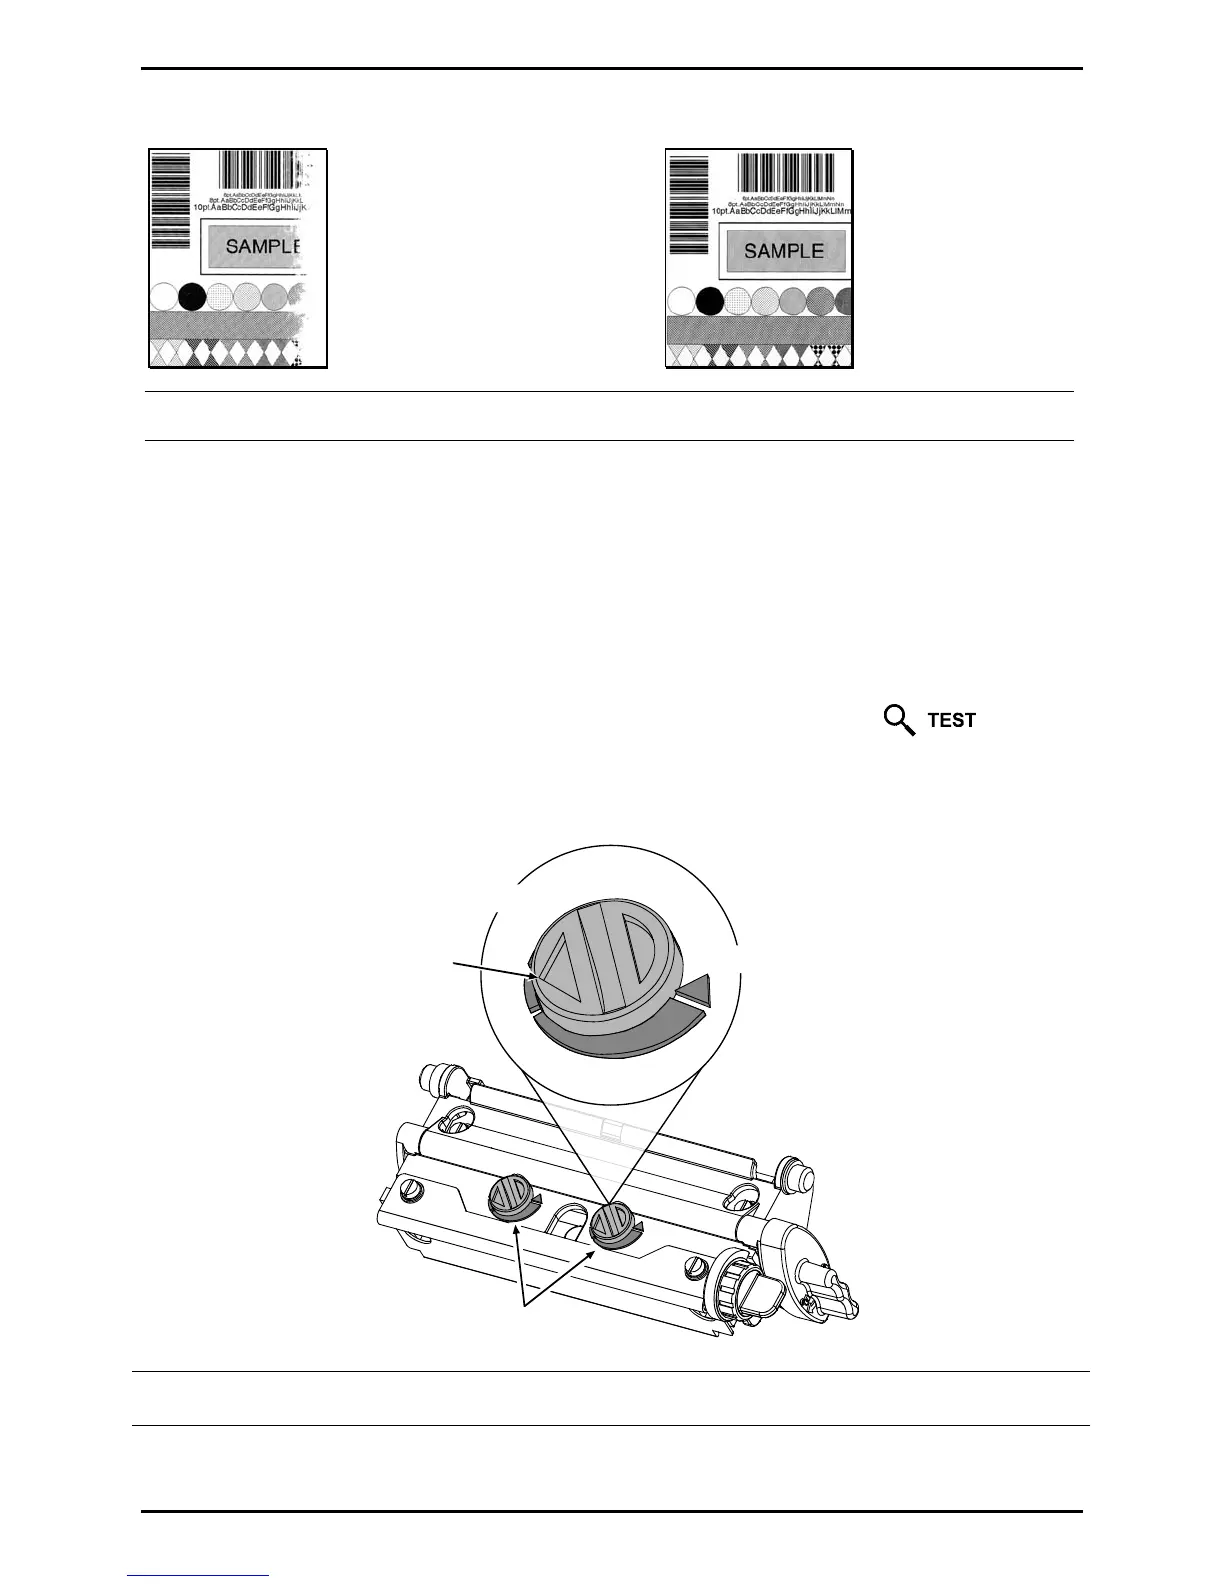
Example 1 –
Over-adjustment
produces an image
that fades across the
label, requiring a
decrease in the setting
of the Leveling Cam.
Example 2 –
Correct adjustment
produces a complete
image, with even
print contrast across
the label.
Note: Under-adjustment can cause ribbon wrinkling, tracking problems, and excessive wear on
printer components.
2.2.2 Pressure Adjustment
To maintain print quality across the variety of media types, the printhead pressure is adjustable. This
adjustment should only be performed, however, after attempting improvement using the HEAT and/or
PRINT SPEED settings. Use only the minimum pressure needed, following the steps below:
1. Load 4 inch (102mm) wide media (and ribbon, if needed). Then, disengage the Leveling Cam and
latch the Printhead Assembly.
2. Enter the Quick Test Mode then select 100 Print Quality Labels and press the
Key to
begin printing.
3. Turn each Pressure Adjustment Cam equally (counterclockwise to increase pressure or clockwise
to decrease it) until even print quality is achieved across the label.
Pressure
Adjustment Cams
Indicator
Minimum
Maximum
Note: Excessive pressure can cause ribbon wrinkling, tracking problems, and excessive wear on
printer components.
 Loading...


