Adjustments and Maintenance
2-11
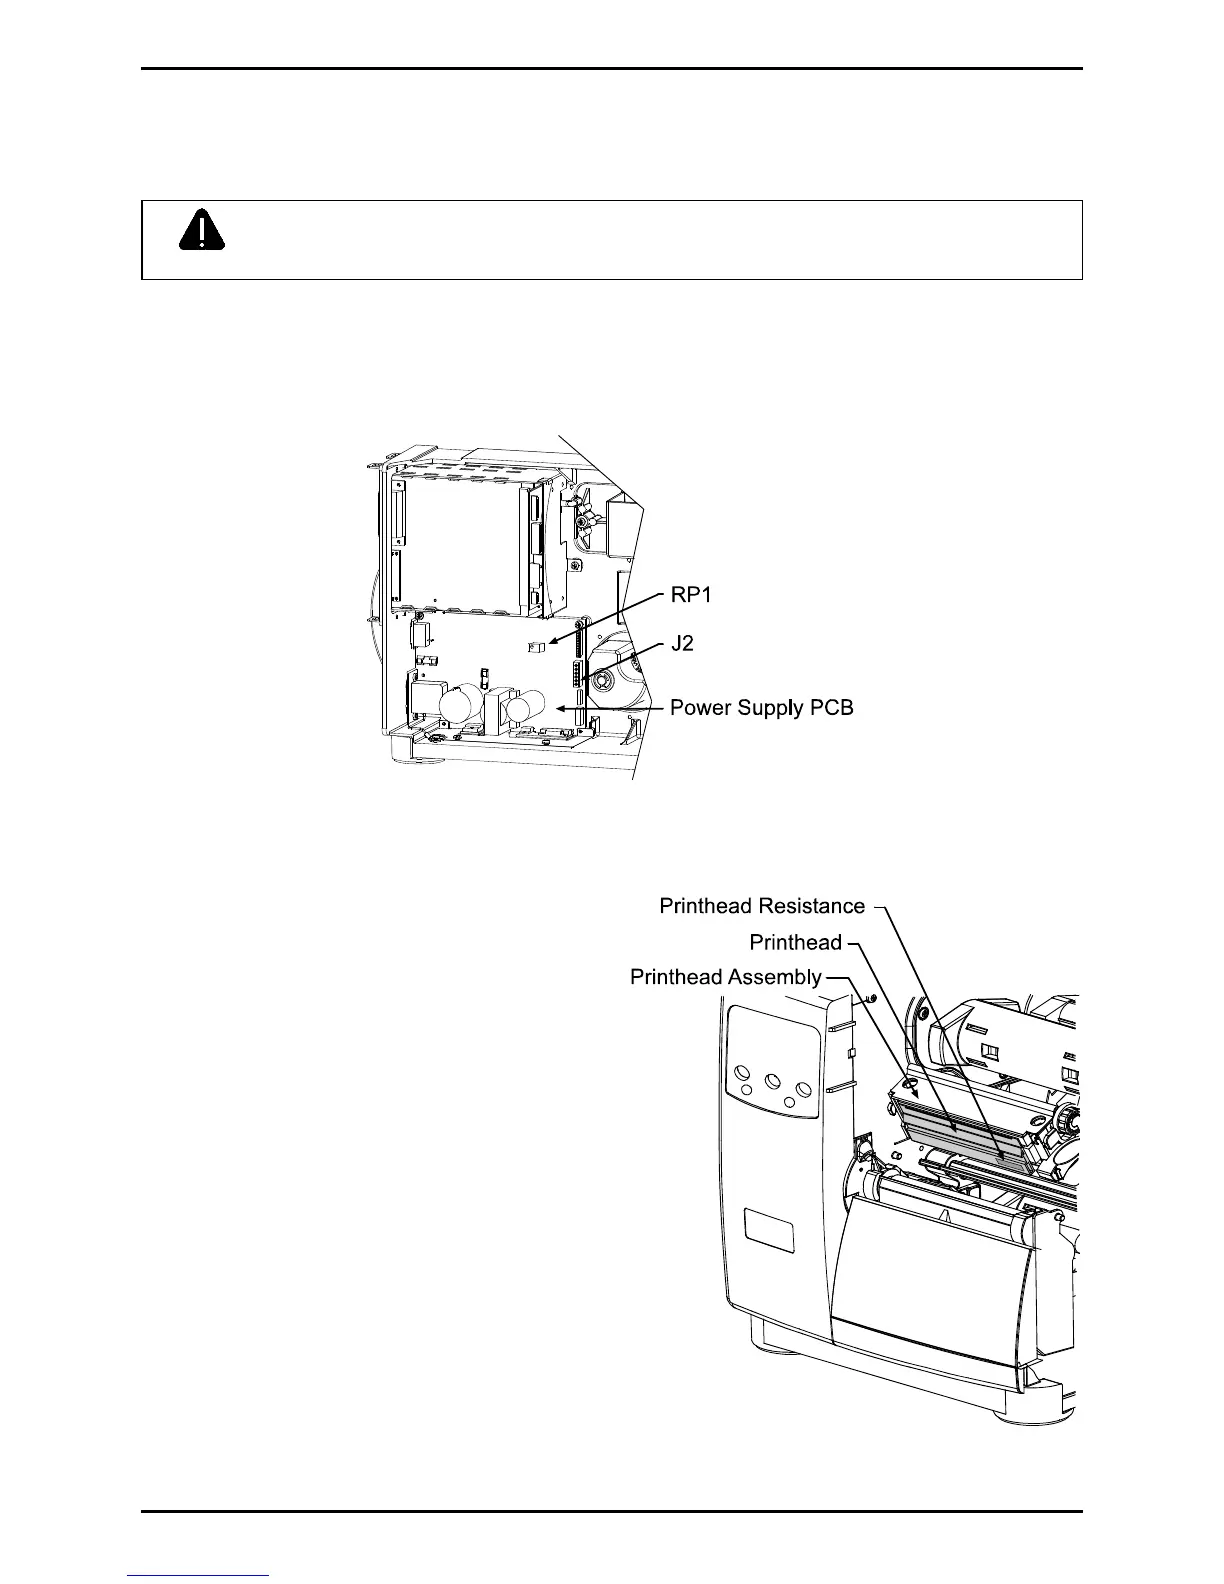
2.2.4 Voltage Adjustment
CAUTION
Voltage measurement required; use extreme caution.
The printhead voltage adjustment is required (1) when replacing the power supply or (2) if the factory
voltage setting of the power supply has been changed. No voltage adjustment is required during a
routine printhead replacement. Adjust the Printhead Voltage as follows:
1. Turn OFF and unplug the printer and remove the cover; see Section 4.1.
2. Using a multi-meter set to measure DC voltage, connect the positive lead to Power Supply
Connector J2 - pin 1 and the negative lead to J2 - pin 6.
3. Raise the Printhead Assembly. Locate and
note the Printhead Resistance.
4. After ensuring that media is loaded, latch the
Printhead Assembly in the down position. Plug
in and turn ON the printer.
5. After READY is displayed, press the FEED
button (this will enable the printhead voltage
for approximately 30 seconds). Adjust the
voltage using RP1 on the Power Supply PCB
according to the printhead resistance listed in
the appropriate table below.
6. Turn OFF and unplug the printer. Remove the
multi-meter and replace the cover.
 Loading...


