Removal and Replacement
4-22
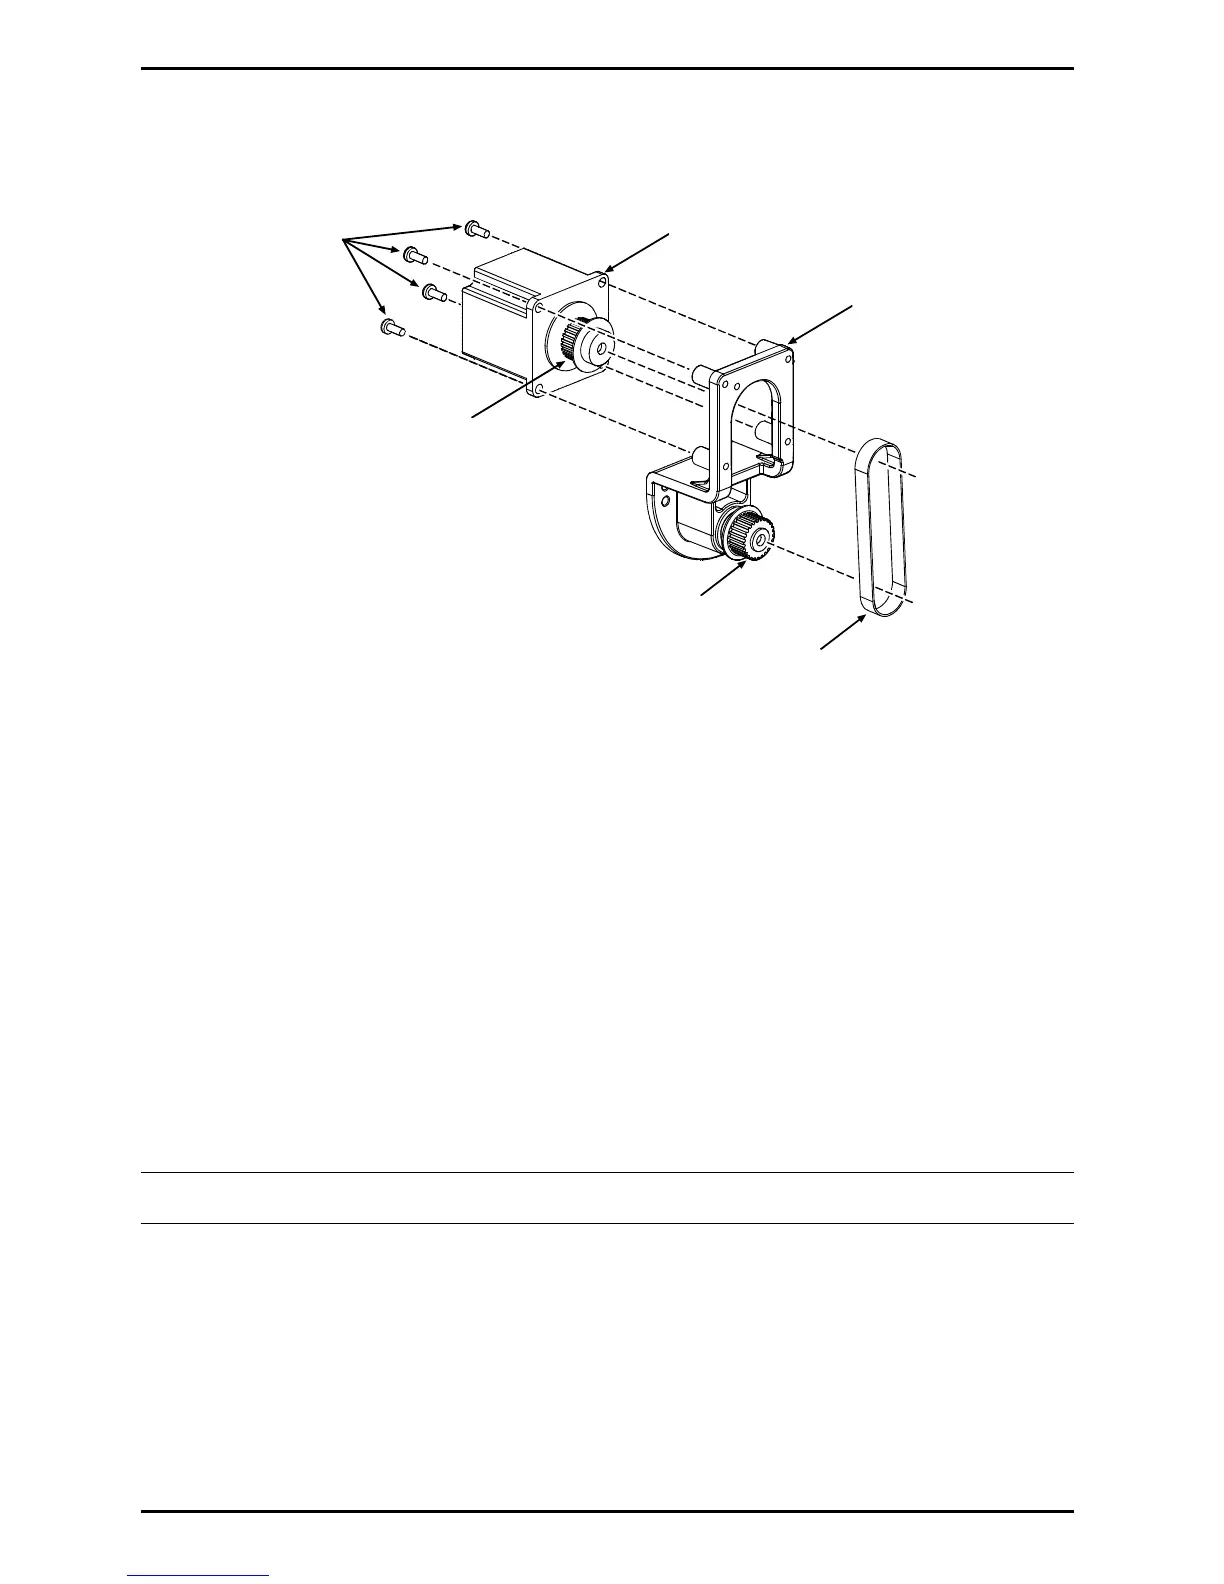
4. Remove the four Screws that secure the Drive Motor to the Motor Mounting Block then slip the
Belt off the Motor Pulley.
Screws
Drive
Motor
Belt
Motor
Mounting
Block
Motor
Pulley
Motor Mounting
Block Gear
Replacement:
1. Position the Drive Motor on the Motor Mounting Block. Route the Belt around the Motor Pulley and
the Motor Mounting Block Gear, engaging the teeth, then reinstall and tighten the four Screws.
2. Position the Drive Assembly onto the Centerplate Standoffs and then secure the assembly with
three Screws.
3. Reconnect the motor cable.
4. Reinstall the Cover Assembly; see Section 4.1.
4.8.2 Direct Drive
Note: Though the illustration depicts the motor replacement of a 203 / 400 DPI model, except
as detailed below the procedure is the same.
Removal:
1. Turn OFF and unplug the printer.
2. Remove the Cover Assembly; see Section 4.1.
 Loading...


