V0215, 1.7
1.5. Getting started
1.5.1. Introduction
In order to obtain a bend program for a product, the control offers the possibility to create a
product drawing and calculate a valid bend sequence for the product. With this information, a
product program is generated.
This is done with the following steps:
1 Go to the Products mode in the navigation panel and start a new product by tap-
ping New Product.
2 Enter the product properties and start to draw a 2D product profile in the Drawing
mode.
3 Check the tooling, modify or make a new set-up in the Tool Setup mode.
4 Use the Bend Sequence mode to determine the bend sequence by calculating it
or manually modifying it upon your own idea's.
5 When required modify the numerical CNC program via the Program mode.
6 Tap Auto and press the Start button in order to produce the programmed product.
1.5.2. Preparations
Before product programming can be started, the following preparations must be made.
• The correct material properties must have been programmed in the Materials library.
You can find this on the Materials page in the Settings mode.
• The correct tools must be programmed in the Tool Library. Tools are necessary to create
a CNC program. You can find the libraries for the different types of tools in the Machine
mode.
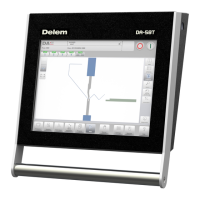
1.5.3. Create a drawing
The control offers the functionality to create a drawing of the intended product. With this
drawing application, tap Drawing in the navigation panel, a 2D profile is created. At this stage,
there is no calculation of bends or dimensions: any profile or drawing can be created.
The drawing method on the Touch screen control is based on:
• Sketching
• Value setting
Sketching
The product as well as tool shape Sketching can be done by tapping on the screen in the
different directions the drawing must have. The application will follow the tapping with drawing
a line between the indicated points. The last point of the design will show always a big red dot.
When the drawing dot is on the screen you can hold your finger on this position and move the
finger across the screen to move the connected line in another required direction or make the
line length longer. This method is the so-called 'Dragging' facility. The length and angle value
will be visible on the screen and can be adjusted to be exact or close to the requested value.
Value Setting
Once the product or tool is drawn in the Sketching method the exact values of line lengths and