Removing and Installing System Components | 165
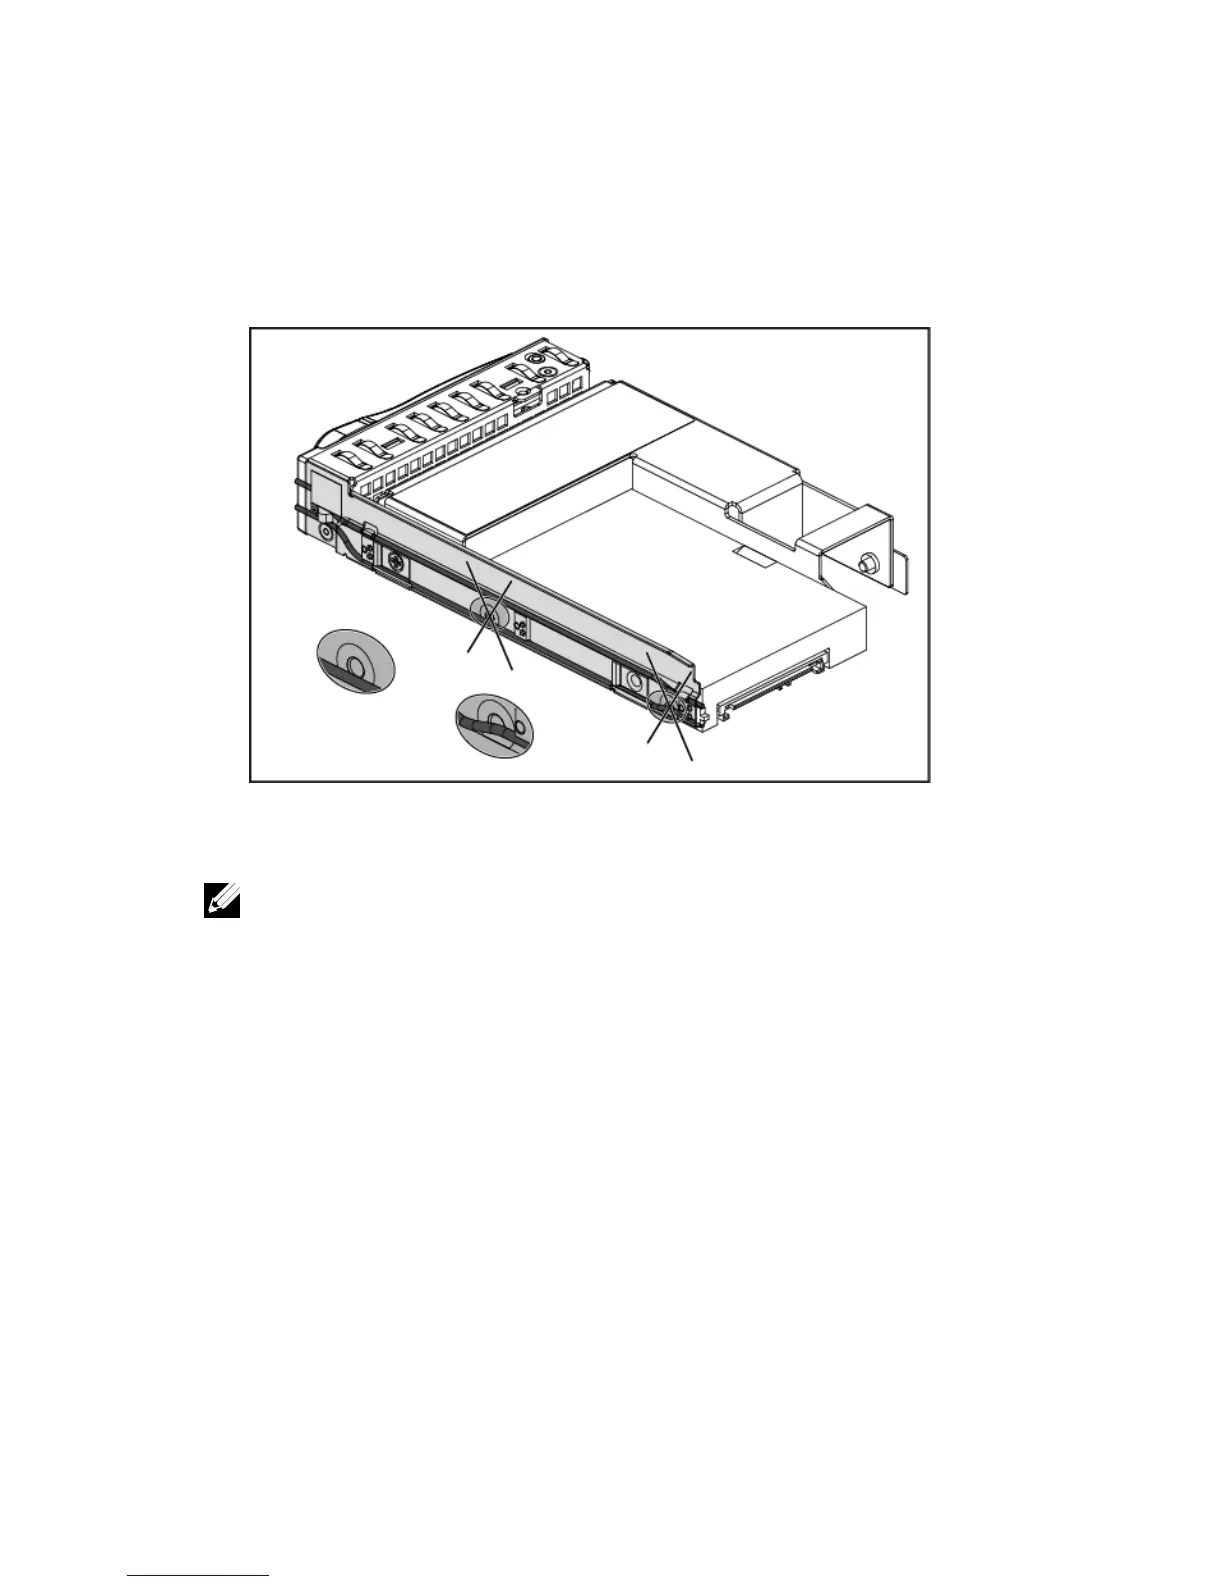
5 Do not install screws in the two screw holes on the side of SSD, which
are occupied by the light pipe. See Figure 3-12.
NOTE:
1 This operation is only for 2.5” SSD. Don’t install any 2.5” HDD
into the adapter; otherwise it will cause performance issue.
2 The 2.5” SSD can be installed firmly into the 3.5” hard-drive
carrier by the steps above so that the 2 screw holes on the side of
SSD and occupied by the light pipe can be ignored.
3 There is no quality or functional concern with the adapter
assembly. Customer, Dell Factory, and Service team should take
care when installing the assembly with 2.5” SDD into chassis.

 Loading...


