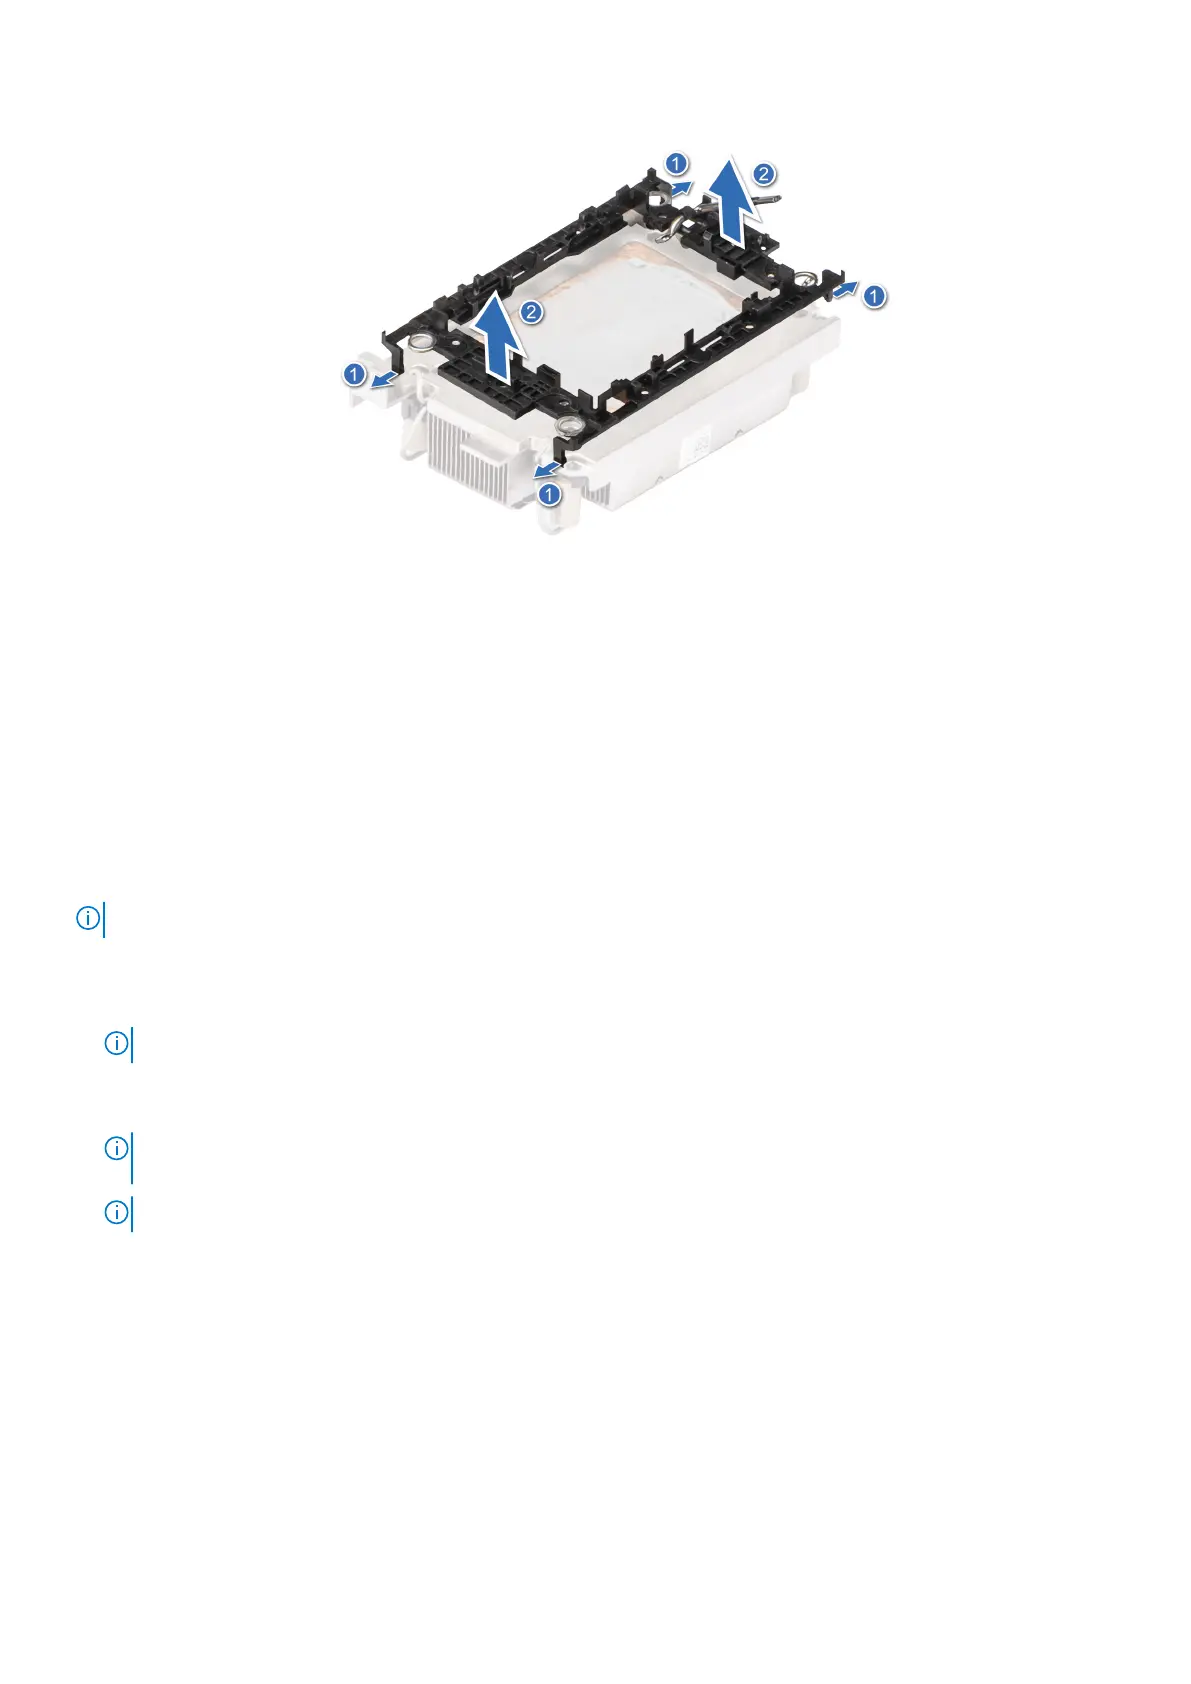
Figure 74. Removing the processor retaining clip
Next steps
Replace the processor into a processor and heat sink module (PHM).
Installing the processor into a processor and heat sink module
Prerequisites
1. Follow the safety guidelines listed in the Safety instructions.
2. Follow the procedure listed in Before working inside your system.
NOTE: The CPU assembly orientation between CPU 1 and CPU2 is reverse.
Steps
1. Place the processor in the processor tray.
NOTE: Ensure that the pin 1 indicator on the processor tray is aligned with the pin 1 indicator on the processor.
2. Place the processor retaining clip on top of the processor that is in the processor tray aligning pin 1 indicator on the
processor.
NOTE:
Ensure that the pin 1 indicator on the retaining clip is aligned with the pin 1 indicator on the processor before
placing the retaining clip on the processor.
NOTE: Ensure that the processor and the retaining clip are placed in the tray before you install the heat sink.
Installing and removing system components 101
 Loading...


