3.1 Connecting to the Dolby CP950 or CP950A
Aer you install the Dolby CP950 or CP950A and configure the network settings, connect your computer to
the unit. Note that the CP950A performs internal networking on a network with an IP address range of
172.16.x.x. Do not set this address range for any external devices
Procedure
1. Connect the Dolby CP950/CP950A and your computer to the auditorium network switch. Alternatively,
you can connect your computer directly to the Dolby CP950/CP950A if your computer supports a gigabit
Ethernet connection.
2. Open the web browser on your computer. Currently, the Dolby CP950 and CP950A are compatible with
Google Chrome v71.x or later. You can use other browsers, but you may experience issues in the Dolby
CP950/CP950A web client user interface (UI). If you do experience issues, clearing the browser cache or
using incognito mode may help.
3. Connect to your unit by typing its IP address in your web browser.
An authenticate login screen appears requesting a user name and password, as shown in the following
figure. The default administrator user name and password are both admin. If you are a system
administrator, you should change the administrator password, and then set up user access levels and
passwords for all other users, as described in Section 3.7.
Figure 32: Authenticate login screen
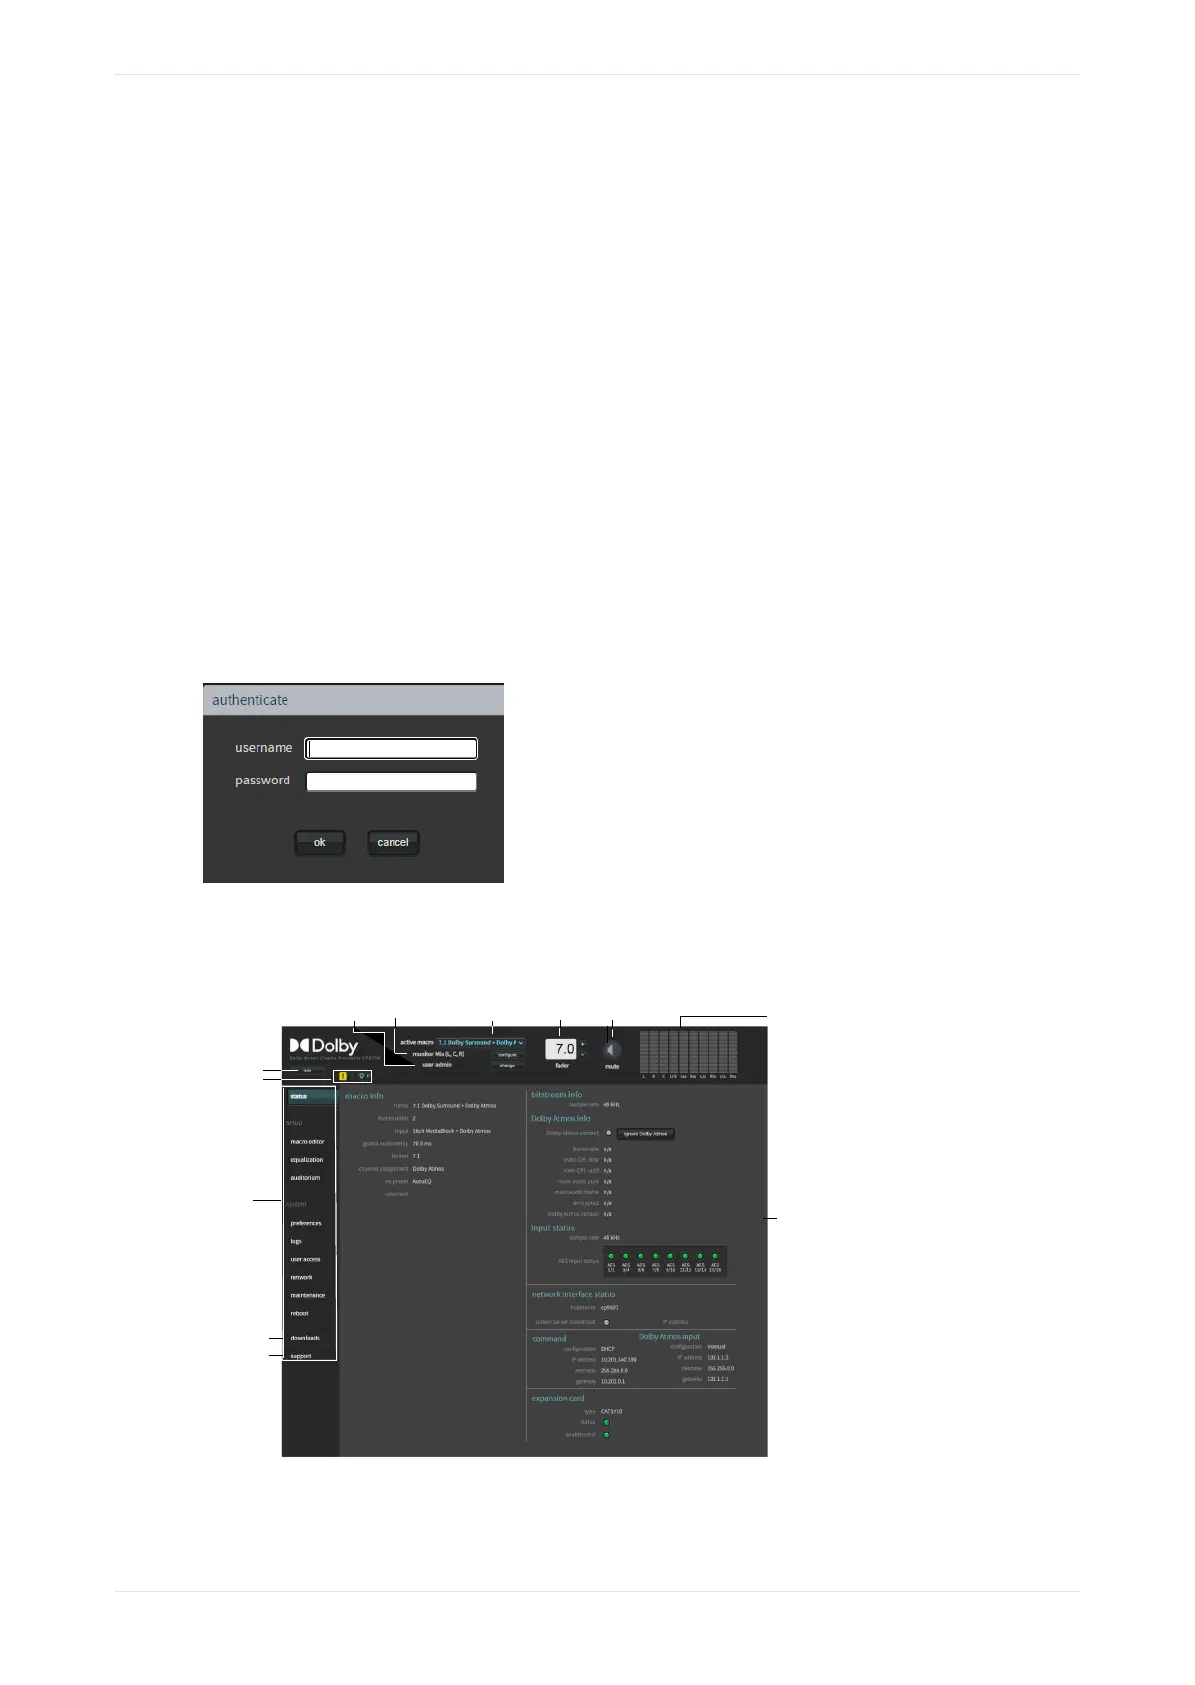
4. Aer you log in, the web client status screen appears, as shown in the following figure, which uses a
CP950A with a Dolby Atmos enablement installed as an example.
Figure 33: CP950A web client status screen
Click for
system info
Click for
downloads
Click for
support
contacts
Click for
alerts and
site info
Navigation
sidebar
Audio meter
Mute/unmute
Active macro selection
Monitor
User level
Fader
Input summary
display
Following is a description of the recurring objects that appear in all of the web client UI screens.
Connecting to the Dolby CP950 or CP950A
Dolby Cinema Processor CP950 and Dolby Atmos Cinema Processor CP950A Manual 41
Issue 9 Part Number 8800298 19 January 2022