DTG M Series Maintenance Manual Initial Setup & Basic Operations
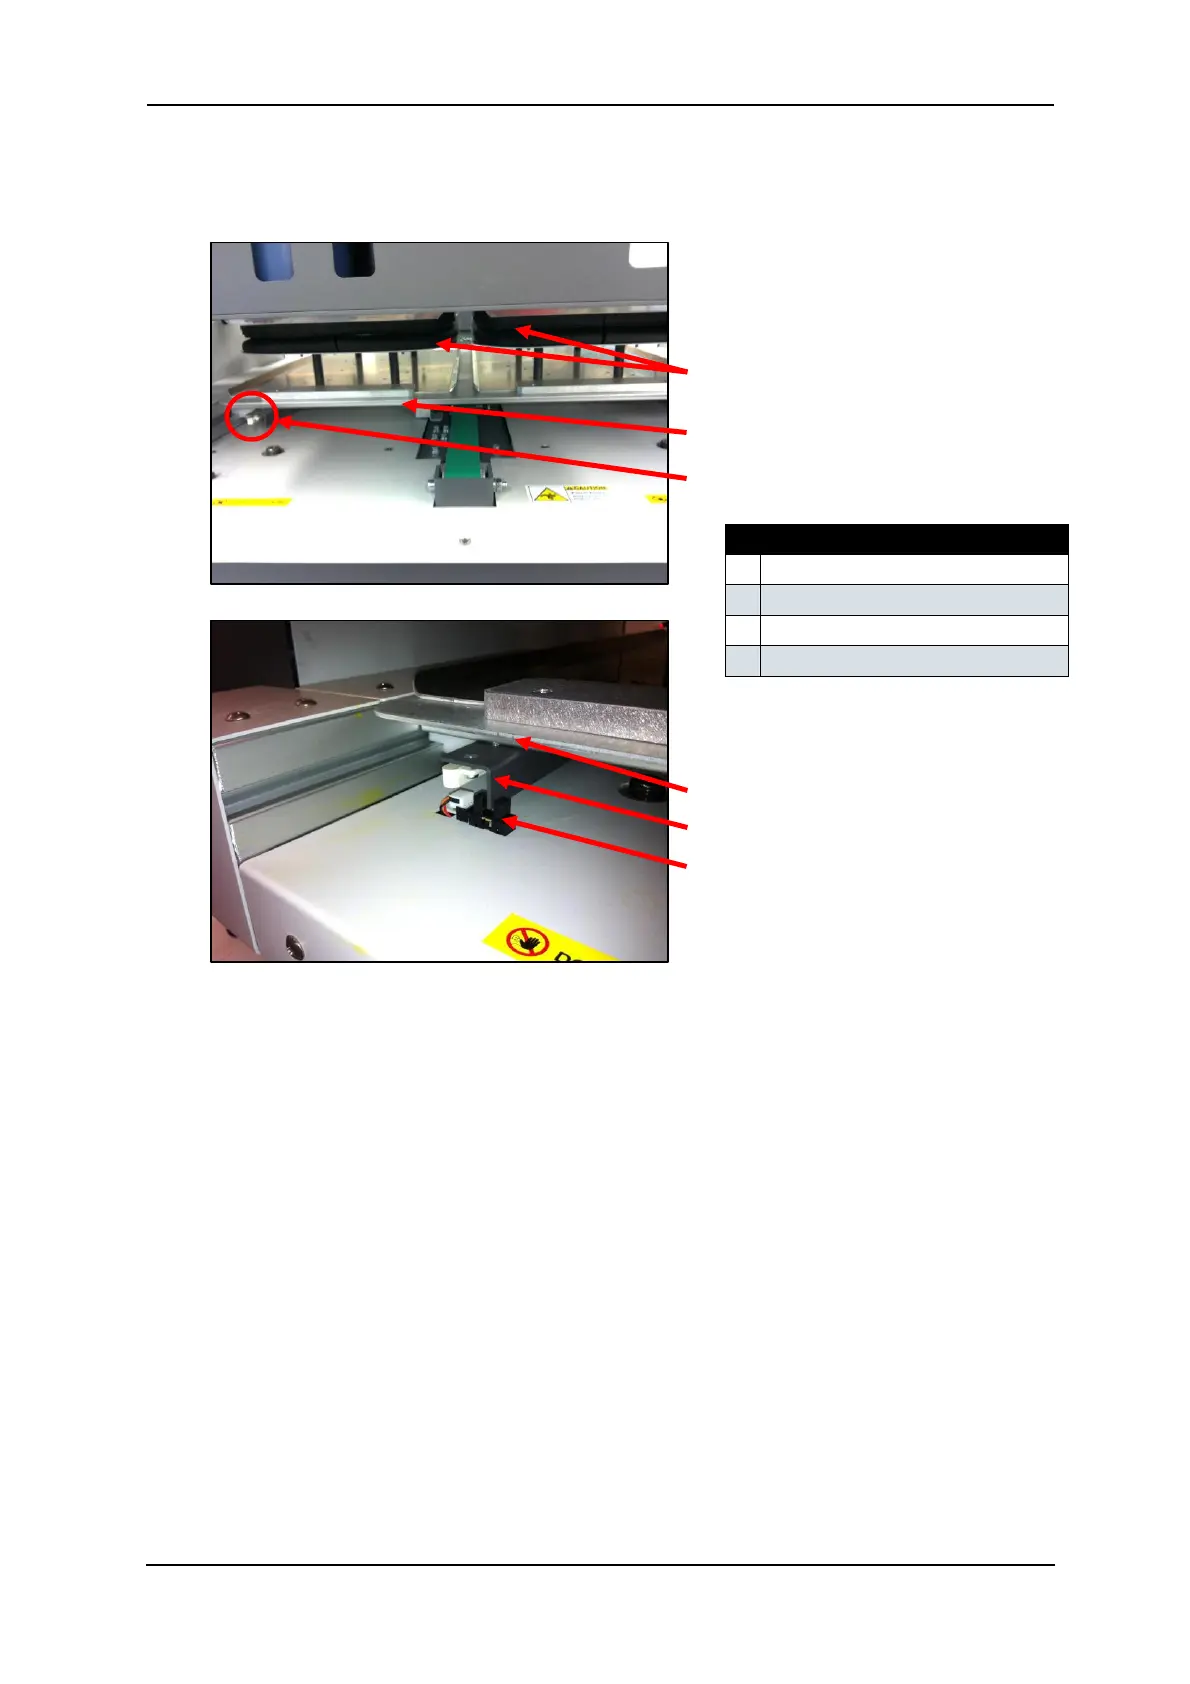
6. From the rear of the printer, slowly pull the Media Tray towards the rear of the printer,
until the Media Sensor is triggered by the interrupter located on the base of the Media Tray
as shown here:
7. Press the LOAD button to set the printer to “load mode”. The Load/Eject status light
should turn green.
8. Follow the menu selection described above in Section 3.6.8.2 "Accessing the Bi-D
Adjustment Menu" p.57 to access the Bi-D High1 utility.
9. When Bi- D H i g h 1 is displayed, press the [Enter] key.
10. E n t e r P r i n t S t a r t will be displayed – press the [Enter] key again.
11. Adjustment P r i n t will display on the LCD screen, and the test pattern will be printed.
12. The platen will not eject after the test print has completed, so manually pull the platen out
to the front of the printer far enough that you can examine the test print pattern.