131
© 2017 Eaton. All rights reserved
2018.12.12
Clutch Housing Removal and Installation | Service Procedures TRSM0940
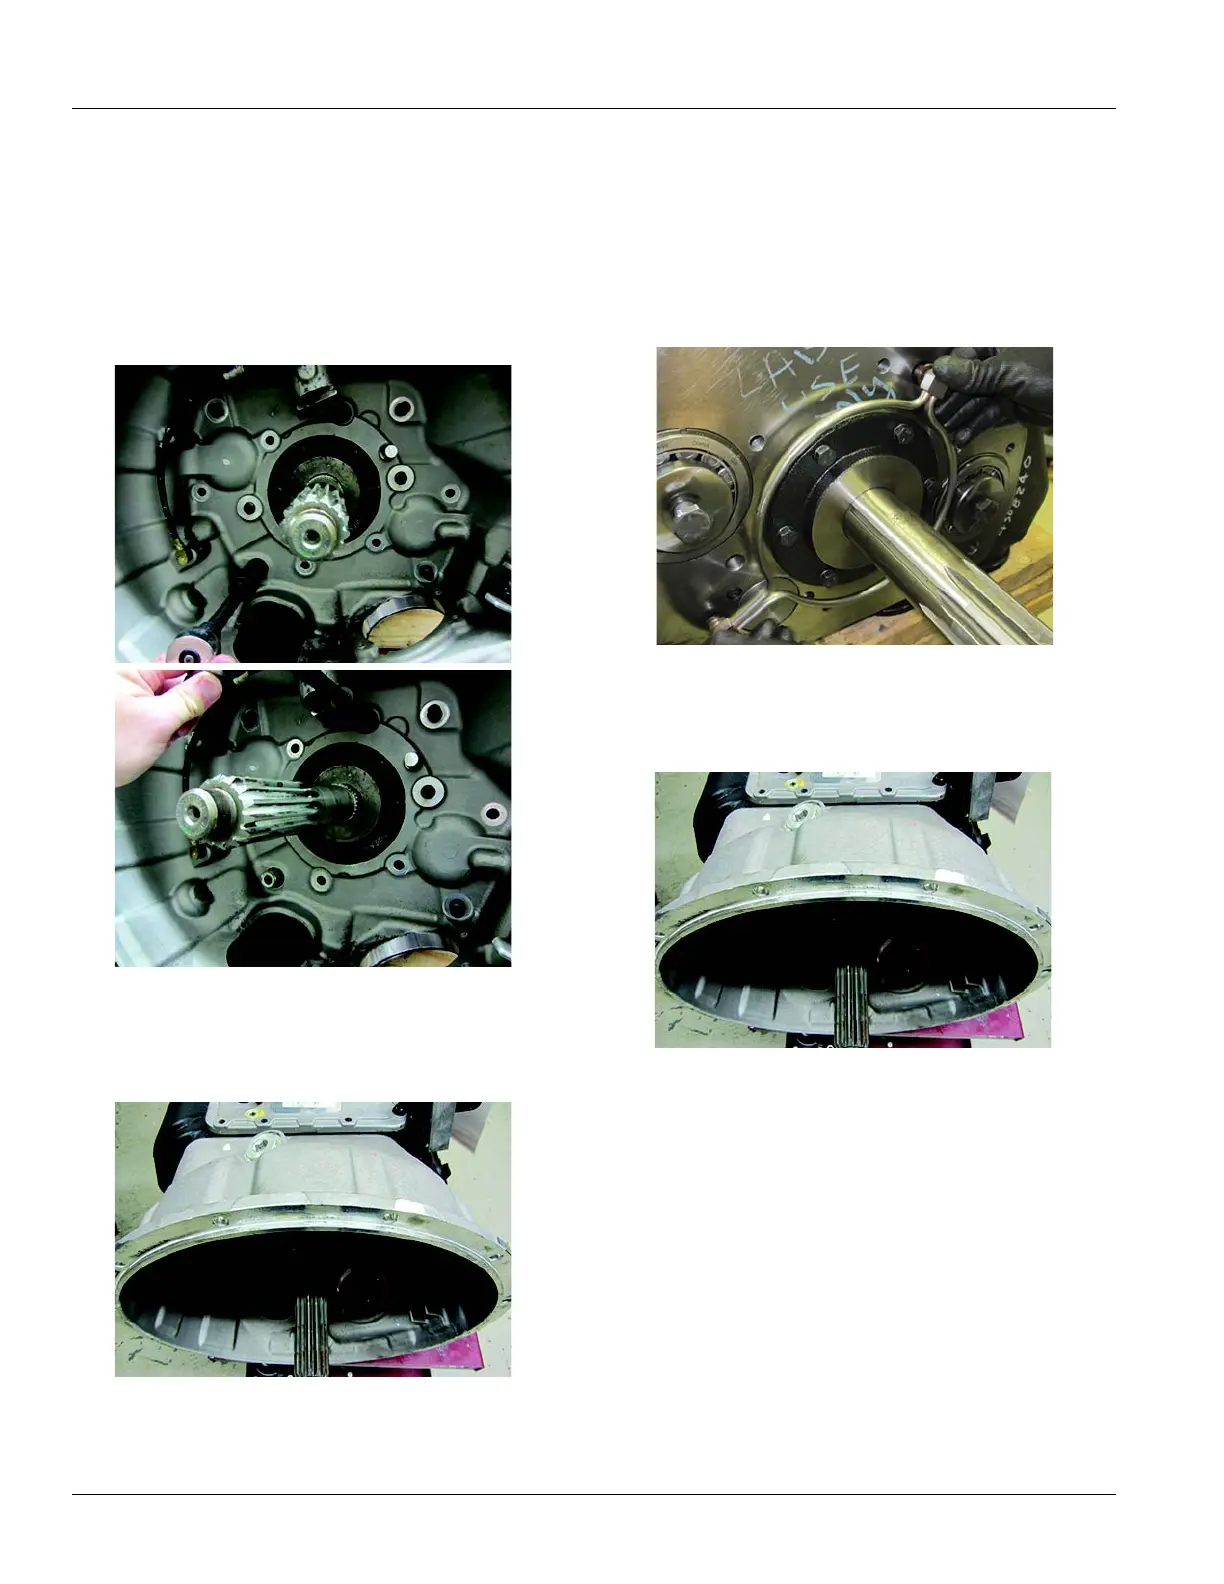
Clutch Housing Removal
1. Remove the Clutch Release Mechanism and Low
Capacity Inertia Brake.
2. Remove the
6 cap screws and 6 nuts and washers fas-
tening the Clutch Housing to the Transmission Main
Case.
3. Remove
the Clutch Housing from the Transmission
Main Case.
Clutch Housing Installation
1. Make sure the Clutch Housing and Main Case surfaces
are clean. Install a new Clutch Housing gasket on the
Main Case side.
2. Install
the Halo Tube assembly into the case.
3. Install
the Clutch Housing.
4. Put th
e 6 nuts and washers on the mounting studs and
install the bolts into place.
5. In a
cross-pattern sequence, torque the nuts to 30
lb-ft, then rotate clockwise 100°. Torque the bolts to 30
lb-ft, then rotate clockwise 115°.

 Loading...