8-73
Figure 8-25: SonarConfig.ini Example
3. Close the SonarConfig.ini without making any changes to the text.
4. Open the file name specified in the SonarConfig.ini. It is found in the same directory.
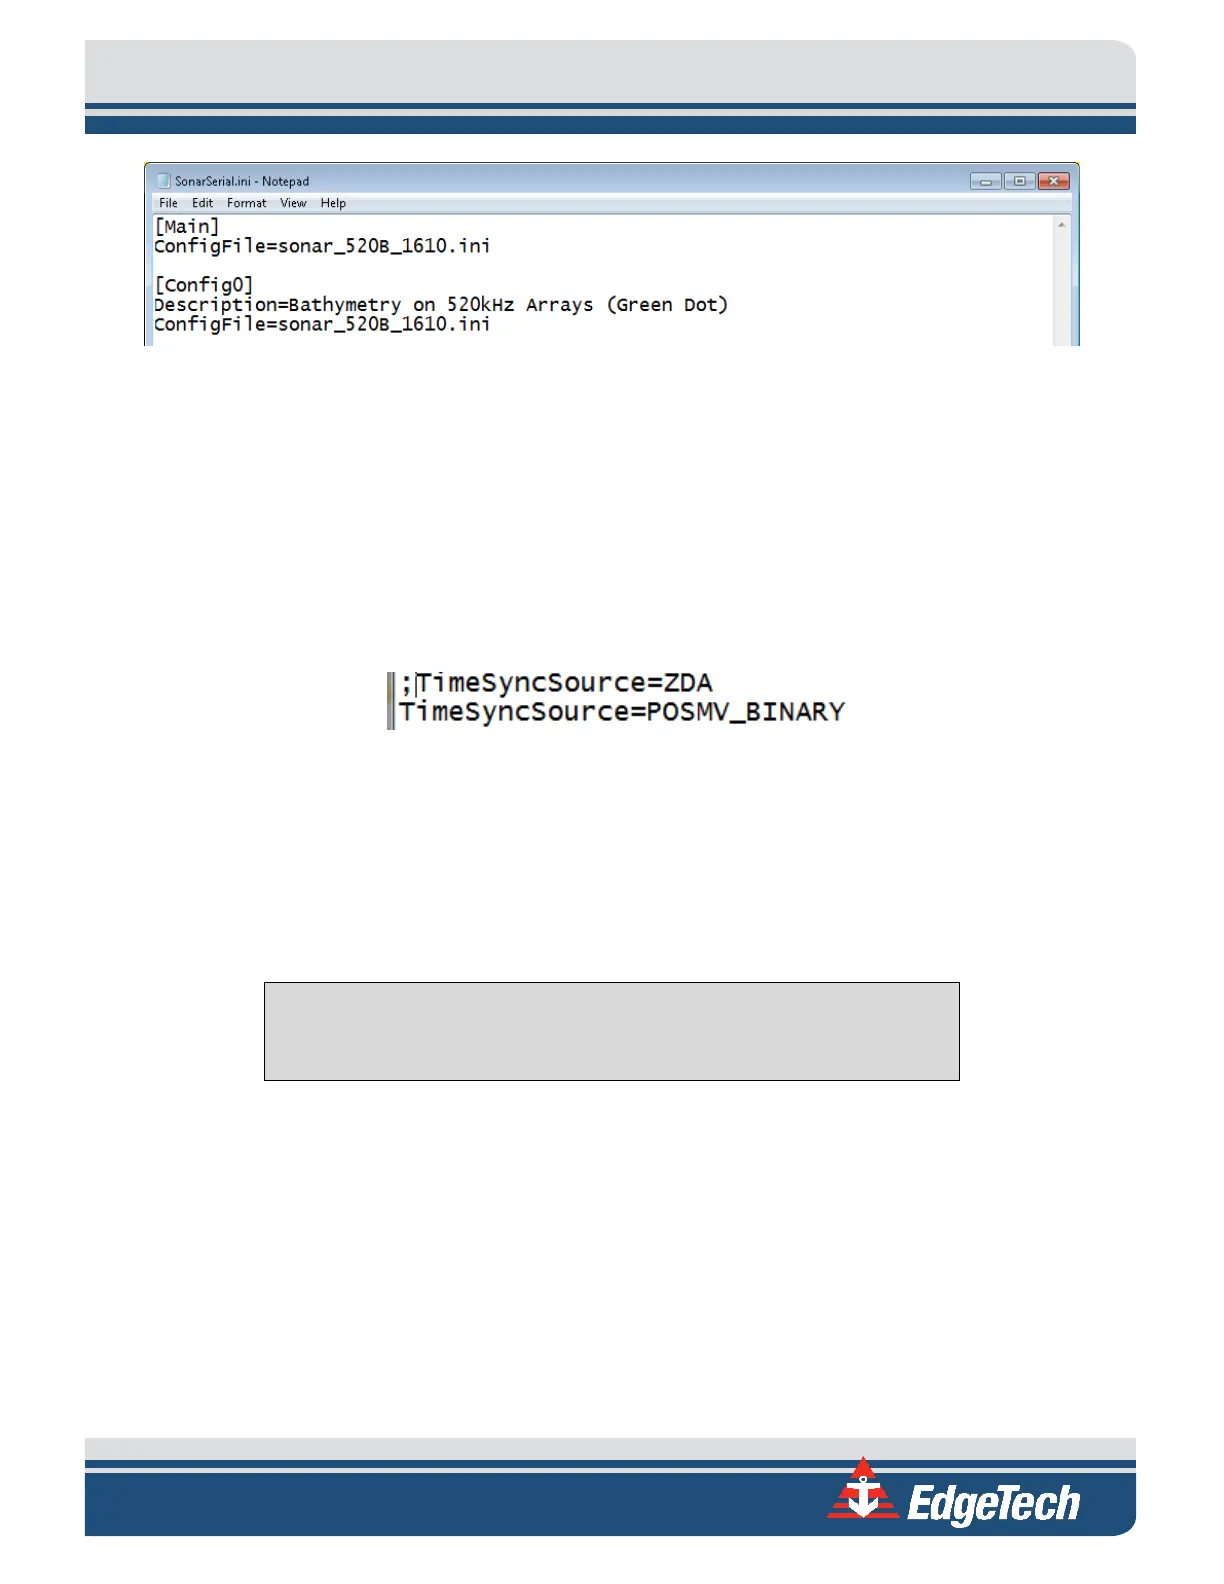
5. In the [Main] section of this file, comment out the current TimeSyncSource command line (default
is TimeSyncSource=ZDA) by adding a “;” in front of the keyword.
6. Under commented out TimeSyncSource line add the following: TimeSyncSource=POSMV_Binary.
Ensure there is no semicolon in front of this iteration of the keyword.
Figure 8-26: TimeSyncSource Keyword Adjustments
7. In the [DSP0] section of this file, ensure the OnePPSInputLine keyword is set to the following:
OnePPSInputLine=2. Ensure there is no semicolon in front of the keyword.
8. Select File > Save and close the text document.
CAUTION!
Do not alter the file in any way other than what has been specified.
This configuration sets the software to utilize the time and date reference received from the POSMV data
string. It also activates the 1PPS port on the topside module. A 1PPS sync must be utilized when data is
received via UDP due to the inherent added latency.
When the above steps are complete, Sonar.exe must be re-launched to activate the configuration
changes. This can be completed via the “x” in the top right-hand corner of the Sonar.exe GUI and the
Sonar.exe shortcut on the embedded CPU desktop.
Once the configuration of both the 6205s and the POSMV is completed, the Sonar Serial Port Viewer can
be utilized to confirm data is being accepted correctly. To access this, select the Misc. tab in the Sonar.exe
GUI (as shown in
FIGURE 8-16), then Serial Port Information. Select Com5 in the first dropdown, ensure
data is being received, and the State is being reported as “OK.”