EasyManuals Logo

Epson DFX-9000 Service Manual

Epson DFX-9000
333 pages
To Next Page IconTo Next Page
To Previous Page IconTo Previous Page
Page #168 background imageLoading...
Page #168 background image
Epson DFX 9000 Revision B
Disassembly and Assembly LF MOTOR 161
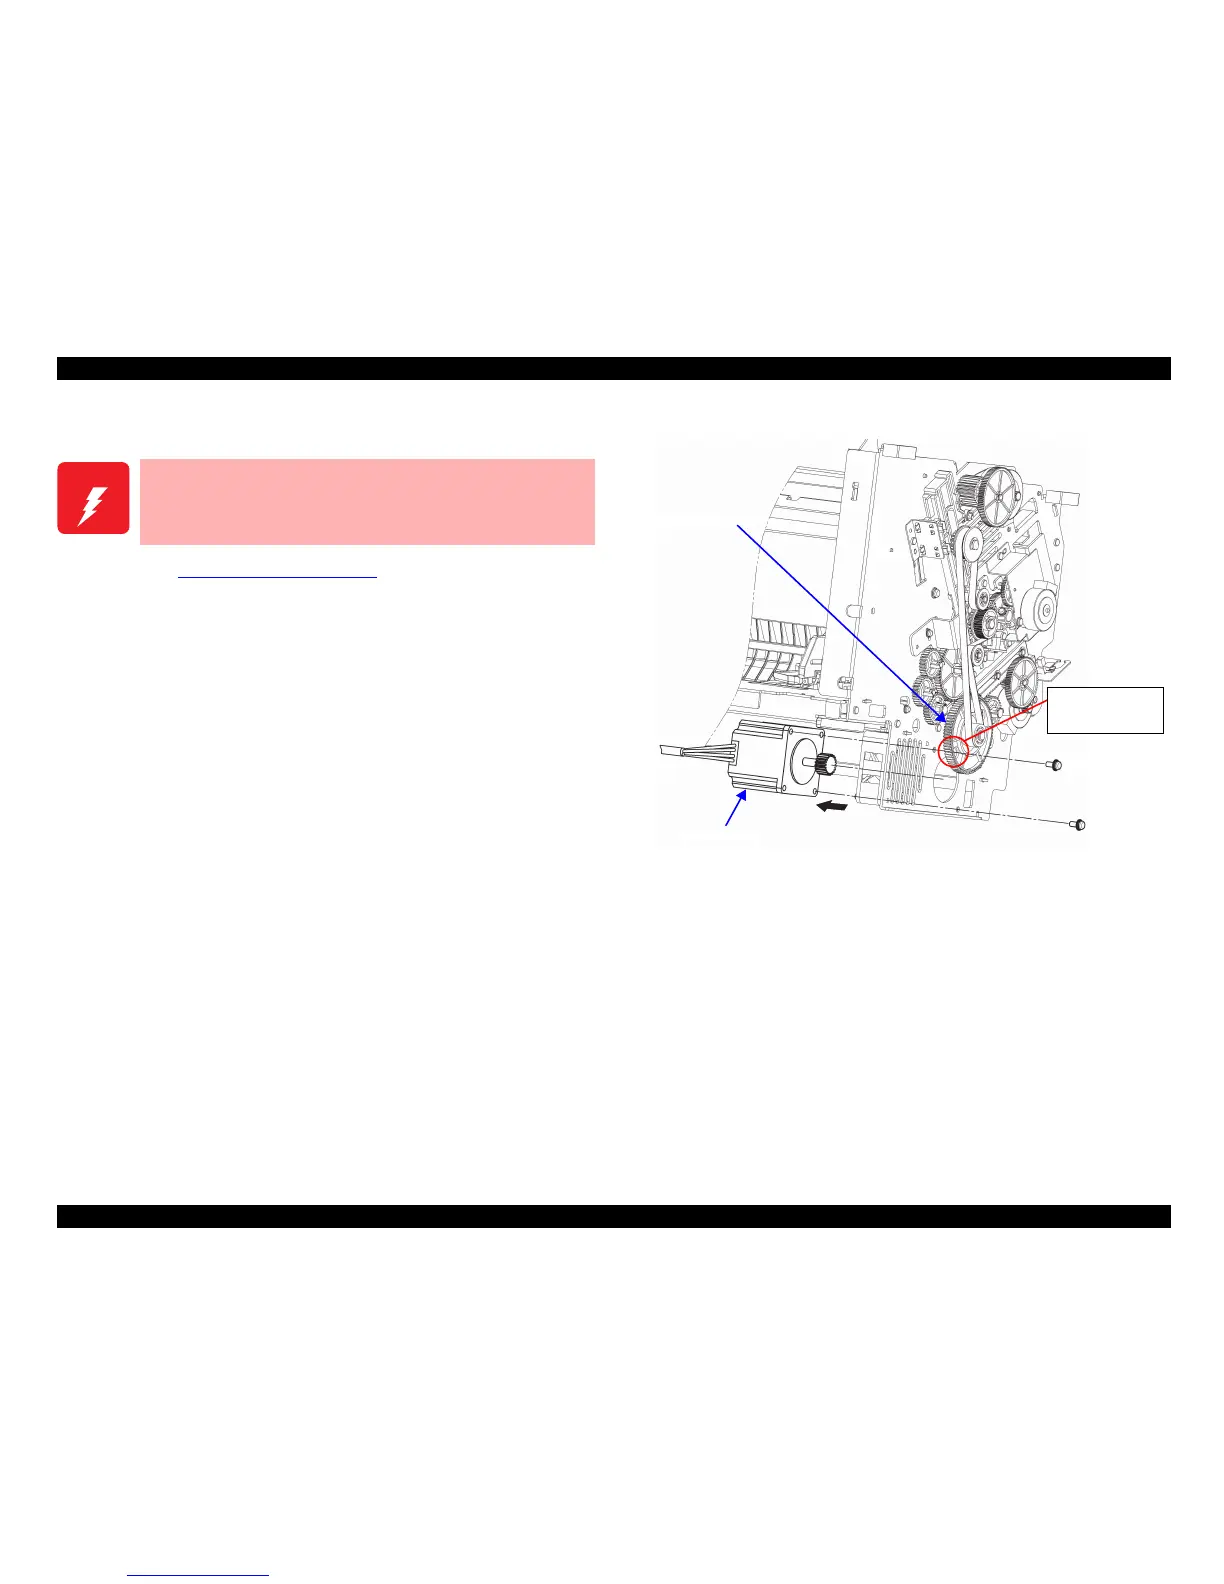
4.2.4.7 LF MOTOR
1. Remove the PR MECHA ASY (p. 149)
2. Release the LF MOTOR cable from the three cable clamps on the
bottom rear of the PR MECHA ASY.
3. Match the screw access hole in the Pulley Gear to the screw location
for the LF MOTOR. Remove the two C.P. (S-P1) 4 × 10 screws that
secure the LF MOTOR to the SIDE FRAME, LEFT, and remove the
LF MOTOR.
Figure 4-40. LF MOTOR Removal
W A R N I N G
Do not touch the LF MOTOR immediately after using the
printer, or you may burn your hand. Allow the motor to
cool enough to work with it.
3)
3)
LF MOTOR
Screw access hole
in the pulley gear
Pulley gear

Table of Contents

Other manuals for Epson DFX-9000

Questions and Answers:

Question and Answer IconNeed help?

Do you have a question about the Epson DFX-9000 and is the answer not in the manual?

Epson DFX-9000 Specifications

General IconGeneral
ColorNo
Built-in barcodesCode 39, POSTNET, UPC-A, UPC-E
Maximum resolution240 x 144 DPI
Maximum print sizeA4 (210 x 297 mm)
Standard interfacesSerial
Dimensions (WxDxH)700 x 378 x 363 mm
Power requirements100-240V, 50-60Hz
Connectivity technologyWired
Compatible operating systemsMicrosoft Windows 95 / 98 / 2000 / Me / XP/ Windows NT 4.0
Sound pressure level (printing)58 dB
Mean time between failures (MTBF)20000 h
Sustainability certificatesENERGY STAR
Power consumption (standby)1.85 W
Power consumption (typical)7.5 W
Operating temperature (T-T)5 - 35 °C
Operating relative humidity (H-H)10 - 80 %

Related product manuals