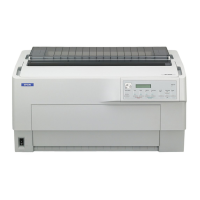
Epson DFX-9000 Revision B
Product Description Operations 50
1.3.4 Special operations
The following shows how to start up and operate the special functions.
1.3.4.1 Special user functions
Self test
Prints the self test pattern. To cancel it, pause the printer and turn off the
power.
Draft self test
Turn on the printer while holding down the [LF/FF Load] button.
NLQ self test
Turn on the printer while holding down the [Top of Form] button.
NOTE: To stop the printer during the self test print, press the
[Pause] button.
Data dump
Starts the data dump mode in which all the input data are printed as
hexadecimal numbers and corresponding characters.
Setting method: Turn on the printer while holding down both the [Top of
Form] and [LF/FF Load] buttons.
NOTE: The hex dump feature is designed for a connection with a
DOS-based PC. When printing from the printer driver of a
Windows-based PC, disable the bi-directional support
setting in the printer driver.
NOTE: Data Dump mode is canceled when you turn the printer off.
Bi-D adjustment
Setting method
1. Close the cover and turn the printer on while pressing the [Pause]
button.
2. The printer prints the adjustment instructions, and the first alignment
pattern.
3. Select the most closely aligned pattern number using the [Item↑]
(Font) or [Item↓] (Pitch) buttons to scroll through the selection
numbers. The LCD shows the pattern number currently selected.
4. Select the best pattern number by pressing the [Set↓] (Top of Form)
button. That pattern number is saved, and the next alignment pattern
is printed.
5. Repeat steps 3 and 4 until you have completed the Bi-D adjustment
for high-speed draft, draft, and NLQ printing modes.
6. Turn the printer off. The Bi-directional adjustment settings are
stored in non-volatile memory.
Figure 1-22. Bi-D adjustment print
*** Bidirectional Alignment Sheet ***
To align the print head, follow these steps:
1. Look at the alignment sheet shown below and select the aligned pattern number or the pattern
closest to being aligned. Press the Item↑ or the Item↓ button until the selected pattern number
appears on the LCD panel.
2. Press the Set↓ button to register your selection. The next alignment sheet will be printed.
3. Repeat steps 1 and 2 for two additional alignment sheets. There are three alignment sheets
in total.
4. When you have registered your selection for the last sheet, turn the printer off.
High speed draft
No. 1
No. 2
No. 3
No. 4
No. 5
No.13
No.25

 Loading...


