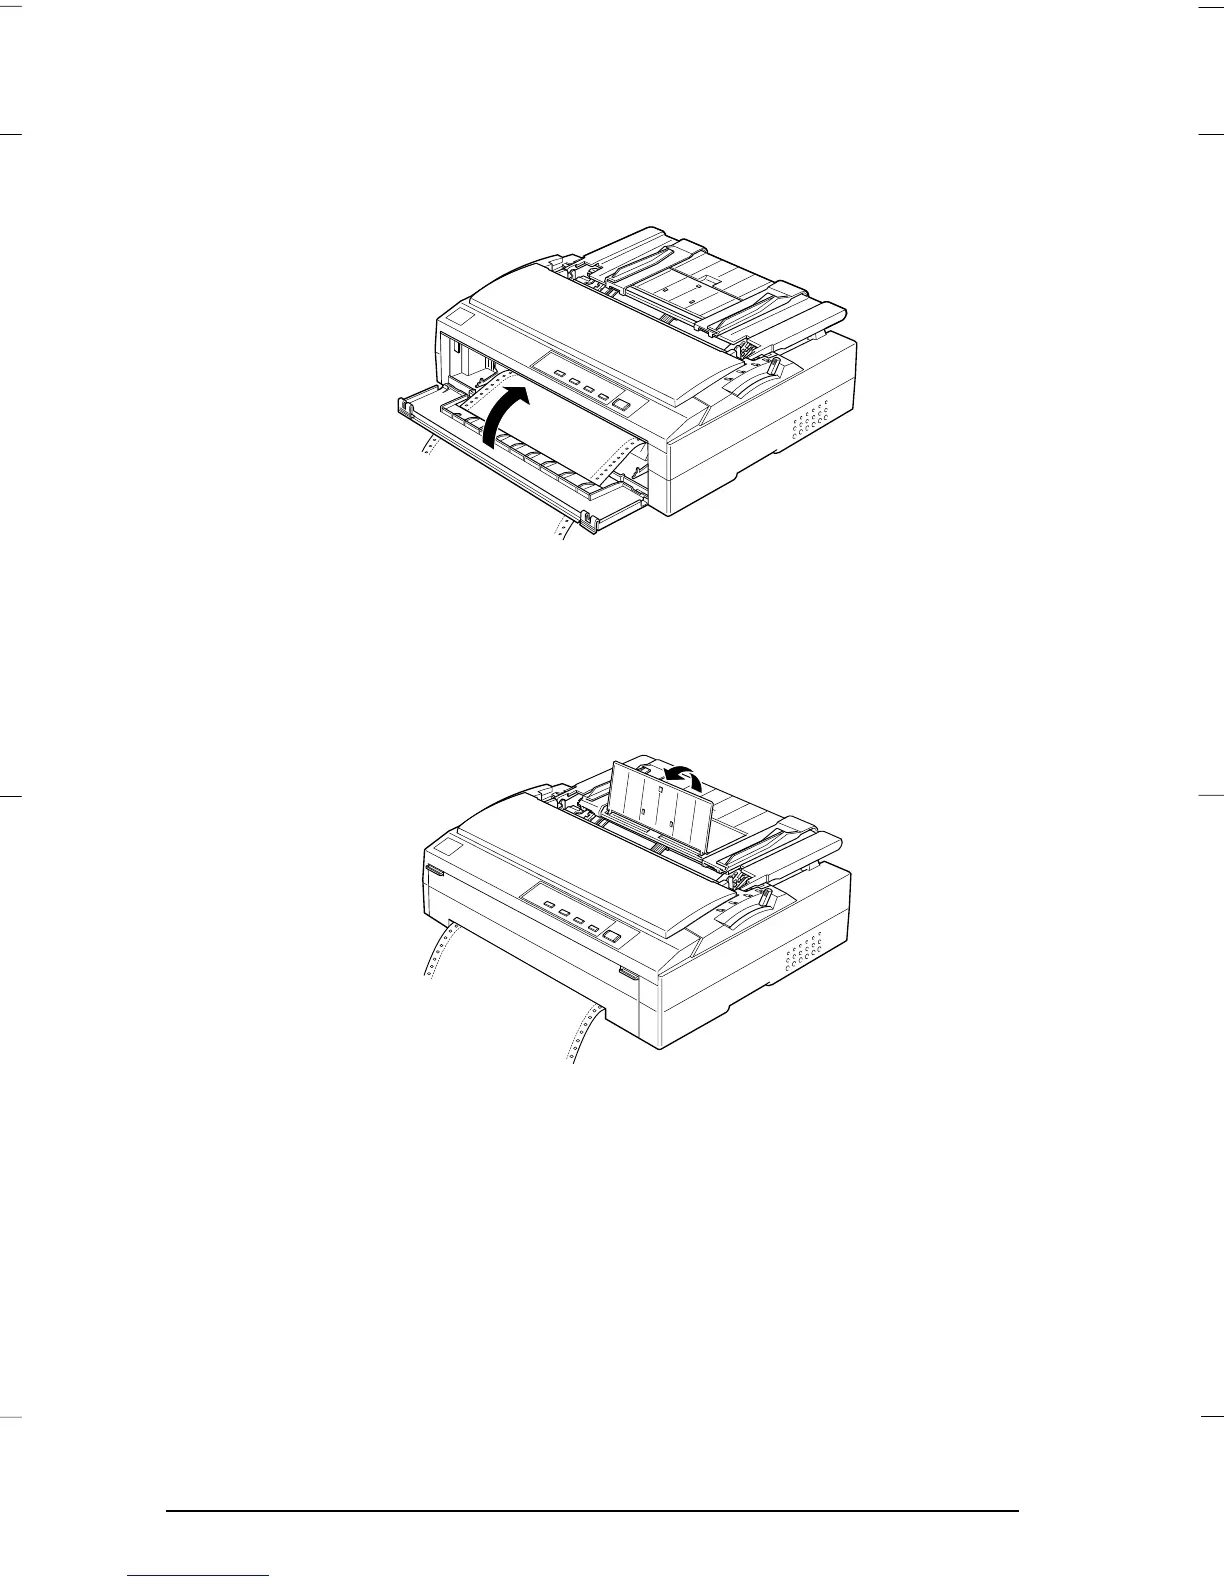
9. Attach the front cover with the continuous paper positioned as
shown below.
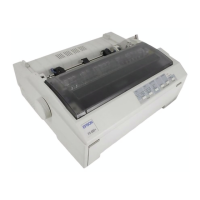
10. Make sure that the paper guide is lying flat on the printer and
the edge guides are open all the way to the left and right. Then
raise the continuous paper support.
11. Turn on the printer. When the printer receives data, it
automatically loads the paper and starts printing.
12. After you finish printing, press the
Tear Off/Bin
button to
advance the paper to the printer’s tear-off edge, and tear off
your printout.
If your paper’s perforation is not aligned with the tear-off edge,
you can use the micro adjust feature to move the perforation
to the correct tear-off position as described in “Adjusting the
tear-off position” on page 3-28.
G3-10
g3-12-1
L
Gentian Rev.c
A5 size Chapter 3
97/07/04 pass 2
3-10
Printing on Continuous Paper