A3 Size Color Flat Bed Scanner GT-30000 Revision A
ADJUSTMENTS Belt Tension Adjustment 57
5.2 Belt Tension Adjustment
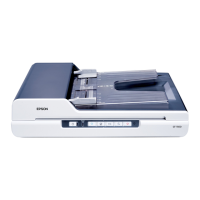
1. Install the CR motor assembly to the scanner mechanism, and fit the belt.
(See "Figure 5-1. CR Motor Assembly Installation".)
Figure 5-1. CR Motor Assembly Installation
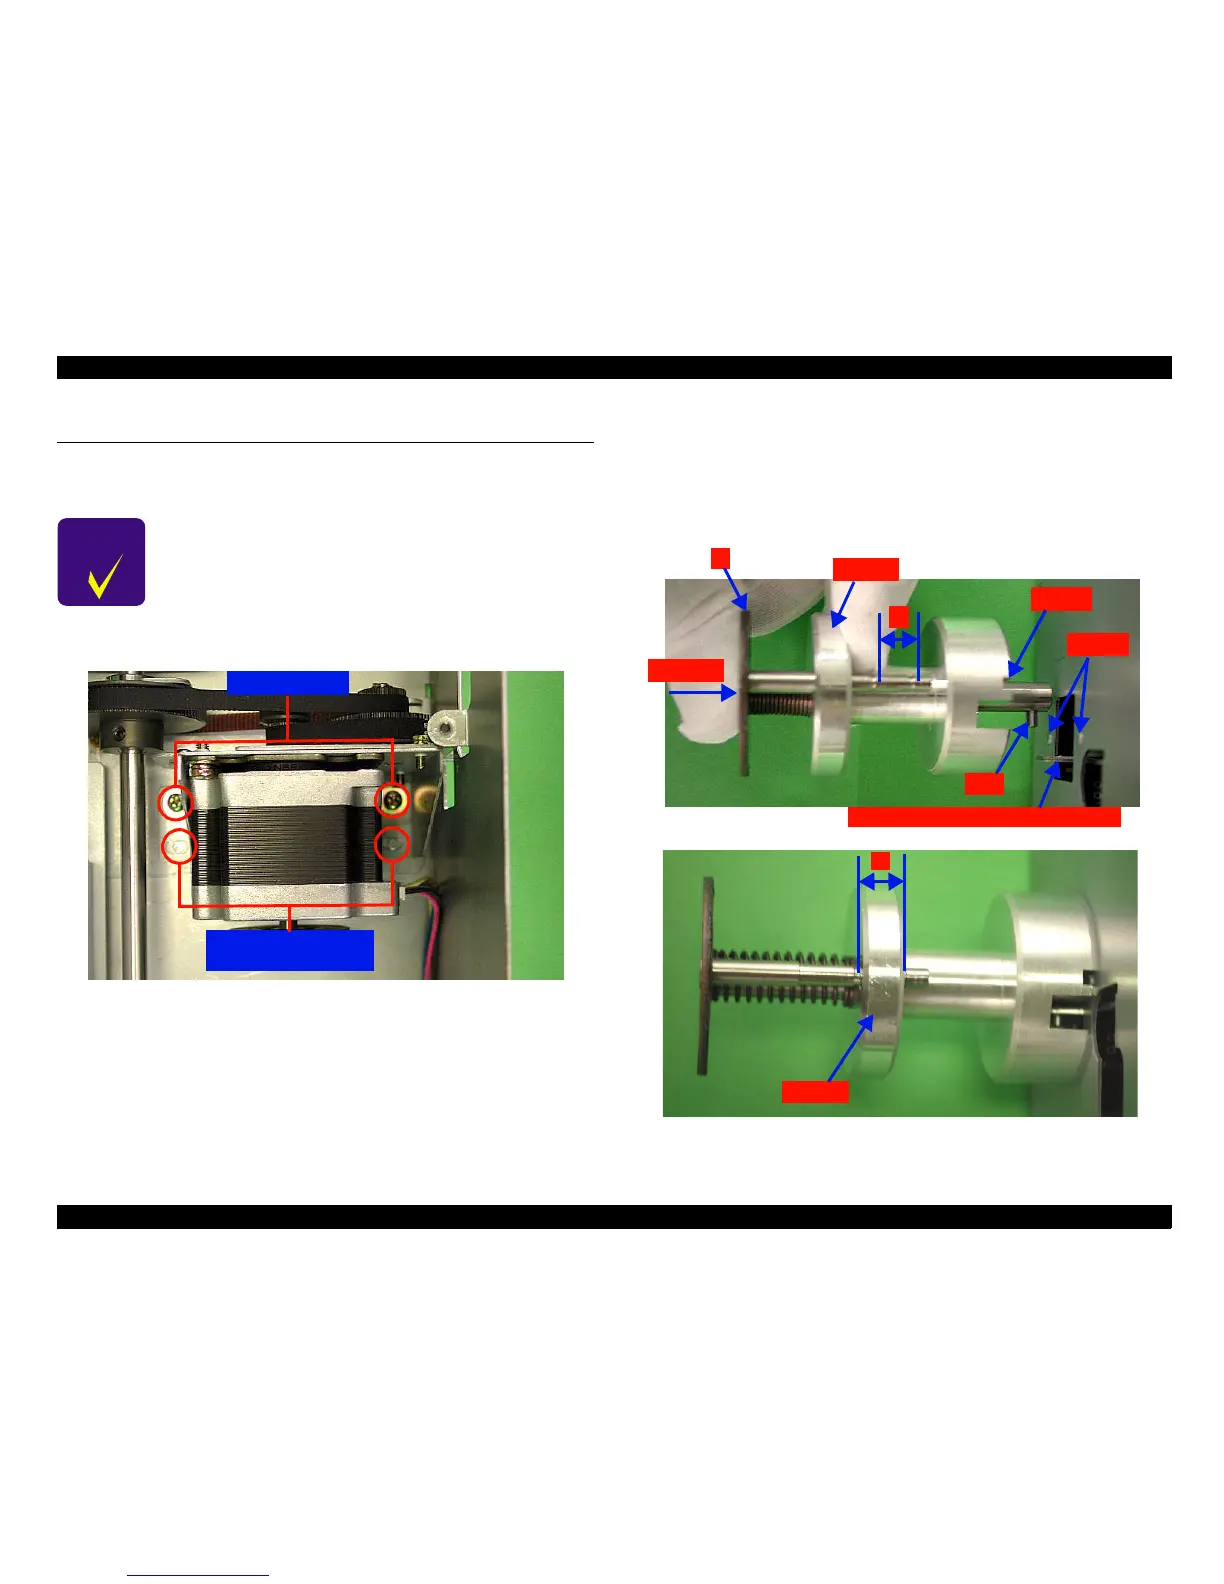
2. While pressing the section marked A on the belt tension adjustment tool,
insert the pin of the belt tension adjustment tool into the hole in the CR
motor assembly to align the dowels with the grooves in the belt tension
adjustment tool, and then release the section marked "A".
3. Check that the flange is between the sections marked "a" (so that the belt
tension is within the specified range).
4. Secure the CR motor assembly to the scanner mechanism by tightening
the screws. (See "Figure 5-1. CR Motor Assembly Installation".)
Figure 5-2. Belt Tension Adjustment Tool Installation
C H E C K
P O I N T
!
The belt should be securely on the pulley.
!
The CR motor assembly should be in the correct
position (aligned with the dowels of the scanner
mechanism).
Screws (No.13)
The Dowels of The
Scanner Mechanism
Pressing
a
Pin
Dowels
Groove
A
Flange
The hole in the CR motor assembly
a
Flange
 Loading...