Maintenance 7. Maintenance Parts Replacement Procedures
C
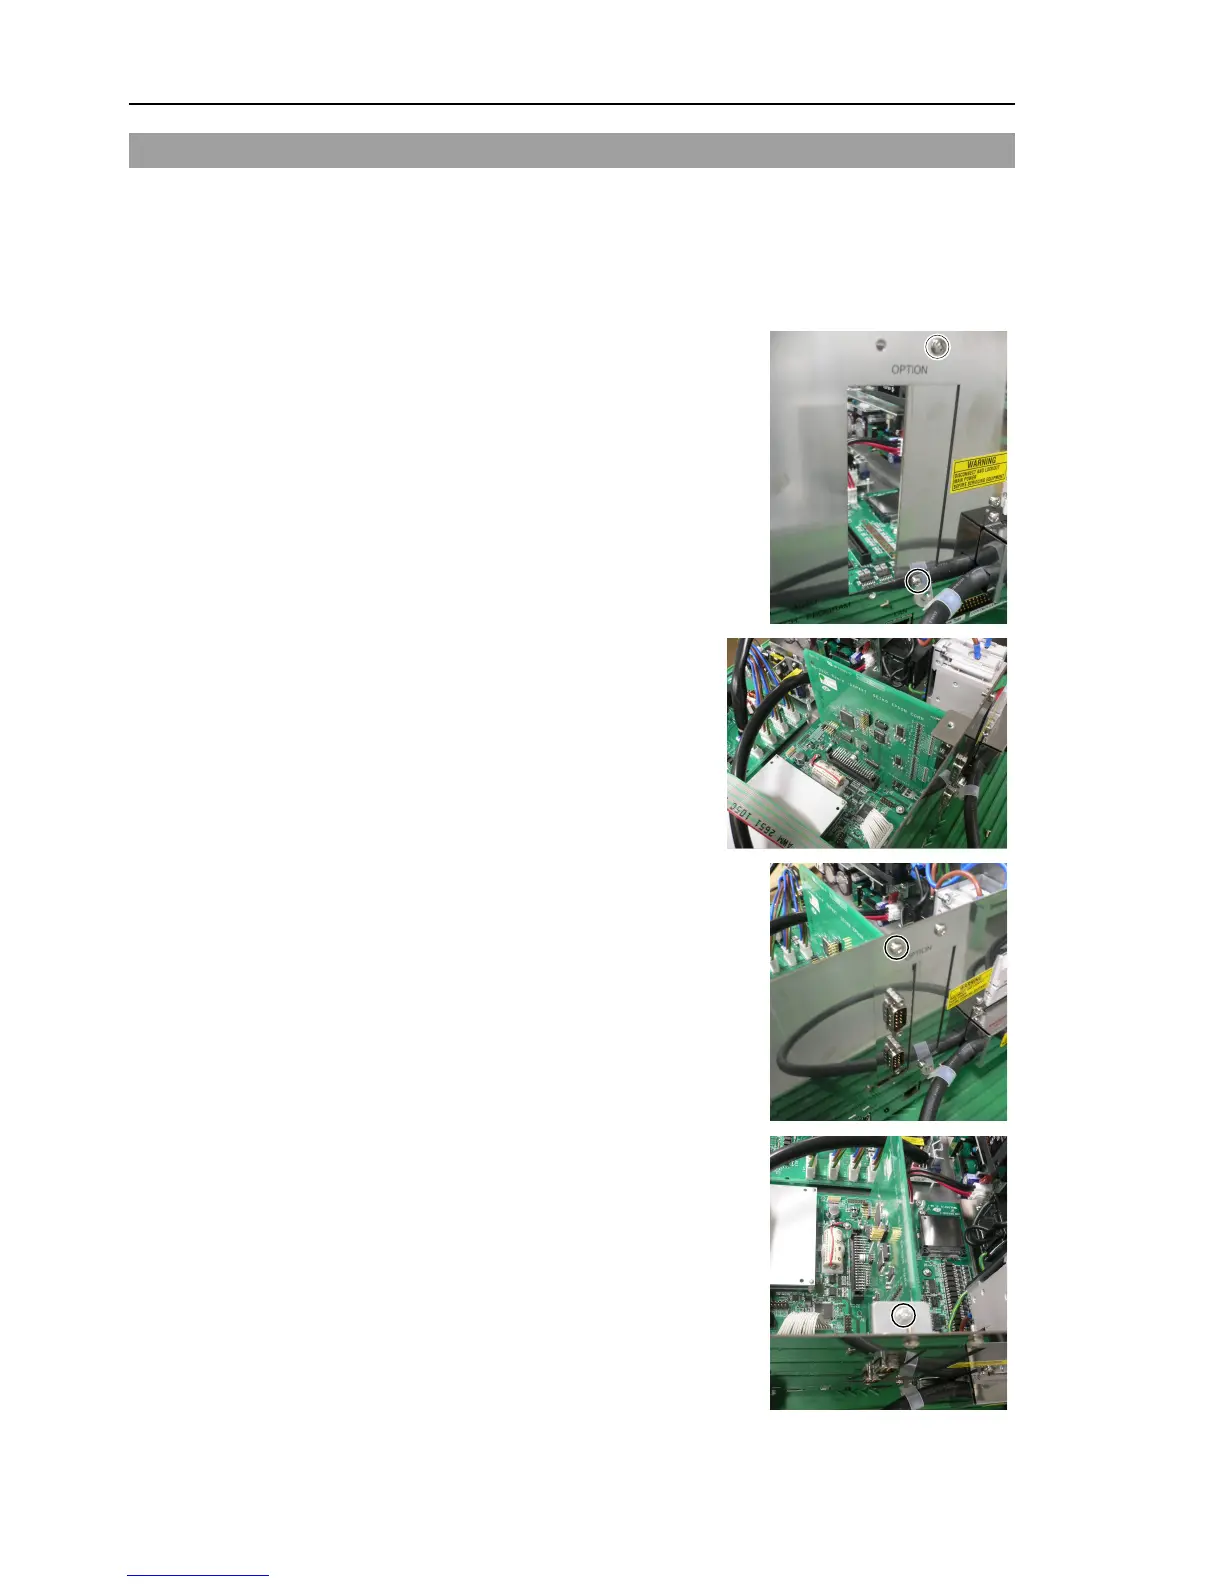
7.8 Option Board
Unplug the power connector.
the Top Panel. (Mounting screws ×10)
Remove the clamp of the power supply cable.
Remove the screws of the Option Slot Panel
(
Slide the panel as shown in the picture and
install the
When installing two Option Boards:
The Option Slop Panel is not necessary.
Install the Option Board as shown in the picture.
shaped plate with a
screw from the front side.
shaped plate and Option Board
with the attachment screw.
Mount the clamp of the power cable.
112 RC90 (EPSON RC+ 7.0) Rev.4
 Loading...


