Setup & Operation 7. LAN (Ethernet Communication) Port
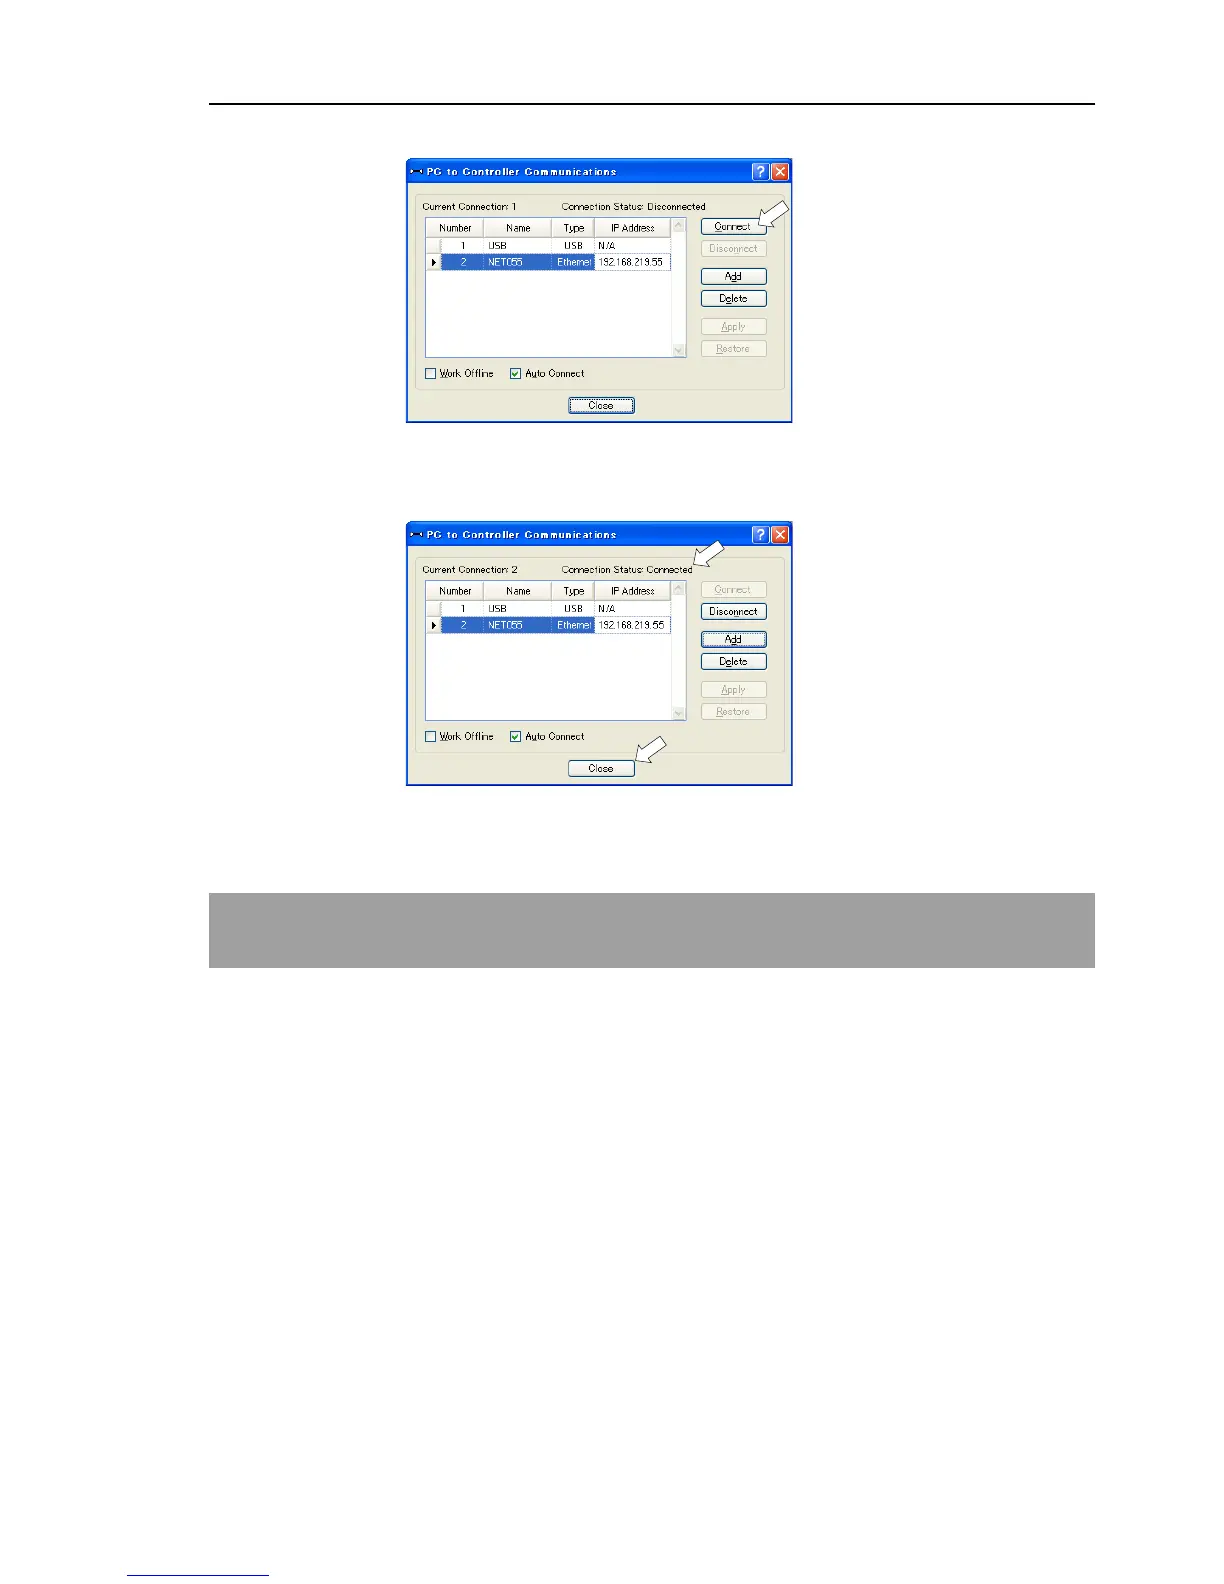
(8) Make sure that “No.2” is selected, and click the <Connect> button.
(9) After the development PC and Controller connection is completed, “Connected” is
displayed in the [Connection status:]. Make sure that “Connected” is displayed and
click the <Close> button to close the [PC to Controller Communications] dialog.
Connection between the development PC and the Controller is complete. Now the robot
system can be used via an Ethernet connection from EPSON RC+ 7.0.
7.5 Disconnection of Development PC and Controller
with Ethernet
Disconnection of the development PC and the Controller is shown below.
(1) Display [PC-Controller Connection] dialog from [Setup] in EPSON RC+ 7.0 menu.
(2) Click the <Disconnect> button.
Communication between the Controller and the development PC is disconnected and
the Ethernet cable can be removed.
If the Ethernet cable is removed when the Controller and the development PC is connected,
Emergency Stop occurs and the Robot stops. Be sure to click the <Disconnect> button in
the [PC to Controller Communications] dialog before the Ethernet cable is removed.

 Loading...


