Setup & Operation 3. Installation
3.2.2 Installation
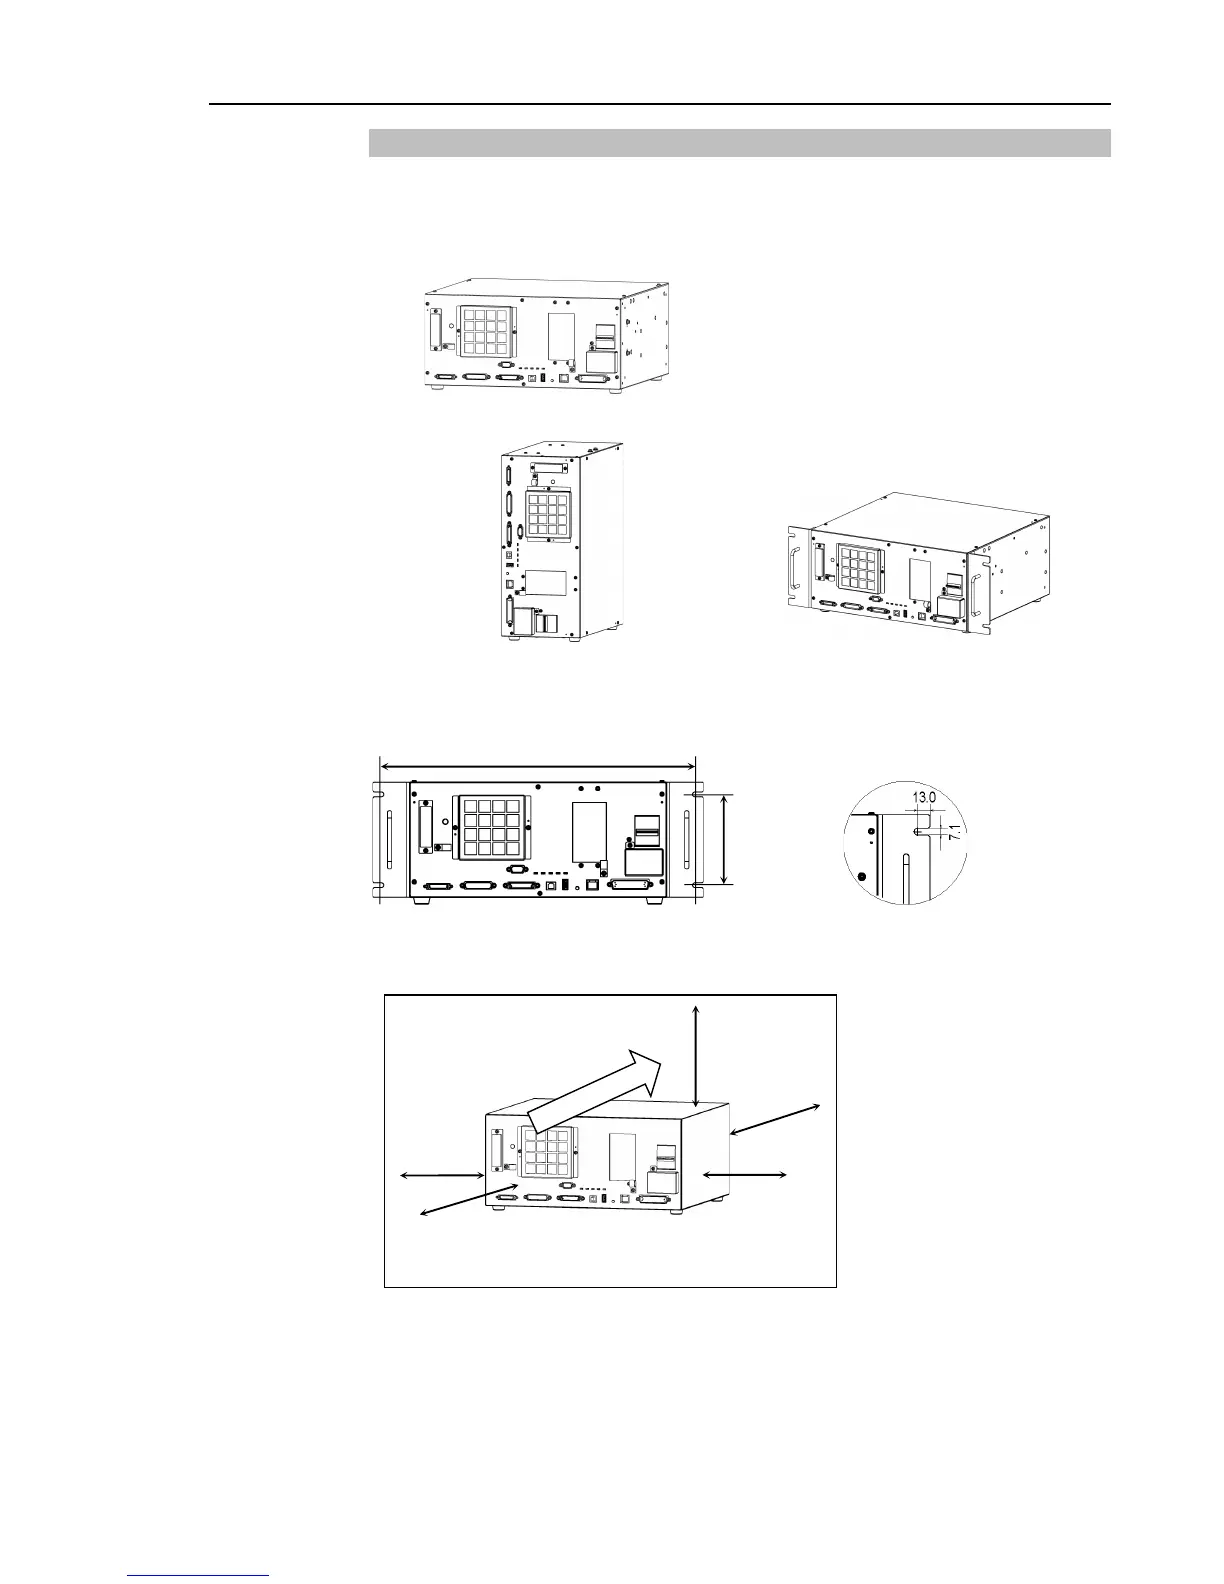
Install the controller on a flat surface such as wall, floor, and controller box in the direction
shown from (A) to (C).
(A) Flat Mounting
(B) Upright Mounting (C) Rack Mounting
* The rubber foot needs to be replaced.
* Rack-mount plate is required.
For installing the Controller to the Controller box or the base table, process screw holes as
follows.
Ensure the draft around the in/out and prevent the other equipments, walls and install the
Controller by keeping the distance as follows for maintenance.
100 mm
Excluding the installation
side such as base table
Air flow of the Controller Fan
- Hot air with higher temperature than the ambient temperature (about 10 deg.C) comes out
from the Controller. Make sure that heat sensitive devices are not placed near the outlet.
- Arrange the cables in front of the Controller so that you can pull the Controller forward.
RC90 (EPSON RC+ 7.0) Rev.4 19

 Loading...


