3.
Select Various copies > Copy/Restore Photos.
4.
Change the print settings as necessary, and then select To Placing Originals.
“Menu Options for Paper and Print Settings for Copying Photos” on page 128
5.
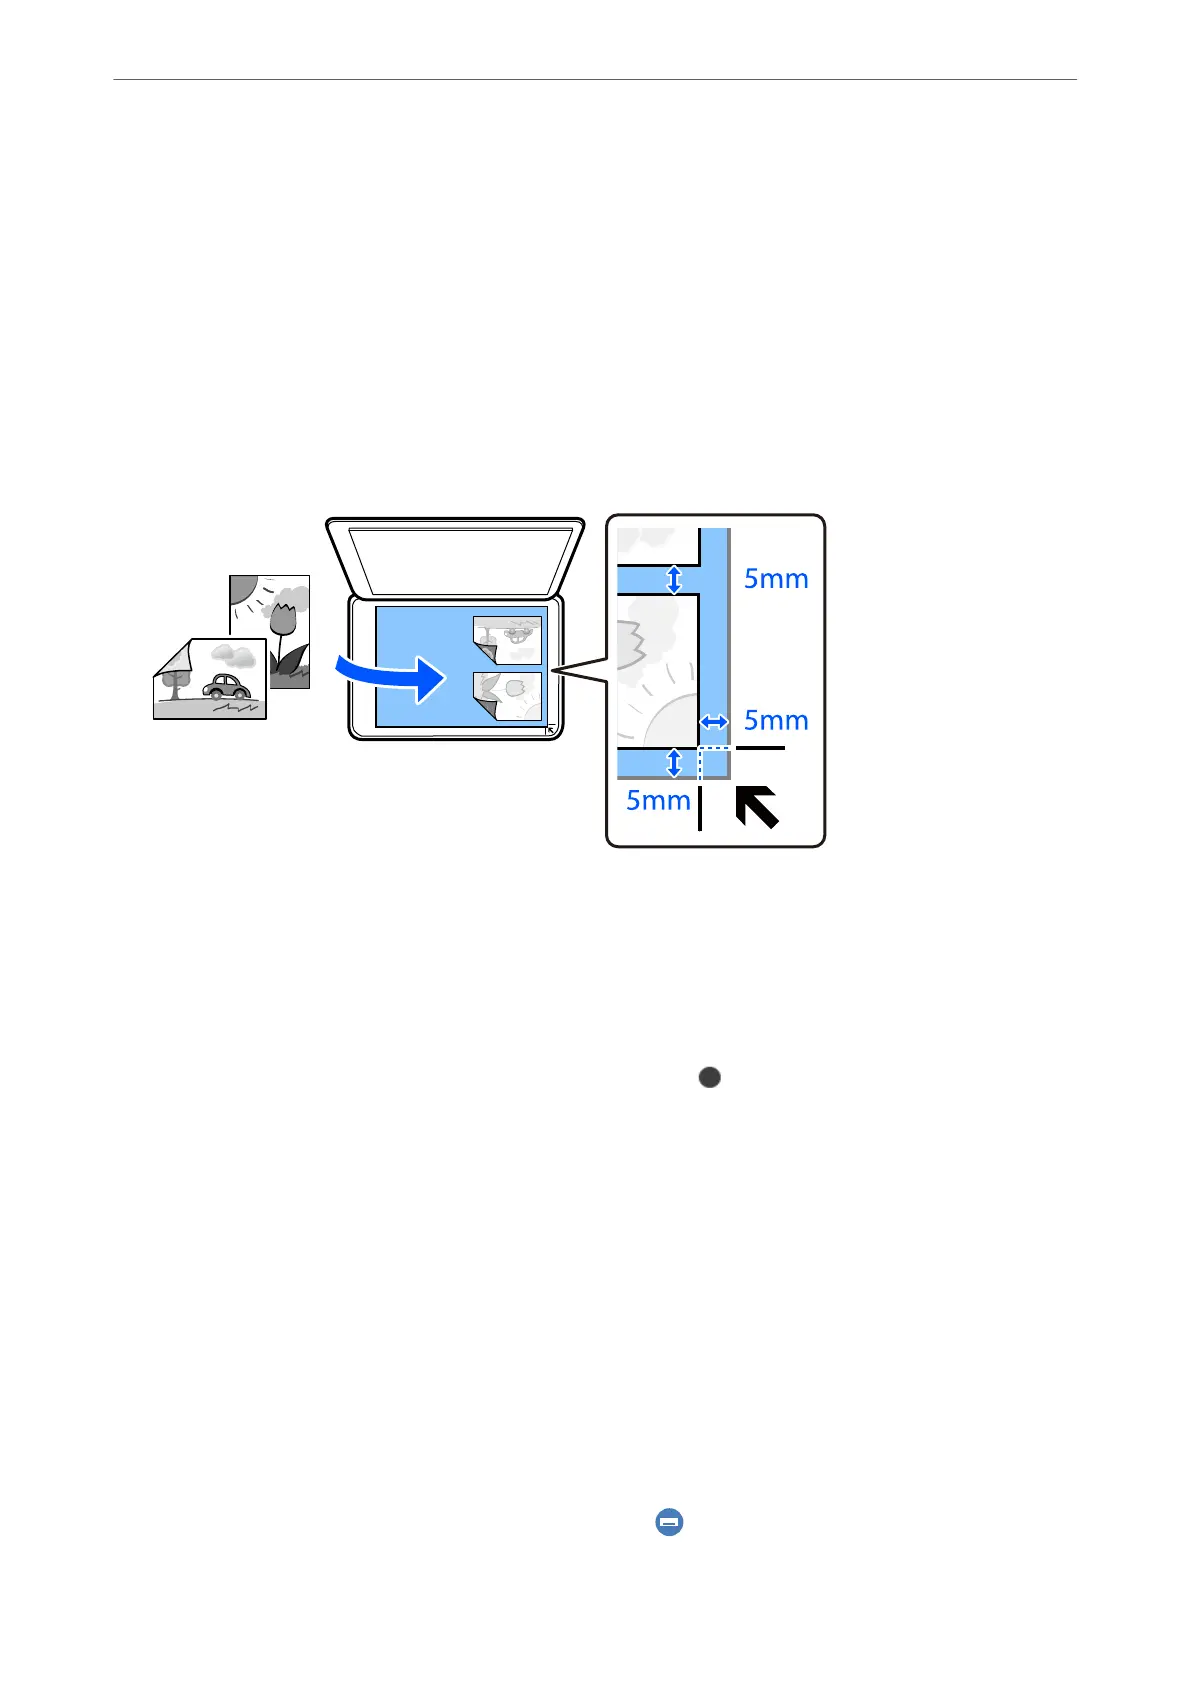
Place the original face-down and slide it to the corner mark.
Place the photos 5 mm away from the corner mark of the scanner glass. You can place multiple photos and
photos of dierent sizes.
When placing multiple photos, leave a gap of at least 5 mm between the photos.
Maximum size: 10×15 cm (4×6 in.)
6.
Select Start Scanning.
e photos are scanned and displayed on the screen.
7.
Select Edit if necessary to make settings such as photo adjustments.
Note:
If you want to print by enlarging part of a photo, select Crop/Zoom, and then make settings. Slide the print area frame
to the le, right, top and bottom, and then change the frame size using
on the corners of the frame.
“Menu Options for Photo Adjustments for Copying Photos” on page 129
8.
Set the number of copies as necessary, and then tap
x
.
Note:
e color, size, and border of the copied image are slightly dierent from the original.
Menu Options for Paper and Print Settings for Copying Photos
Restore Color:
Restores the color of faded photos.
Paper Setting:
Select the paper source that you want to use. Select to select the paper size and the paper type you
loaded.
Copying
>
Copying Photos
>
Menu Options for Paper and Print Settings for Copying Photos
128
 Loading...