DIR911T User Guide
30
4. ALI/ANI Connection. If out of band ALI/ANI sources are to be used with the
unit, plug them into the appropriate DB-9 connector on the rear panel. The pinout
of the ALI connector is given in Table #17. The pinout of the ANI connector is
given in Table #18.
5. Time Sync Connection. If external time synchronization equipment will be used,
plug it into the Sync DB-9 connector on the rear panel. The pinout of the Time
connector is given in Table 20.
6. Move the rear panel battery switch to the enable position. If there is residual
charge in the battery the unit may power up when the switch is moved.
7. Apply Power. Plug the 2.1mm barrel connector into the power supply connector
on the rear of the unit. This is a keyed and locking type connection. Make sure to
orient the connector such that it plugs into the unit completely. Once plugged in,
turn the power supply barrel connector clockwise until it locks into place. You
should not be able to remove the connector barrel from the unit when it is locked
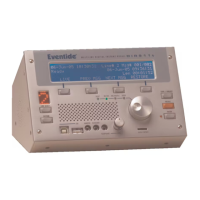
into place. The unit will power up and display the power-up screen shown in
Figure #3.
Eventide
Model DIR911t
Multi-
Line Install Recall Recorder
Loading ......
Figure 3: Power Up Screen
A few seconds after power-on, you should see the Jog/Shuttle, Speed, and Filter
LEDs illuminate.
After a few more seconds, the Jog/Shuttle LED will go dark and the Filter LED
will blink/flicker.
Continuing along, the Jog/Shuttle LED will light again and the Filter LED will
continue to flicker.
Finally, the unit will show the screen in Figure #4 and all the LEDs on the front
panel will turn on and the version of the software that is loading is displayed on
the bottom row very quickly followed by boot status text .