Deleting a Group Master
To delete a group:
1. Click Tools > Configure Groups (see figure 54) to open the configure groups
dialog box
or click View > Group Controls and then click Add a Group.
2. In the Select Group drop-down list, click a numbered group (such as Group #1)
to select it.
3. Click Delete Current Group in the lower left area.
4. Click Yes in the Confirm Deletion dialog box.
Viewing and Using a Group Master
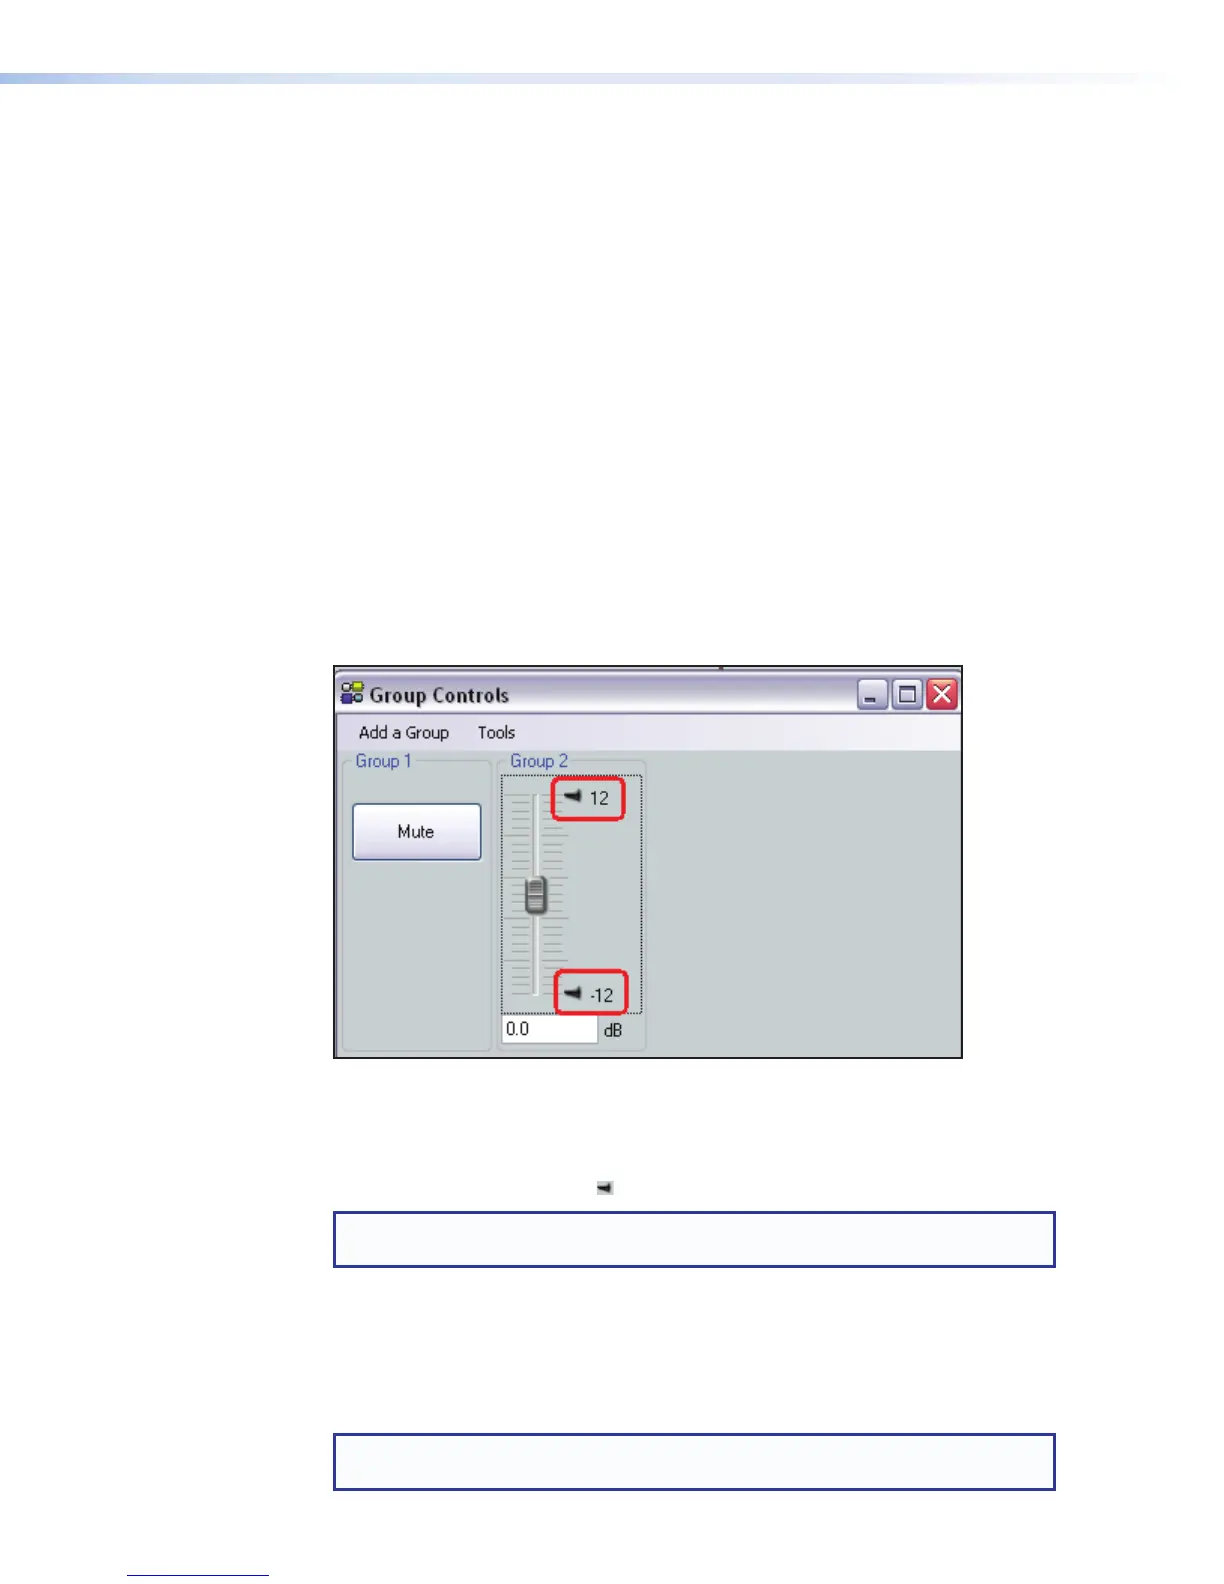
Click View > Group Controls to open the group controls dialog box (see figure 54).
The group controls dialog contains two menu items:
• Add a Group allows you to add additional groups.
• Tools enable you to perform various functions from the group controls dialog box.
In addition, once groups are created, a single mute button or a group fader plus the
current setting readout and any soft limits that are set are visible.
Figure 54. Group Controls Dialog Box
The group fader controls function as follows:
• Slide a group fader up and down to adjust all gain controls in the group.
• Click and drag a soft limit ( ) to set the ceiling and floor for the group.
NOTE: Soft limits cannot be dragged beyond the current setting of the group
fader.
Add a Group
To launch the configure groups dialog box from group controls, click Add a Group. When
a new group is added and the Add New Group dialog is closed, the group controls dialog
box refreshes to display the added control.
NOTE: If a block is muted, that block remains muted when the group mute is
released.
DMP128 • Software Control 85