User Manual EDITING February 16, 2010
Xynergi Media Production Centre Page 138
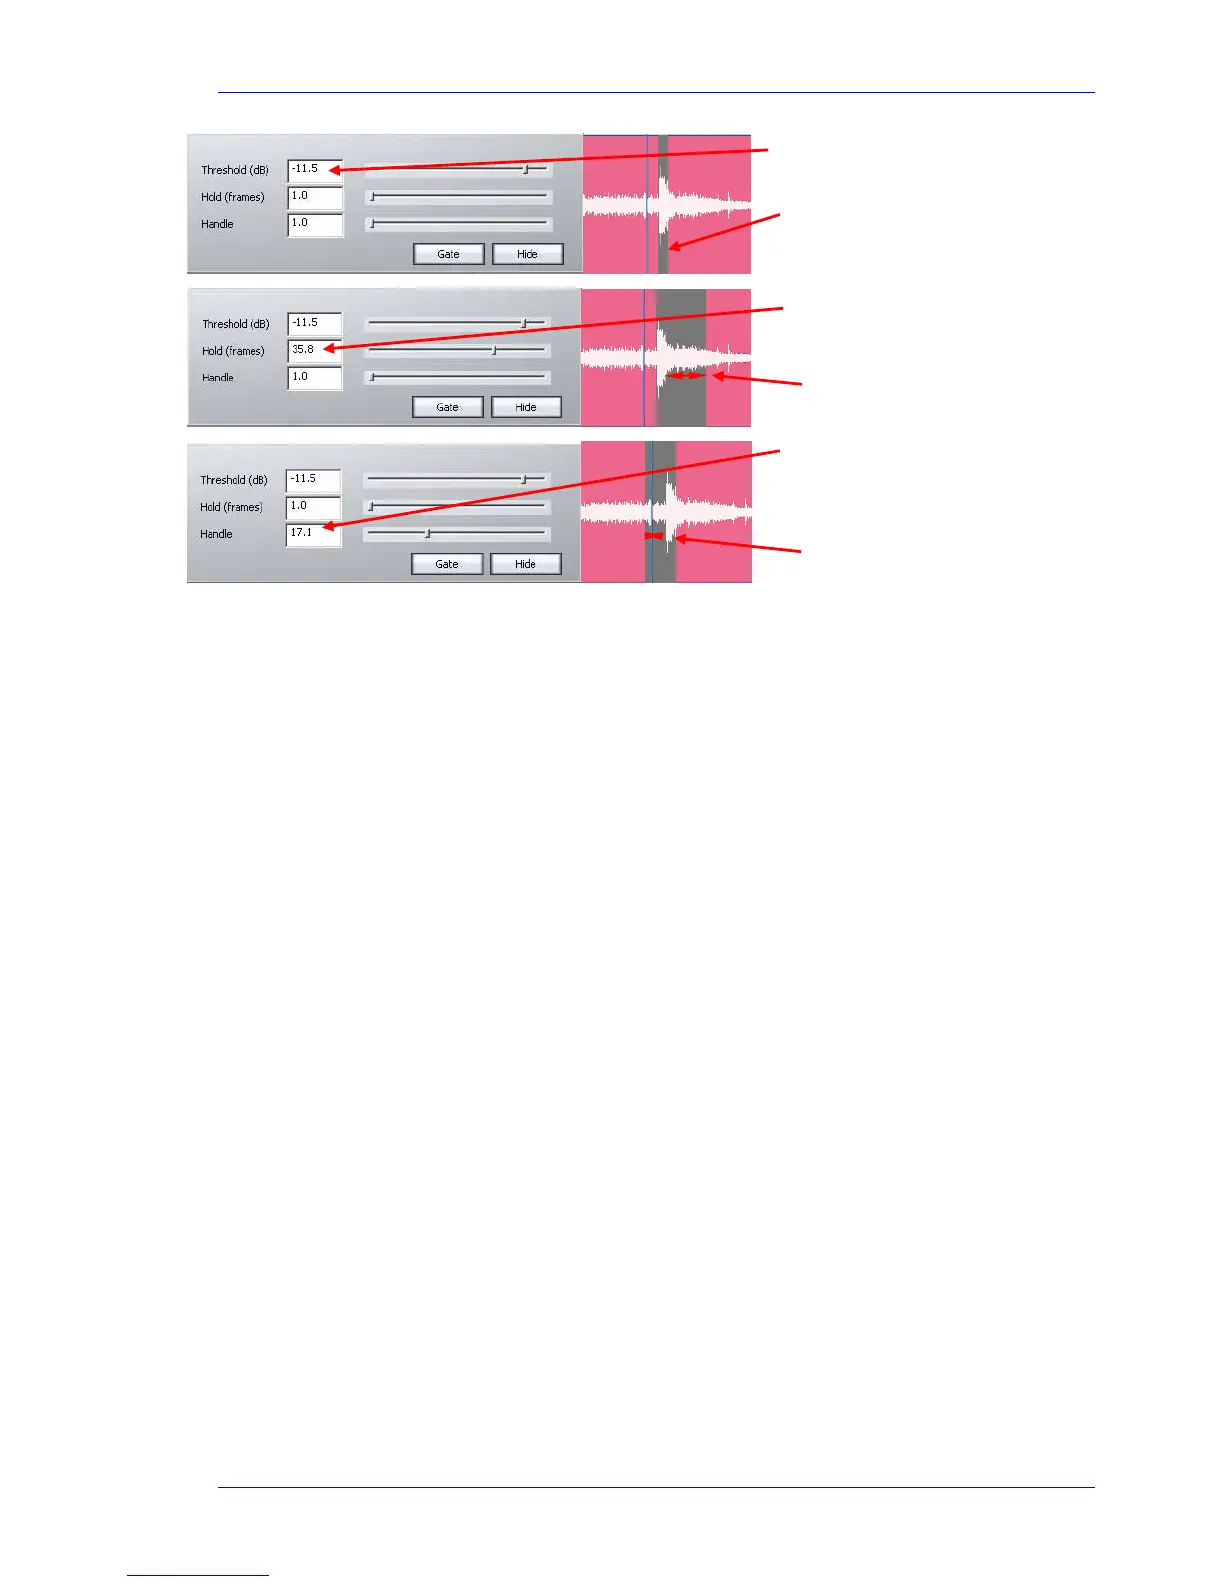
Step 5 When you are happy with the amount retained versus the amount removed from the graphic
representation, press the “
Gate” button to process your settings. All pink areas in the clip will be
removed, retaining the grey areas.
NOTE: As with many other editing functions in Dream II, the original audio is not affected by clip
gating, only the clips that reference it. Any audio removed by gating can be recovered using the
Trim function (see Trim Function, under the chapter on Editing).
Replacing Audio Media
As mentioned elsewhere in this manual, a clip is a “reference” to a piece of media on disk. Editing the
clips is non-destructive to the media – it simply changes the portion of the media being played by the
clip.
Sometimes it is also valuable to change the media played by a clip. This can be done in two ways:
Replace the media of the selected clips
Replace the media of all project clips using a particular piece of media at the moment
Step 1 Select one or more clips by the usual methods. You can use All Layers to affect the clips on all
layers, and you can use a Range to select multiple clips horizontally – in this case only clips lying
entirely inside the range will be affected.
Step 2 Issue the command
Process Change Media – Selected Clips
The system displays a dialog where you can browse for a media file.
Gre
Handle defines time gate opens
before threshold is reached
Notice gate open duration
before threshold is reached