Do you have a question about the Fidelity Electronics A10 and is the answer not in the manual?
Local metrological legislation may limit access to instrument settings. Contact dealer for assistance.
Instrument is legal for trade when sealed. Warranty void if seal is damaged. Contact dealer for service.
Allow a warm-up period of at least 60 seconds before calibration and usage for stable status.
Place on a solid, level surface. Avoid extreme environments. Contact dealer if unsure.
Not explosion-proof/waterproof. Do not open. Avoid shock, vibration, extreme temperatures. Contact dealer for service.
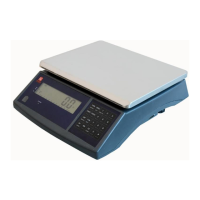
Detailed description of each key on the instrument's keypad and its function.
Details the various ports and their connection points on the instrument.
Instructions for using the correct power adaptor to avoid damage.
Recharge the built-in battery for at least 8 hours before first-time use for optimal performance.
Warning for extremely low battery level; recharge immediately to avoid damage.
Overview of internal functions for performance optimization, user-accessible vs. restricted.
Step-by-step guide to access and navigate internal function modes.
Key functions applicable during internal function settings and operation modes.
Table detailing UART types, connected ports, and remarks for data communication.
Procedures for turning the weighing instrument on and off.
Procedure to set the instrument to zero when unloaded if automatic zeroing fails.
Explanation of manual, auto, and continuous tare functions available in F12.
Steps to manually input Lo and Hi limits for check functions.
Explanation of automatic and manual memory accumulation types and limits.
Procedures to recall and clear accumulated data manually, and conditions for automatic data erasure.
How to create, save, and recall weight check limits using Quick PLUs.
Process for saving Lo and Hi quantity limits into Quick PLU positions.
How to save customer/product codes and descriptions into Quick PLU.
Process to save average piece weight values into Quick PLU positions.
How to manually enter or sample for average piece weight.
Configuration options for ATM mode, including auto accumulation target and delay time.
Configuration options for Animal Weighing mode, including filter speed and release variation.
Overview of predefined and customized PC output protocols available.
Procedures for setting up serial and CT10 Bluetooth barcode scanners.
How barcode scanners can simulate key inputs.
Details on available label format groups (FL1, FL2) and file naming conventions.
What Alibi memory is, its capacity, and how it records transactions.
How to add a 4-digit numeric note to transactions saved in Alibi memory.
Methods for creating and saving Production Settings PLUs via computer.
Procedures to recall Production Settings PLUs using keyboard or barcode scanner.
Instructions for recharging the battery and precautions to prevent damage.
Table defining data codes and their corresponding descriptions for output protocols.
Step-by-step guide to set up customized PC output protocols.
Illustrations of Lab 1 output format for Weighing, ATM, and Animal modes.
Illustrations of Lab 2 output for Weighing and ATM modes.
Table listing variants and their output samples for customizing Lab 2 print format.
Step-by-step guide for installing TSC printer drivers.
Procedures for adding instrument data to labels using Bartender software.
Steps for installing BarDrawer software and printer drivers.
Table of prompt commands, descriptions, and suggested lengths for label programming.
| Brand | Fidelity Electronics |
|---|---|
| Model | A10 |
| Category | Scales |
| Language | English |