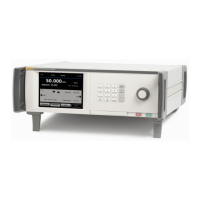
Pressure Controller/Calibrator
PCM Assembly
67
Diagnostic
Control
Primary
Setup Menu
2/05/15 10:52am 0.0020 psi
Input 2: 7.54-- mV
ExitAutotune
Control Coefficients
PA1 1769
Apply Low 12370
PA2 4800
Apply High 14310
PR1 64
Release Low 10730
PR2 3088
Release High 11510
Test C 0 12512.0
Test C 1 0.004567
Supply C0 10242.9
Supply C1 0.004366
Exhaust C0 9434.34
Exhaust C1 0.000541
Port Pressure
Test Port 14.60 psi
Supply Port 14.13 psi
Exhaust Port 15.15 psi
Control Module
Model Number PCM-STD-20M
Serial Number 3059003
Revision 0.55
MEASURE CONTROL VENT SETUP
1
2
3
hxn407.eps
Figure 39. Current Sensor Information
Calibrate the Sensors
Test port (ATM and 3,000 psi). See Figure 40.
Note
Fluke Calibration does not recommend to do this adjustment at a
maximum pressure <1500 psi to ensure best sensor alignment. If
you do not have a 3000 psi module, use the highest-rated module
that you have.
1. Install the highest-range PMM that you have and make it the fixed range.
2. Set the PMM measurement mode to Absolute.
3. Apply a supply pressure of 110 % to 115 % FS of your highest-range
PMM.
4. Install a shutoff ball valve on the test port and leave it open.
5. Vent the system.
6. Use a reference barometer to read the absolute ATM pressure in the
units and type CAL:PRES4:VAL1 xx.xx (xx.xx = value in units must be
absolute) on the terminal.
7. Close the shutoff valve on the test port.
8. Set a pressure to control at FS of your PMM.
9. Read the absolute PMM pressure and type CAL:PRES4:VAL2 xx.xx
(xx.xx =value in units must be absolute) on the terminal.
10. Type CAL:PRES4:SAVE on the terminal.