EasyManuals Logo

Fronius Primo 3.0-1 Service Manual

Fronius Primo 3.0-1
Go to English
160 pages
To Next Page IconTo Next Page
To Previous Page IconTo Previous Page
Page #115 background imageLoading...
Page #115 background image
115
EN
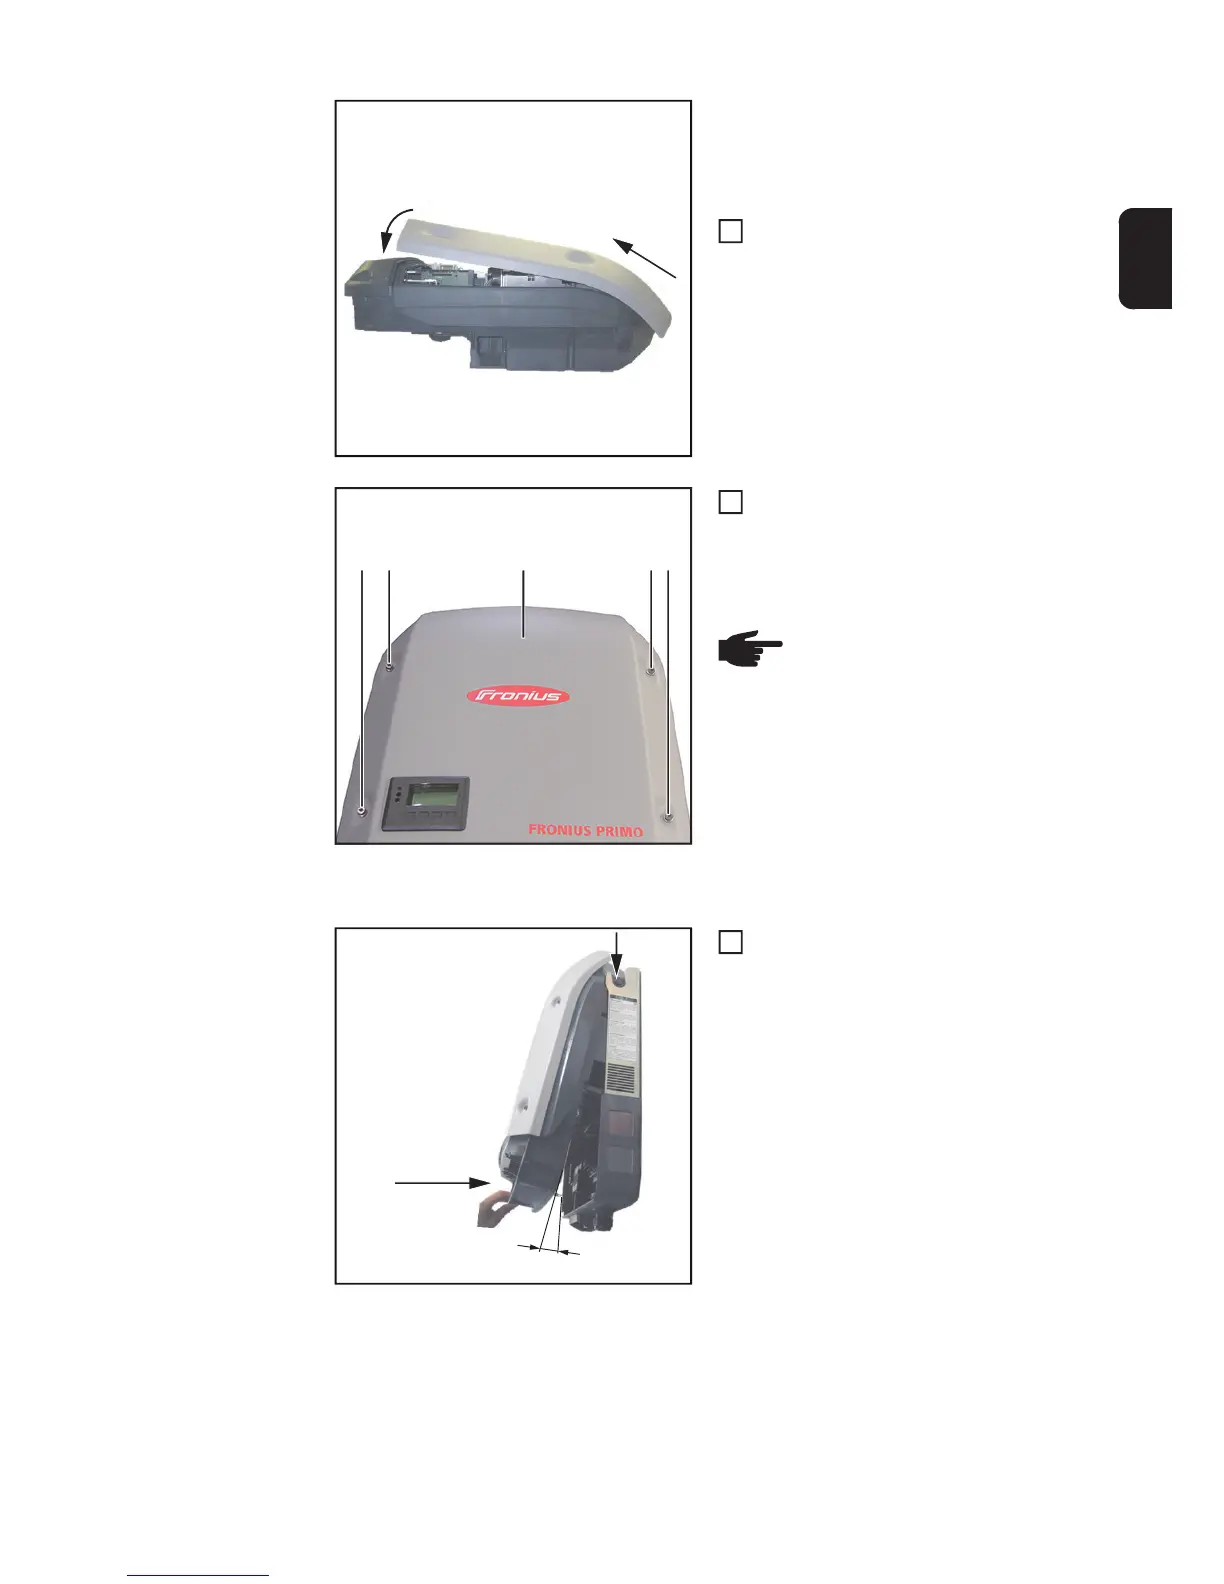
IMPORTANT! The sealing foam will only be
positioned correctly and create an effective
seal if the procedure a) - b) below is follo-
wed.
Attach the power stage set cover to the
fastener at the top and, while keeping
the power stage set cover at an angle,
pull it downwards a) and - under tensi-
on - pivot it onto the base shell b).
IMPORTANT! When closing the cover,
make sure that the springs on the keys en-
gage in the guides.
Secure the power stage set cover (3)
using four 5x18 mm TX25 screws (2)
with seal rings
Tightening torque = 2.5 Nm
Installation
Attach the inverter to the wall bracket
at the top at a maximum angle of 11°
and push it towards the wall bracket
a)
b)
2
(2) (2) (2)(2)(3)
NOTE! If the thread of these
screws is rotating and the screws
no longer engage, use the follow-
ing screws:
PT 5x25 mm T25 KT25
(item number 42,0401,4231)
3
4.33 in.
110 mm
max. 1
4

Table of Contents

Other manuals for Fronius Primo 3.0-1

Questions and Answers:

Question and Answer IconNeed help?

Do you have a question about the Fronius Primo 3.0-1 and is the answer not in the manual?

Fronius Primo 3.0-1 Specifications

General IconGeneral
PurposeSolar panel
Efficiency98 %
Output power3000 W
Input current12 A
Input voltage80 - 1000 V
Output voltage- V
Input frequency50 - 60 Hz
Power supply typeAuto
Adjustable output voltage-
International Protection (IP) codeIP65
Product colorBlack, Grey
Built-in displayYes
Operating temperature (T-T)-40 - 55 °C
Weight and Dimensions IconWeight and Dimensions
Depth204 mm
Width431 mm
Height645 mm
Weight21500 g

Related product manuals