EasyManuals Logo

Fronius Primo 3.0-1 Service Manual

Fronius Primo 3.0-1
Go to English
160 pages
To Next Page IconTo Next Page
To Previous Page IconTo Previous Page
Page #138 background imageLoading...
Page #138 background image
138
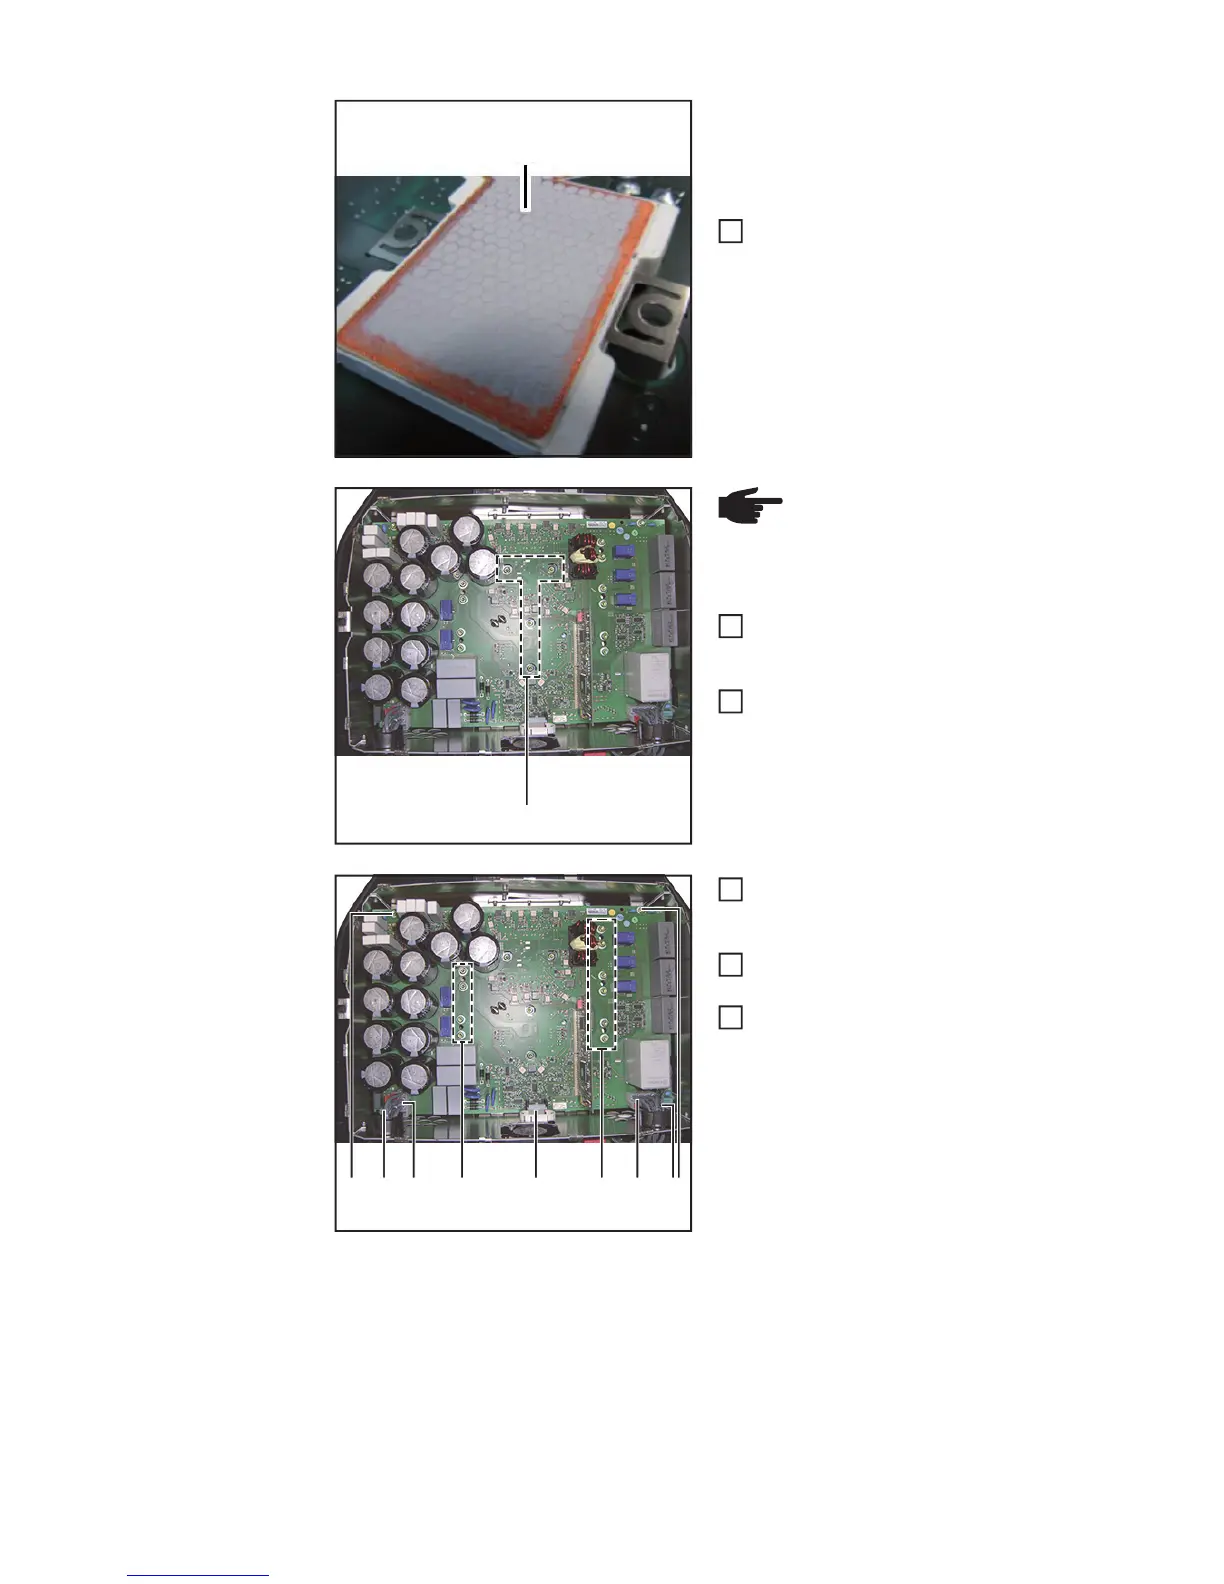
IMPORTANT! When inserting the new PC
board, ensure that the heat-conducting
paste on the modules (9) is not scratched or
removed.
Place the new PC board on the heat
sink
Screw the modules onto the heat sink
using four 4x9 mm TX20 screws (6).
Tightening torque = 0.5 Nm
Retighten the four 4 x 9 mm TX20
screws (6) to 2.0 Nm.
Screw the PrimoPS PC board into pla-
ce using 14 4x9 mm TX20 screws (5)
Tightening torque = 2 Nm
Reconnect all the cables (2) - (4) to the
PrimoPS PC board
Feed the LVRT cable into the ferrite
ring
(9)
3
(6)
NOTE! To avoid mechanical
stress, first tighten the screws with
a tightening torque of 0.5 Nm, then
retighten to 2.0 Nm.
4
5
(2) (3) (4) (5)(5)(5) (5)(5)
6
7
8

Table of Contents

Other manuals for Fronius Primo 3.0-1

Questions and Answers:

Question and Answer IconNeed help?

Do you have a question about the Fronius Primo 3.0-1 and is the answer not in the manual?

Fronius Primo 3.0-1 Specifications

General IconGeneral
PurposeSolar panel
Efficiency98 %
Output power3000 W
Input current12 A
Input voltage80 - 1000 V
Output voltage- V
Input frequency50 - 60 Hz
Power supply typeAuto
Adjustable output voltage-
International Protection (IP) codeIP65
Product colorBlack, Grey
Built-in displayYes
Operating temperature (T-T)-40 - 55 °C
Weight and Dimensions IconWeight and Dimensions
Depth204 mm
Width431 mm
Height645 mm
Weight21500 g

Related product manuals