EasyManuals Logo

Fronius Primo 3.0-1 Service Manual

Fronius Primo 3.0-1
Go to English
160 pages
To Next Page IconTo Next Page
To Previous Page IconTo Previous Page
Page #40 background imageLoading...
Page #40 background image
40
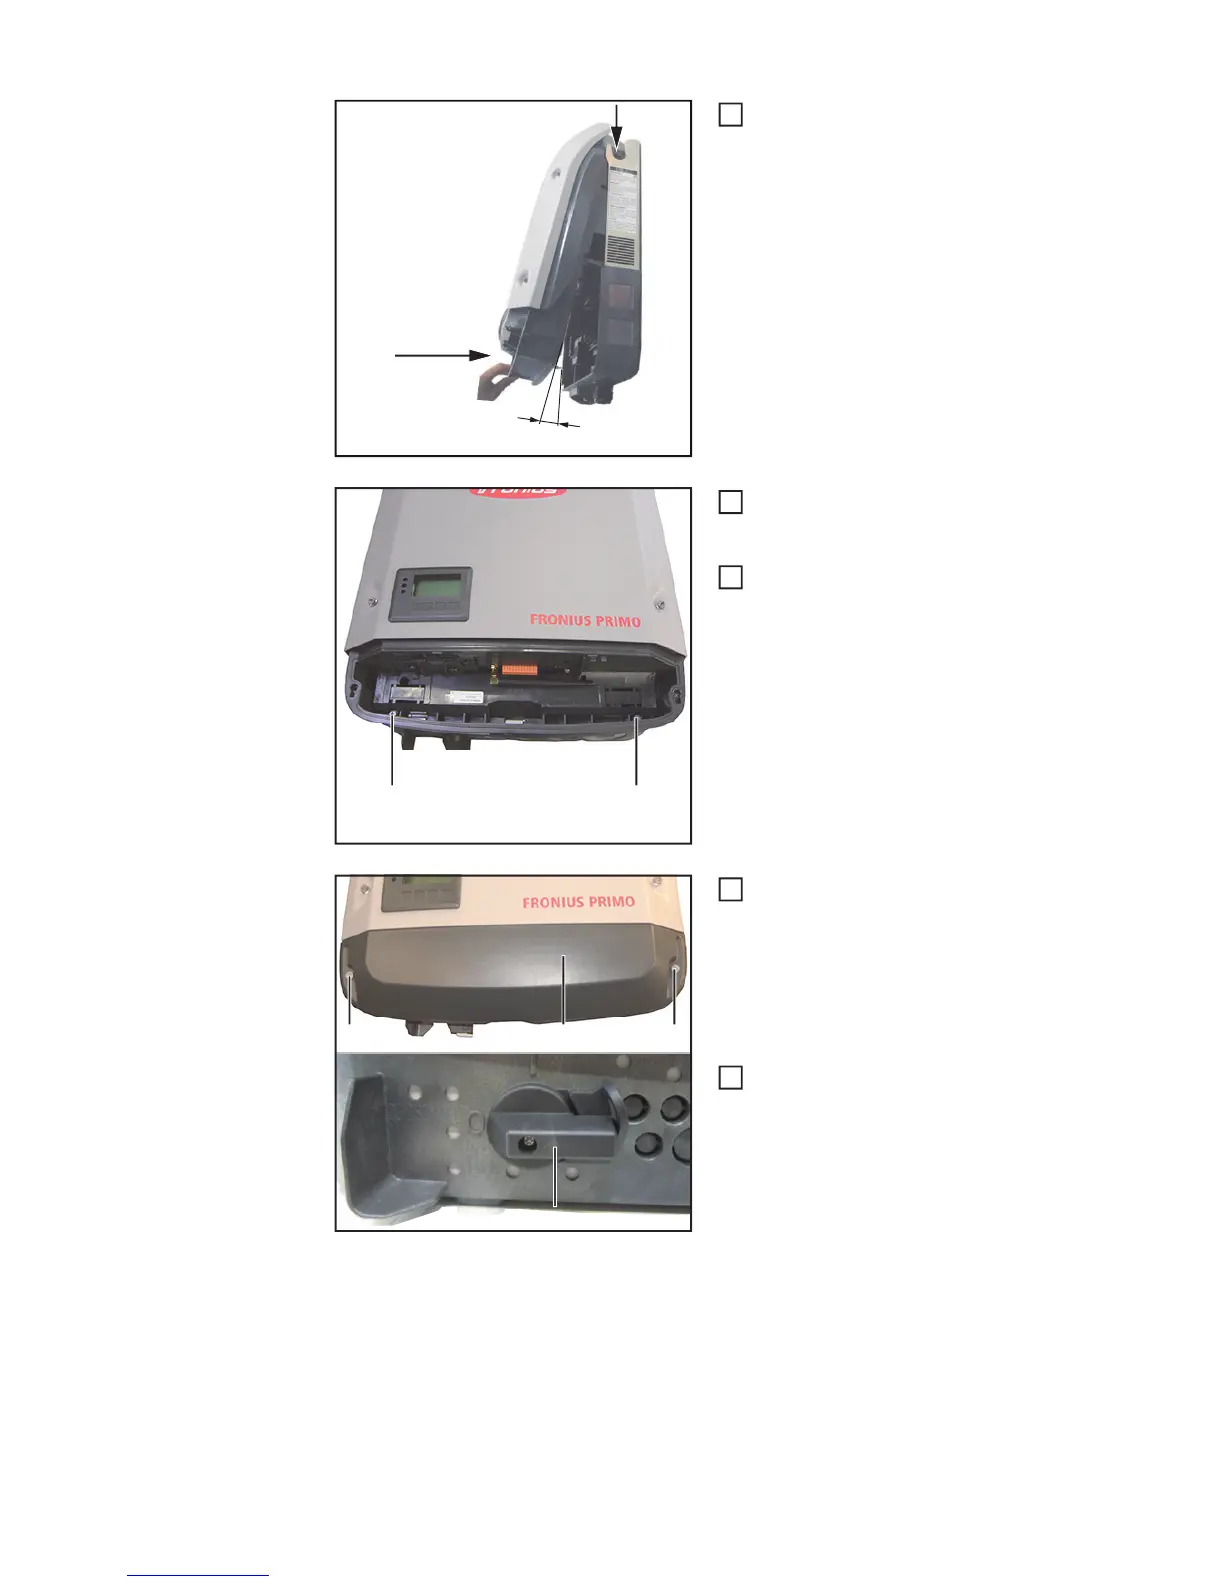
Wechselrichter oben mit einem maxi-
malen Winkel von 11° in die Wandhal-
terung einhängen und Richtung
Wandhalterung andrücken
Falls vorhanden Datenkommunika-
tions-Leitungen wieder mit dem Wech-
selrichter verbinden
Wechselrichter mit 2x Schrauben 5x25
mm TX25 (4) in der Wandhalterung fi-
xieren
Anzugsmoment = 2,5 Nm
DATCOM-Deckel (6) ansetzen und mit
2x Schraube TX25 (5) fixieren.
Anzugsmoment = 2,5 Nm
DC Trenner (7) auf I stellen
4.33 in.
110 mm
max. 1
4
(4)(4)
5
6
(7)
(5) (5)(6)
7
8

Table of Contents

Other manuals for Fronius Primo 3.0-1

Questions and Answers:

Question and Answer IconNeed help?

Do you have a question about the Fronius Primo 3.0-1 and is the answer not in the manual?

Fronius Primo 3.0-1 Specifications

General IconGeneral
PurposeSolar panel
Efficiency98 %
Output power3000 W
Input current12 A
Input voltage80 - 1000 V
Output voltage- V
Input frequency50 - 60 Hz
Power supply typeAuto
Adjustable output voltage-
International Protection (IP) codeIP65
Product colorBlack, Grey
Built-in displayYes
Operating temperature (T-T)-40 - 55 °C
Weight and Dimensions IconWeight and Dimensions
Depth204 mm
Width431 mm
Height645 mm
Weight21500 g

Related product manuals