Importing Scanned Data
325
Computer Operations
11
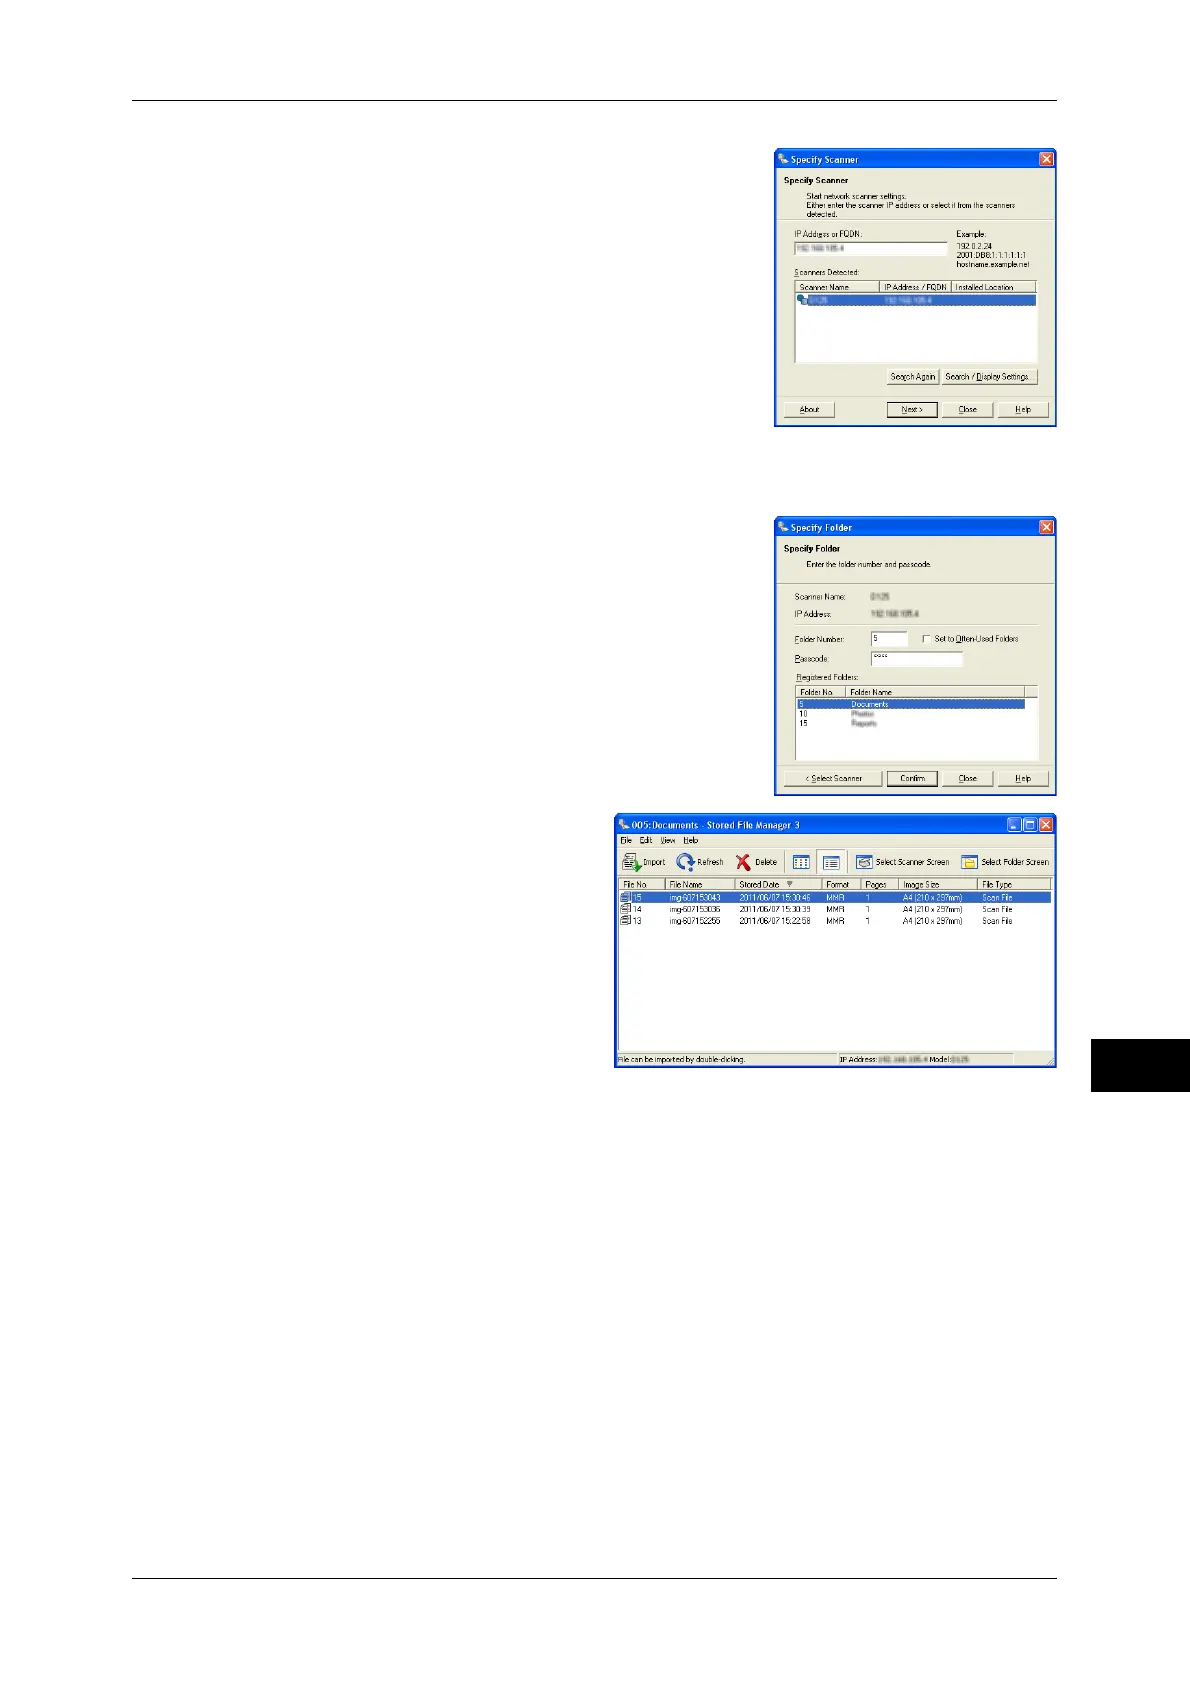
2 From the displayed list, click the scanner name of
the machine, and click [Next].
Note • If no scanners are shown in the list, click [Search
Again]. The application searches for scanners.
• To change the display of scanner names, use the
dialog box that appears by clicking [Search/Display
Settings]. For more information, refer to "Changing
the display of scanner names" (P.326).
• Only when the machine is connected to the
network, the scanner name is automatically listed.
To view the machine connected to another
network, click [Search/Display Settings] and
register the IP address and scanner name. For
information on how to change the settings, refer to
"Changing the display of scanner names" (P.326).
3 In the [Folder Number] field, enter the number of the
folder (001 - 500) that contains the file to be
imported. In the [Passcode] field, enter a passcode
(up to 20 digits).
Note • You can also select a folder number from
[Registered Folders].
• Clicking [Select Scanner] returns to step 2, where
you can reselect a scanner.
4 Click [Confirm].
5 Select a file to be imported from the
list, and click [Import].
Note • You can select multiple files.
• When [File Saving Options] is
set to [Set Destination for
Each File] under the import
settings, a dialog box for
specifying a save destination
is displayed. When the dialog
box appears, specify a save
destination, and click [OK].
For information on the import
settings, refer to "Import
settings for scanned files"
(P.326).
6 The file is imported to the specified directory.
Note • When [File Saving Options] is set to [Save in Fixed Destination] under the import settings, a
file is saved in the specified directory.
For information on the import settings, refer to "Import settings for scanned files" (P.326).
 Loading...