424 A Appendix
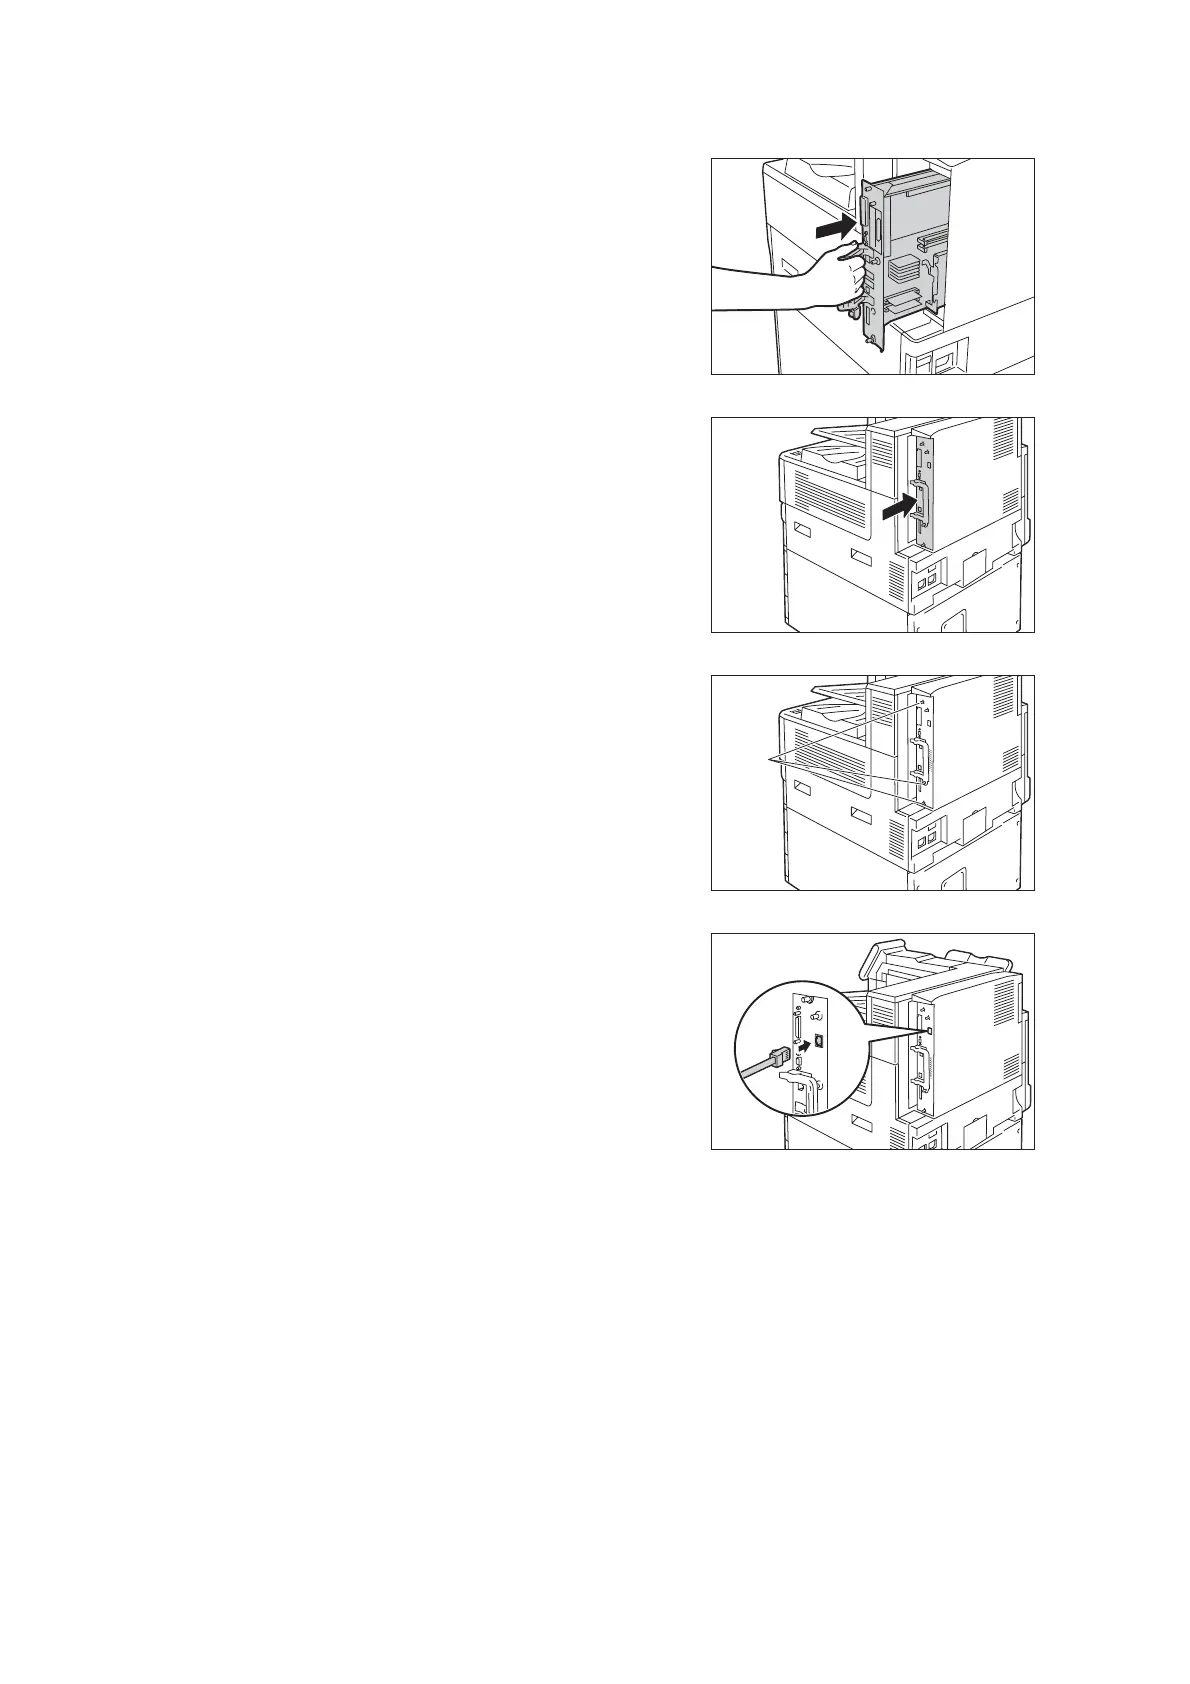
10. Reinsert the control board back into the
printer. Holding its handle, slide the control
board back into the printer.
Important
• Be sure to hold the handle when inserting the control
board. The control board may be damaged if you
insert it with the handle being folded.
Press the control board in as far as it will
go.
11. Tighten the three screws to secure the
control board in place.
Note
• Standard USB port is not available when the Gigabit
Ethernet Board Kit is installed. It is recommended to
put the sticker (included with the Gigabit Ethernet
Board Kit) on the standard USB port.
12. Connect the network cable to the interface
connector for the Gigabit Ethernet Board
Kit.
13. Connect the other end of the connector for
the network cable to the network device
such as Hub.
14. Connect the power cord to the printer.
Turn on the printer’s main power switch and power switch.
15. Make sure the printer’s blue lamp lights up.
Gigabit Ethernet Board Kit installation is now complete.
screw

 Loading...


