52 2 Basic Operation
Note
• The power cord connected to the Finisher-B1 is a connecting cord dedicated to the printer.
Do not connect this cord to any other devices than the printer.
• The HDD Extension Kit (optional) is required when installing the finisher.
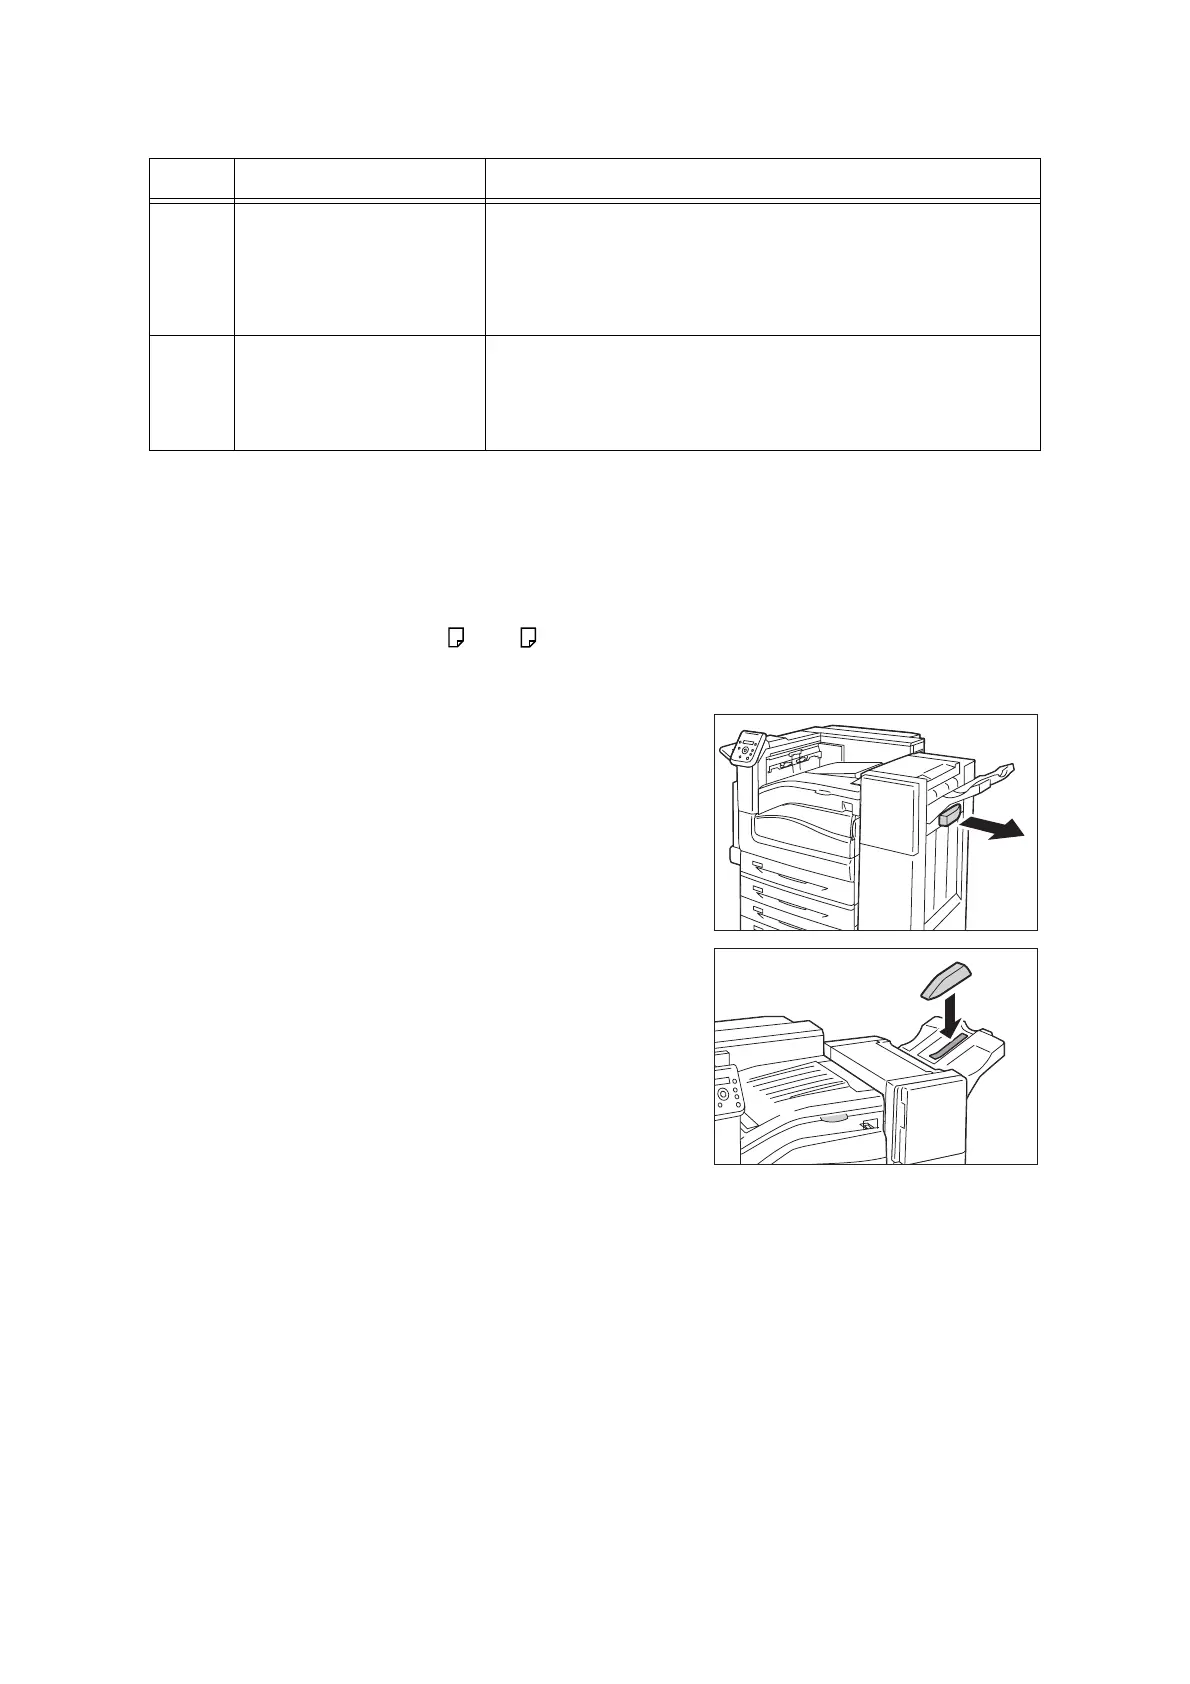
Installing the Tray Attachment
When delivering A4 or B5 paper to the right middle tray without stapling, you can stack
the outputs more neatly by installing the tray attachment supplied with the right middle tray.
1. Remove the tray attachment from the rear
of the right middle tray.
2. Install the tray attachment onto the middle
of the right middle tray as shown in the
diagram.
13 US 2/3 Hole Punch Kit (US
standard) or
2/4 Hole Punch Kit (optional)
Hole-punches outputs.
Note
• The distance between the two holes made with the US 2/3 Hole Punch
Kit (US standard) is 70 mm, which is different from the 80
mm distance
made with the 2/4 Hole Punch Kit.
14 Center tray (Finisher transport
cover F)
Prints are delivered here when they are unable to be delivered to the right
middle tray. Pull the cover upward when removing jammed papers.
Note
• Remove outputs delivered to the center tray frequently.
No. Name Description

 Loading...


