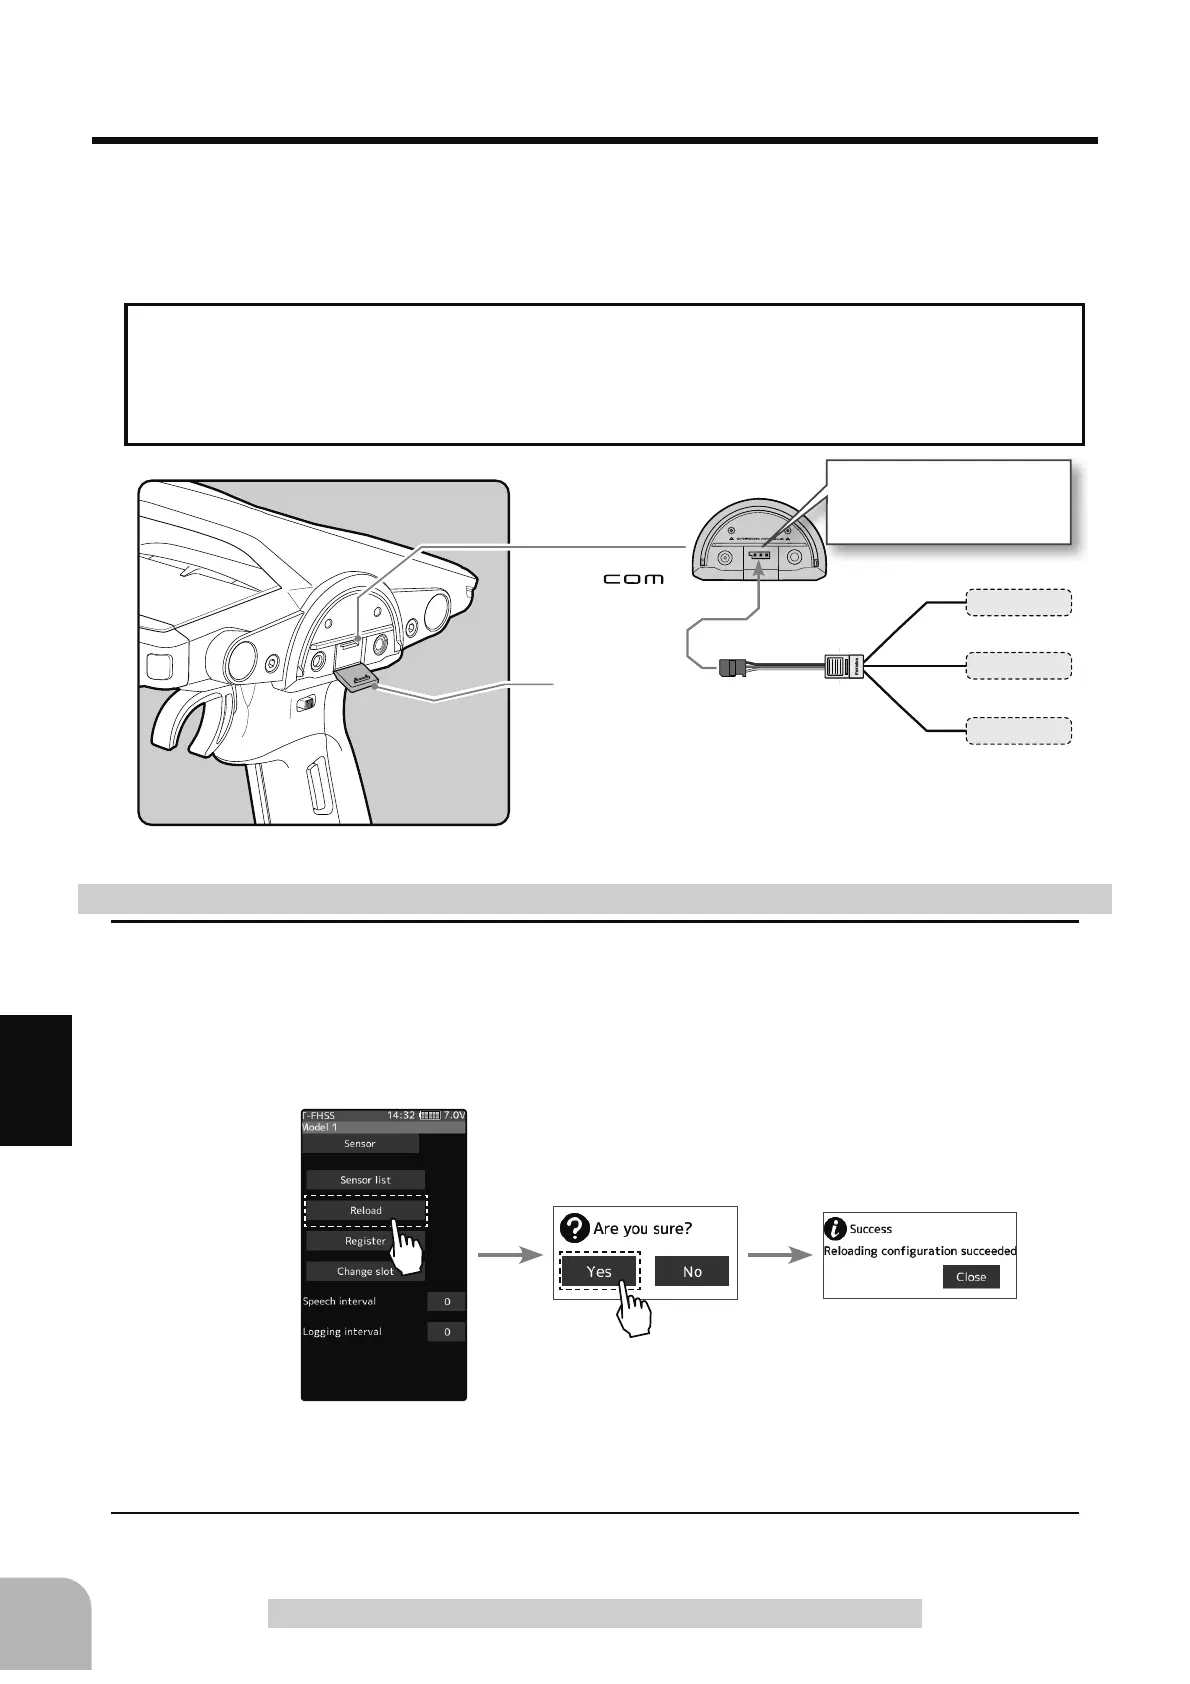
Communication port.
Cover
172
Function
Sensor
Sensor Reload
:KHQXVLQJPXOWLSOHVHQVRUVRIWKHVDPHW\SHWKHVHQVRUVPXVWEHUHJLVWHUHGLQWKHWUDQV-
PLWWHU&RQQHFWDOOWKHVHQVRUVWREHXVHGWRWKH73;5DVVKRZQLQWKH¿JXUHEHORZDQG
UHJLVWHUWKHPE\WKHIROORZLQJSURFHGXUH7KH,'RIHDFKVHQVRULVUHJLVWHUHGLQWKHWUDQV
-
mitter.
To load the sensor, connect all sensors to be used to the T7PXR communication port, as
VKRZQEHORZ7KHSRZHUVXSSO\LVXQQHFHVVDU\$OVRWRFOHDUDOOVHQVRUUHJLVWUDWLRQH[-
HFXWHWKLV>5HORDG@IXQFWLRQZLWKRXWFRQQHFWLQJWKHVHQVRU7KHUHJLVWUDWLRQLVFOHDUHG
and all the slots in the sensor list are unregistered.
All the sensors to be used
are connected to the
T7PXR.
Sensor
Sensor
Sensor
1
(Start slot selection)
Tap the [Reload]. The confirmation screen will be displayed. To execute, tap [Yes] to hear an
electronic sound and finish setting. To cancel, select [No] and tap it. If "Success" appears on
the screen, reload is complete.
2
When finished, return to the Telemetry screen by pressing the HOME button.
How to change start slot and set empty slot