69
Part Replacement
Maintenance
Part Replacement
Replacing the Control Relay Assembly
1. Decrease the air supply pressure to zero.
2. Using a Philips screwdriver, unscrew the four mounting screws on the bottom face.
3. Pull the relay assembly downwards to detach it.
4. Remove the mounting screws and washers from the old assembly and use them to
mount the new assembly in place by tightening them from below.
5. When using the Double Acting Type, adjust the pressure balance of the control
relay as required (see “Tuning the Pressure Balance of Control Relay” on page 71).
6. Carry out tuning and check the valve’s actions (see “Carrying out Tuning” on
page 61 and “Check Valve Actions” on page 63).
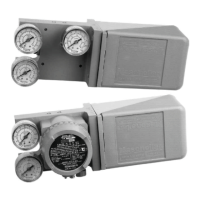
Figure 41 Replacing the Control Relay Assembly
NOTE For the Double Acting Type, the recommended replacement
cycle for the control relay is either when the actual repeat
cycle exceeds 500,000 times, or after the control relay has
been in use for 6 years.