GE MEDICAL SYSTEMS
2127661
LOGIQ 400 SERVICE MANUAL
TM
8–50 OPTIONS
REV 5
8–4–9 Operational Check–out (Continued)
g. Move the cursor to “NEXT” position by rotating the trackball and press the Set button four times to display the
fifth page (5/6).
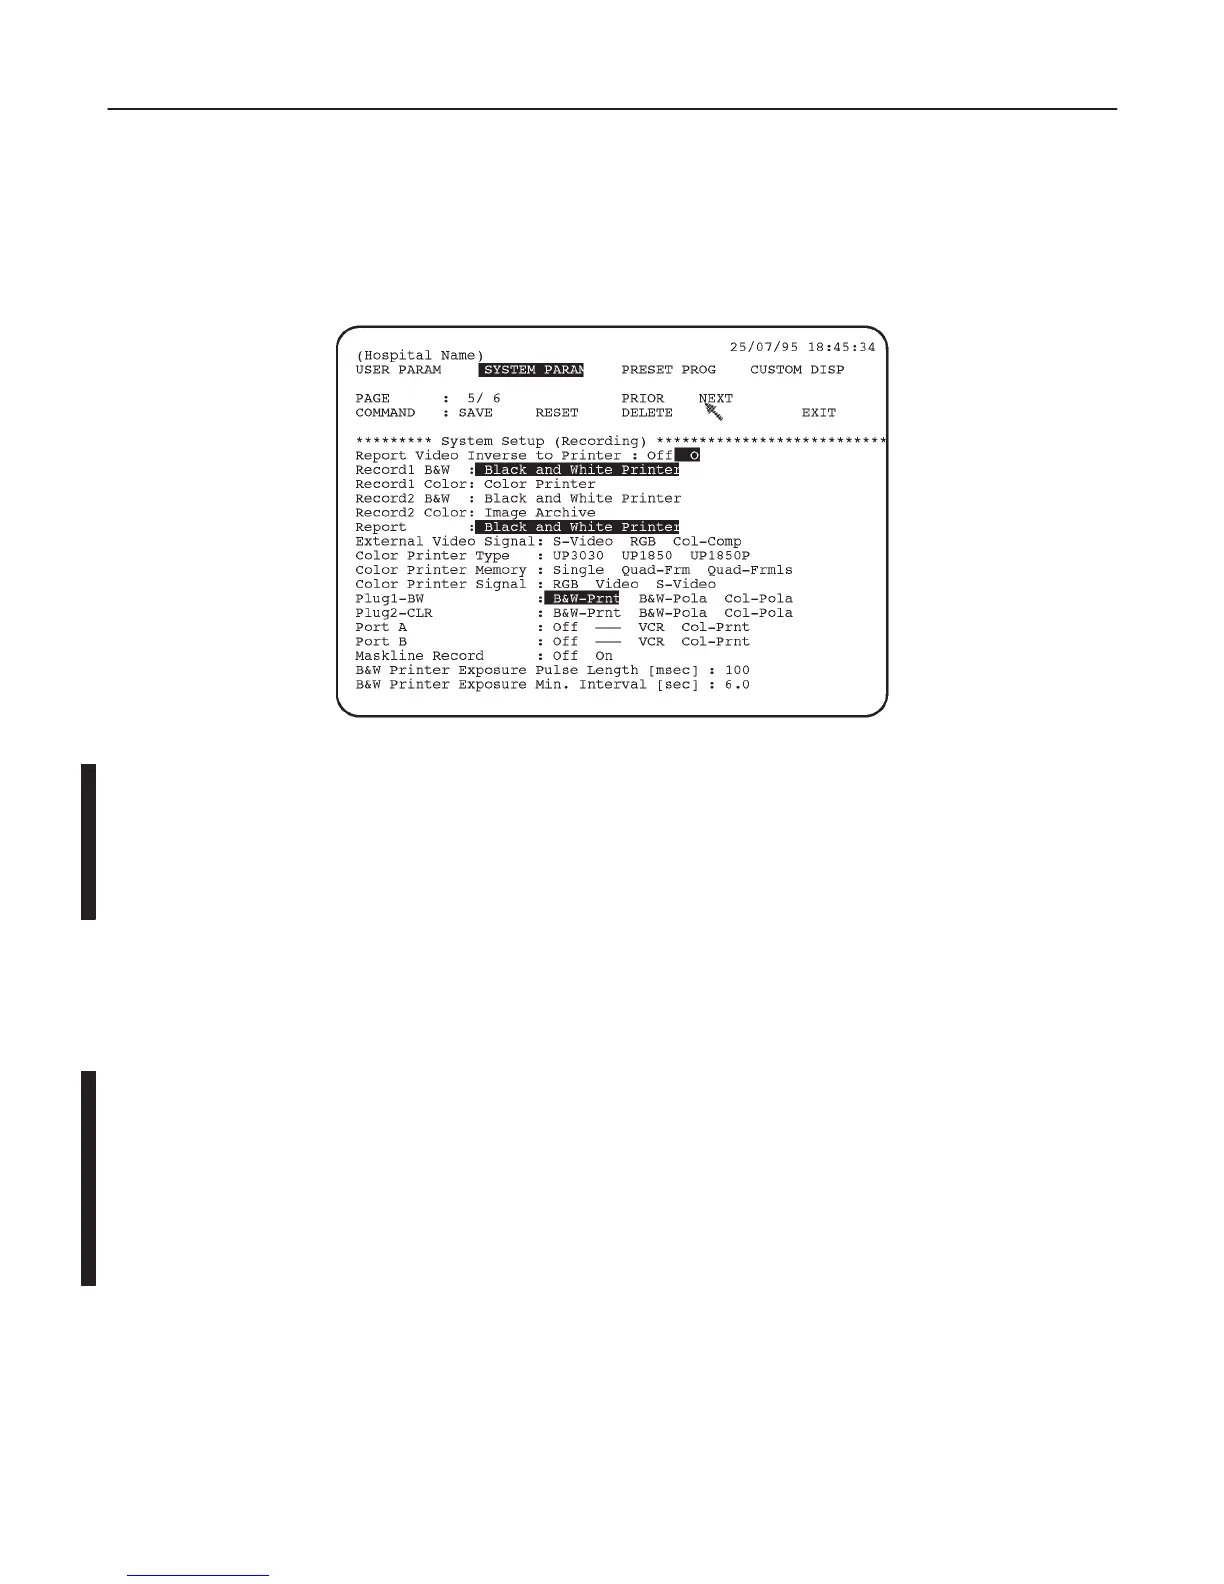
SYSTEM PARAMETER SET-UP MENU (5/6)
ILLUSTRATION 8–56
h. Move the cursor to ”On” for the “Report Video Inverse to Printer” parameter and press Set to select it. Refer to
ILLUSTRATION 8–56.
i. Select “B&W-Prnt” from among Record1 B/W parameters. Refer to ILLUSTRATION 8–56.
Note
Use Ellipse keys to select the Record1 and Record2 parameters. Other option is displayed by press-
ing the Ellipse keys when the current selection of Record1parameter or Record2 parameter is dis-
played in reverse video.
j. Move the cursor to “B&W-Prnt” for the Report parameter and press Set to select it. Refer to
ILLUSTRATION 8–56.
k. Move the cursor to “B&W-Prnt” for the Plug1–BW parameter and press Set to select it. Refer to
ILLUSTRATION 8–56.
l. Move the cursor to “SAVE” position and press Set to save the selected parameters.
m. Press the Top Menu Select key twice to exit the System Parameter Set-Up menu.
5. Make sure that the B/W Video Printer is properly controlled by the console.
6. Perform leakage current test.
7. Turn OFF the power switch of the main unit.

 Loading...


