18
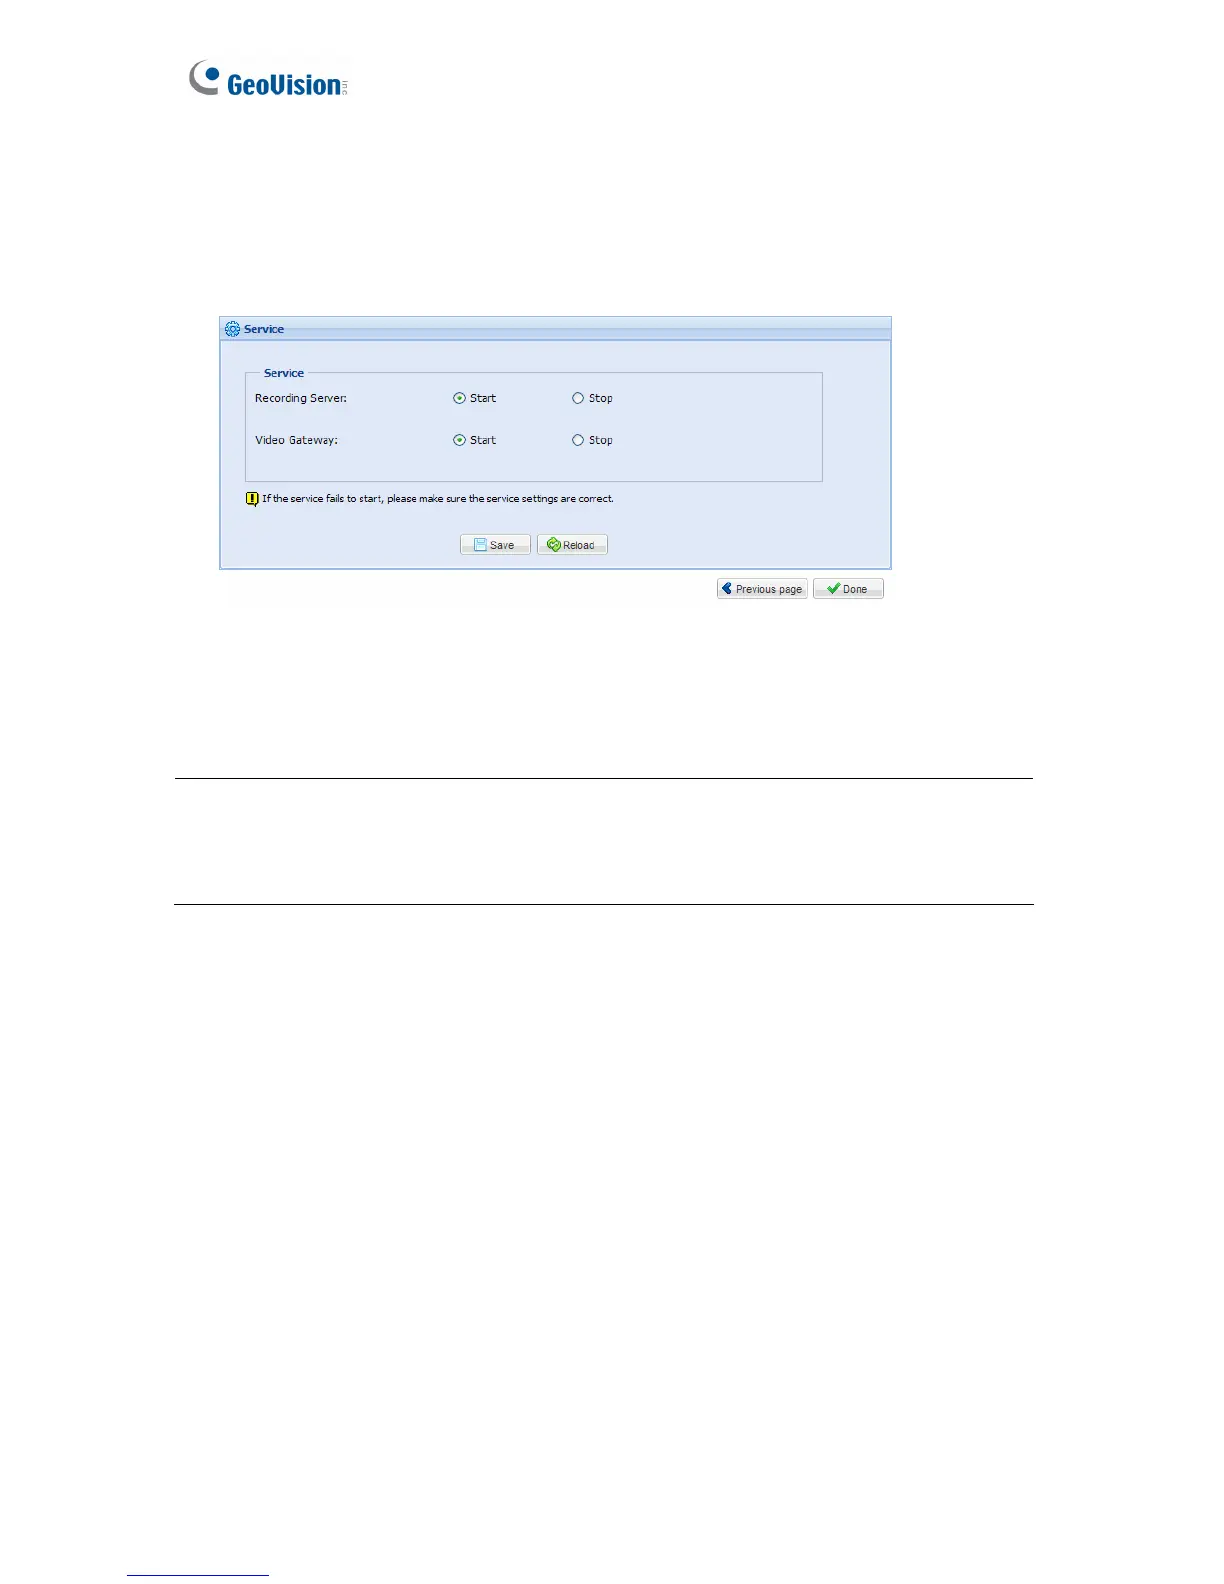
To starting service:
1. In the Service page, to be able to receive and record IP channels, select Start for
Recording Server.
2. To enable the Video Gateway to transmit video to clients, select Start for Video Gateway.
Figure 3-6
3. Click Save and click Done. The Camera Connection Information page appears and
shows the connection status of the camera added.
Note:
1. The default recording policy is round-the-clock recording.
2. When the USB Dongle for GV-Video Gateway is inserted, the Recording Server option
and recording functions will not be available.
After adding camera, you can refer to 5.2.2 Camera Setting to see how to start or stop
recording individual cameras. In addition, you can customize camera settings such as setting
video attributes, recording policy and recording schedule.
 Loading...