Connections with Clients
93
7
7.5 Connecting with the GV-Control Center
You need to configure the GV-Control Center to access video streaming from the GV-
Recording Server.
Note: The GV-Recording Server is only compatible with the GV-Control Center of version
8.5.6.0 or later.
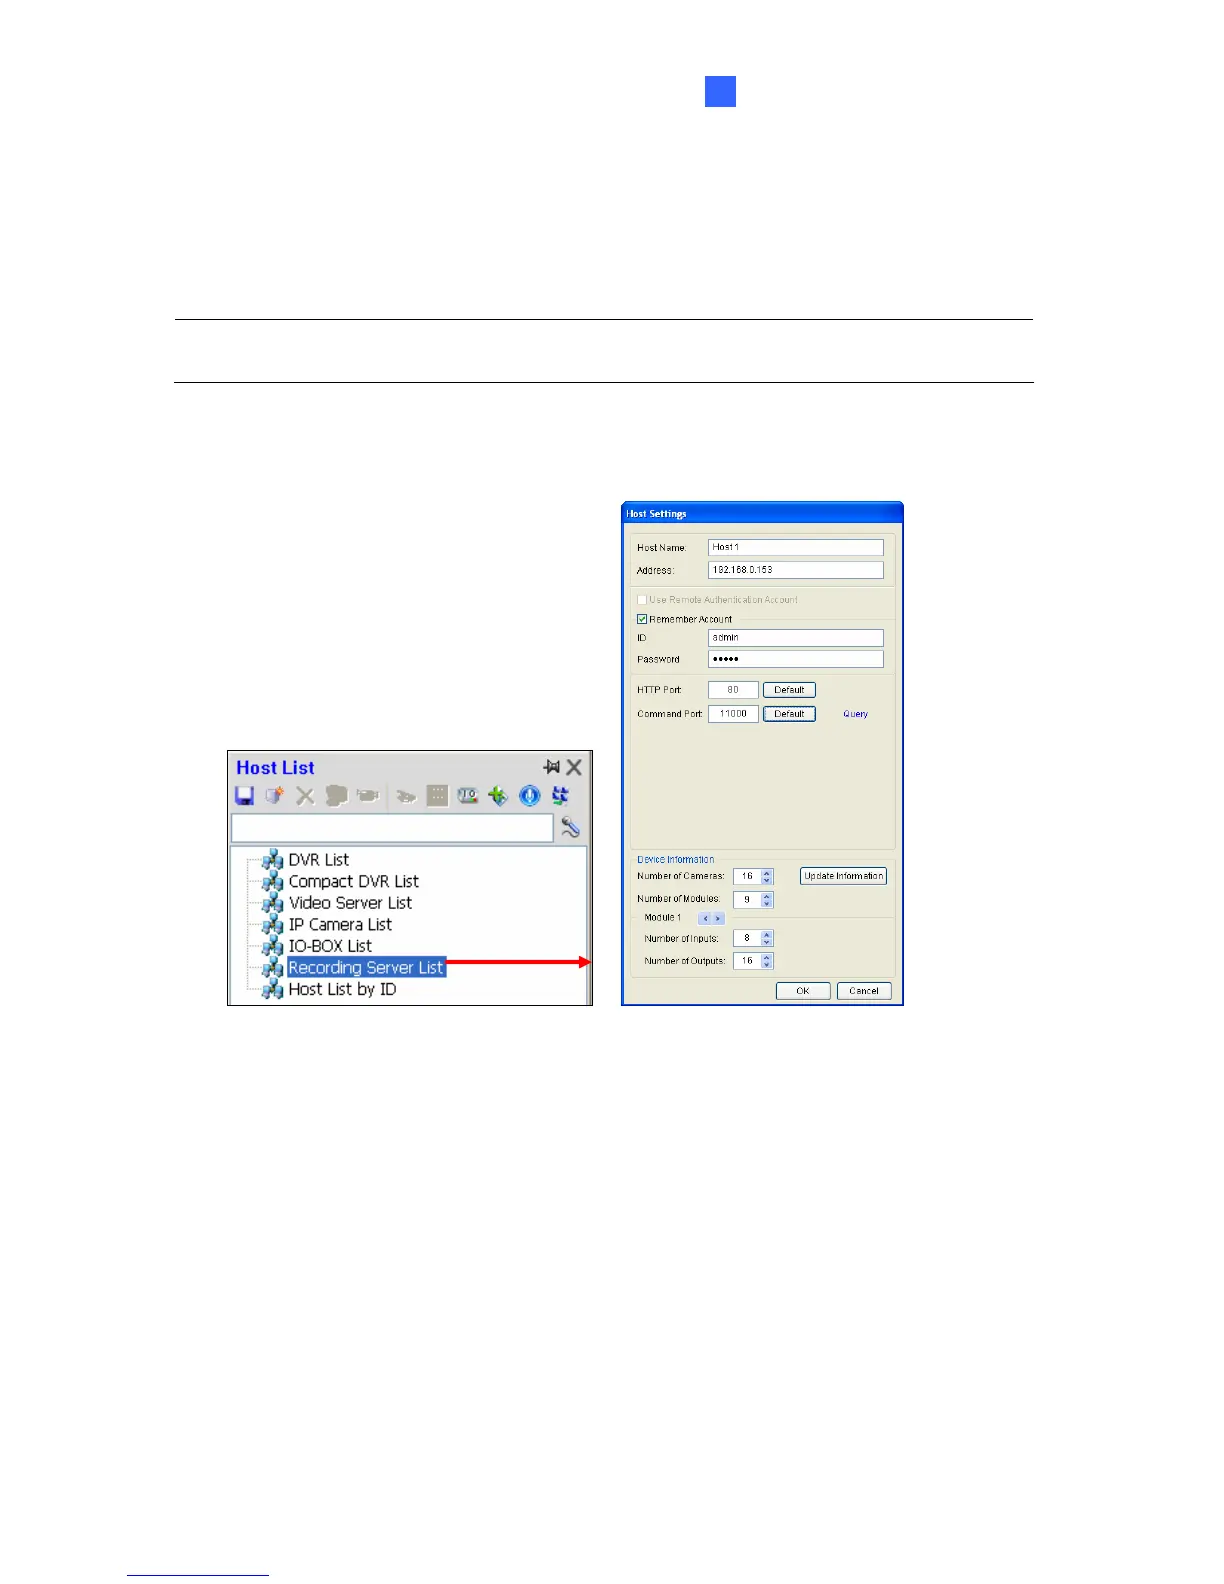
1. On the Host List, right-click Recording Server List and select Add Recording Server.
The Host Settings dialog box appears.
Figure 7-14
2. Name the host of GV-Recording Server.
3. Type the IP address or domain name of the GV-Recording Server.
4. Type the client’s username and password created on the GV-Recording Server.
5. Keep the communication ports as default settings; otherwise modify them to match the
HTTP (default value: 80) and TCP/IP (default value: 11000) ports on the GV-Recording
Server (Figure 5-25).
6. Click the Update Information button to request the number of cameras from the GV-
Recording Server. When the update is complete, the message “Update system
information successfully” will appear.
7. Click OK. The host is created under the Recording Server List.
 Loading...