91
GERBERplotter MP Series User Manual
English
3
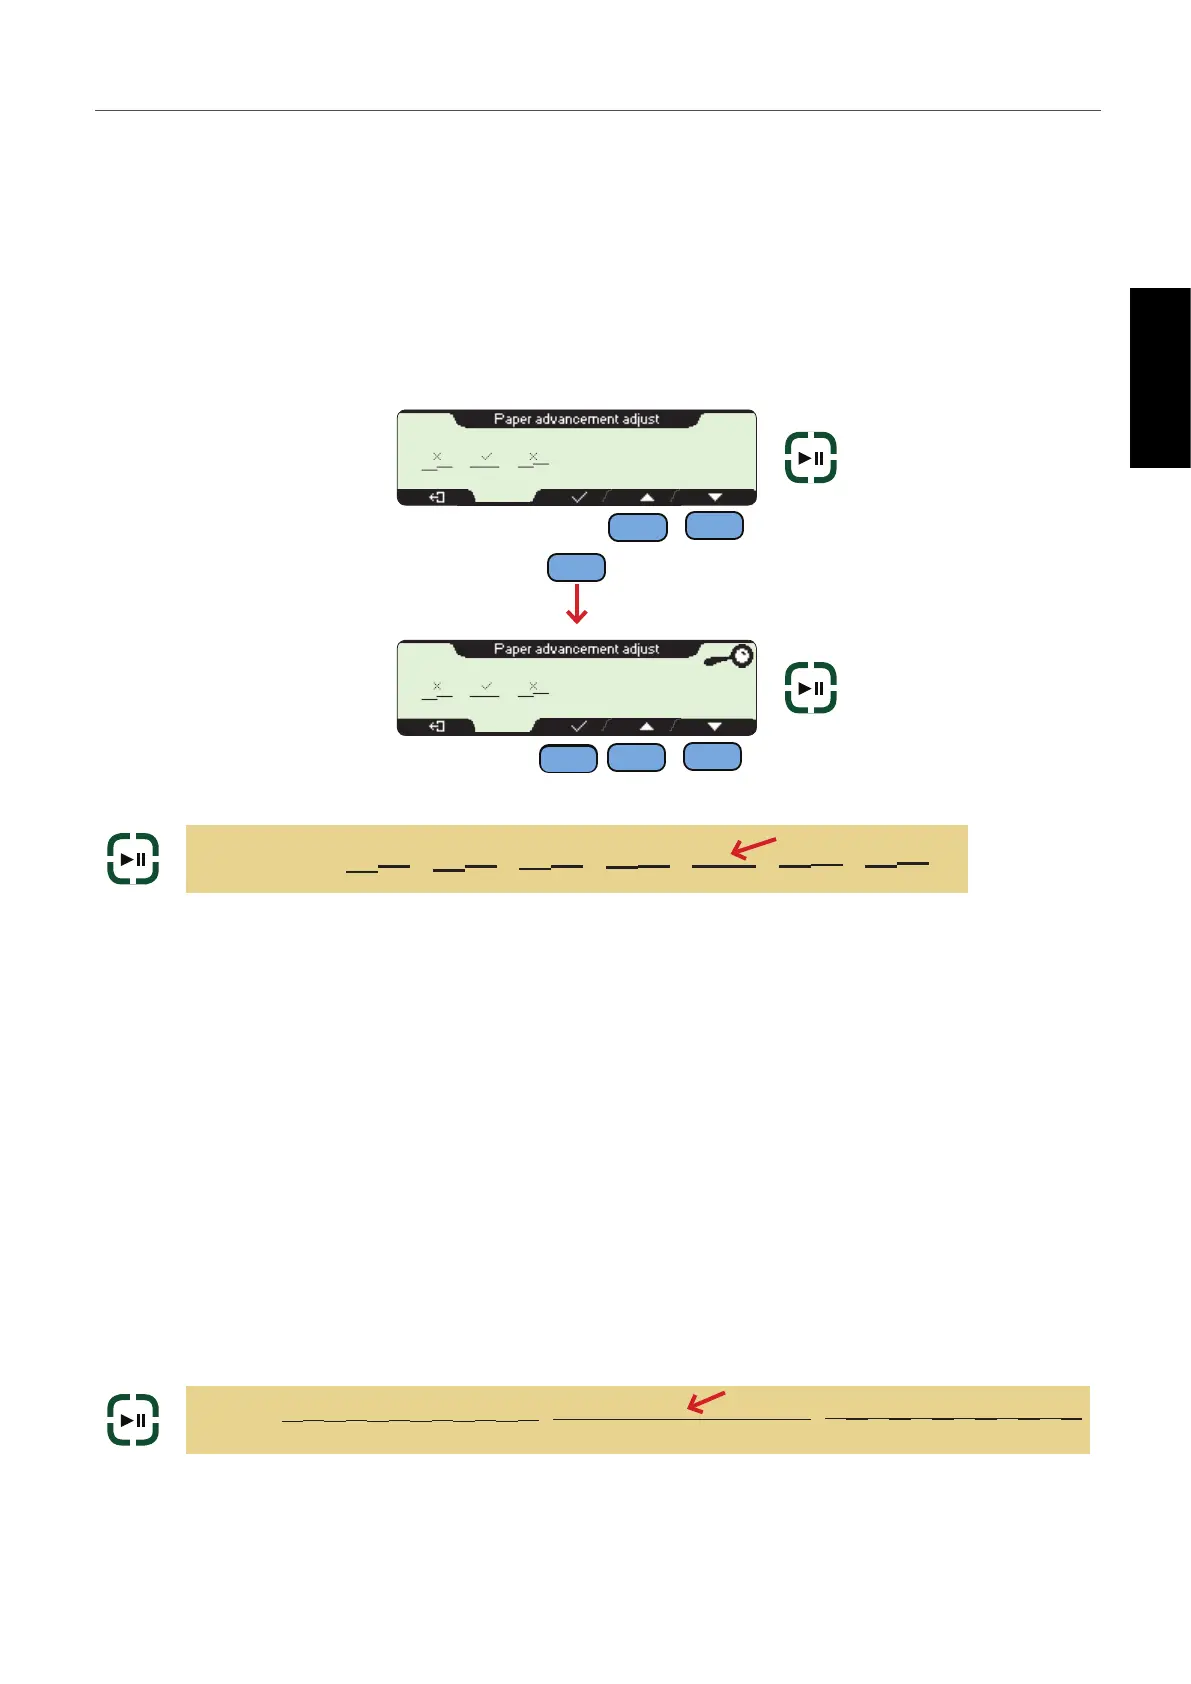
Paper
Step 3 of User adjust, PAPER, allows you to adjust the paper advance settings. The number of print heads is irrel-
evant for this adjustment. The Paper test displays the actual adjustment value (in this example, 15).
1
Press PRINT/PAUSE to print a test. Visually determine the value (between 0 and 29) that best
shows a continuous horizontal line (in this case, 7):
Step 4 of User adjust PAPER VERIFY allows you to verify the previous adjustment. This allows you to be more
precise when calibrating this step.
1
As with the previous adjustments, press PRINT/PAUSE to print a test. Visually determine the value (between 0
and 29) that best shows a continuous horizontal line (in this case, 7). Only values near to the value selected in the
previous step appear.
1
Pressing +/- increases or decreases the adjustment value. Press PRINT/PAUSE to repeat the
print. Select the most accurate PAPER option (for example, PAPER 7 in previous picture).
2
Press OK to accept the value and access the verication stage.
1
Press +/- to increase or decrease the adjustment value. Press PRINT/PAUSE to repeat the print.
2
Press OK to accept the value entered and access the next adjustment stage.
PAPER
7
6
4
3
5
8 9
PAPER
76 8
OK
+
-
+
-
PRINT
PAUSE
PRINT
PAUSE
OK
PRINT
PAUSE
PRINT
PAUSE
 Loading...